Master bath progress: Shortened built-in IKEA seating bench and cabinet tower

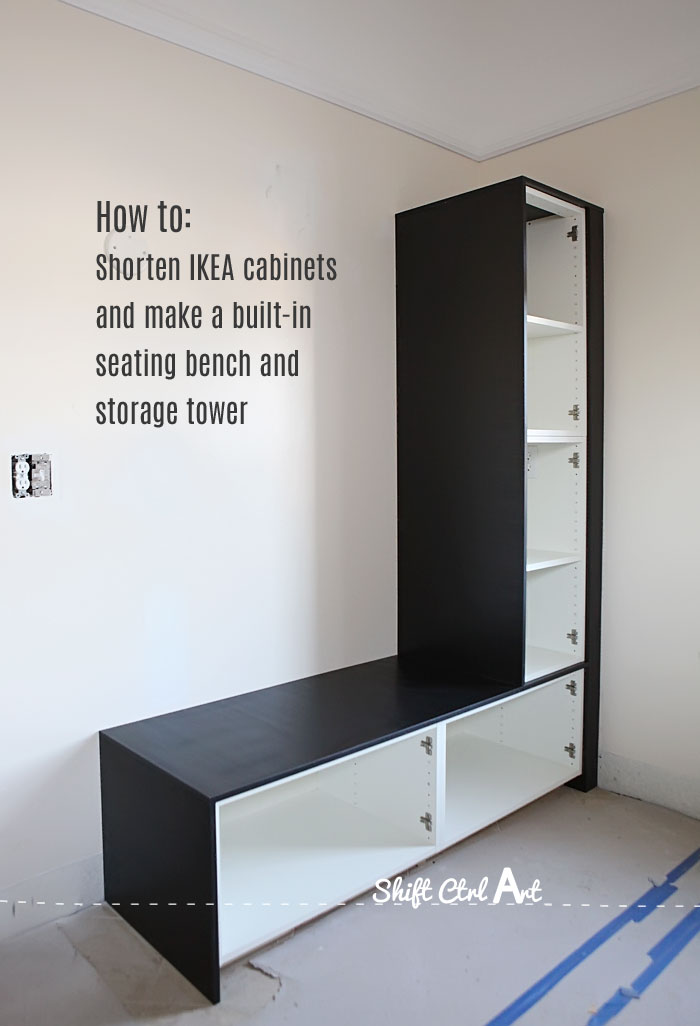
Here is our new seating bench and storage tower in our master bath remodel.

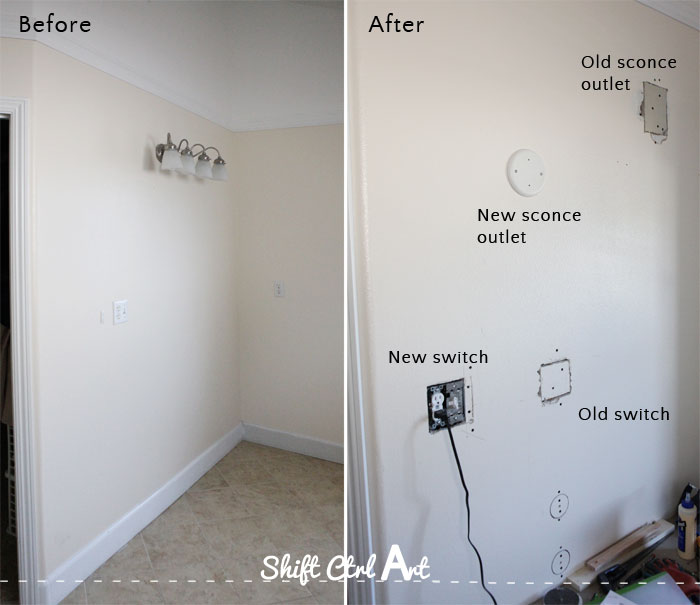
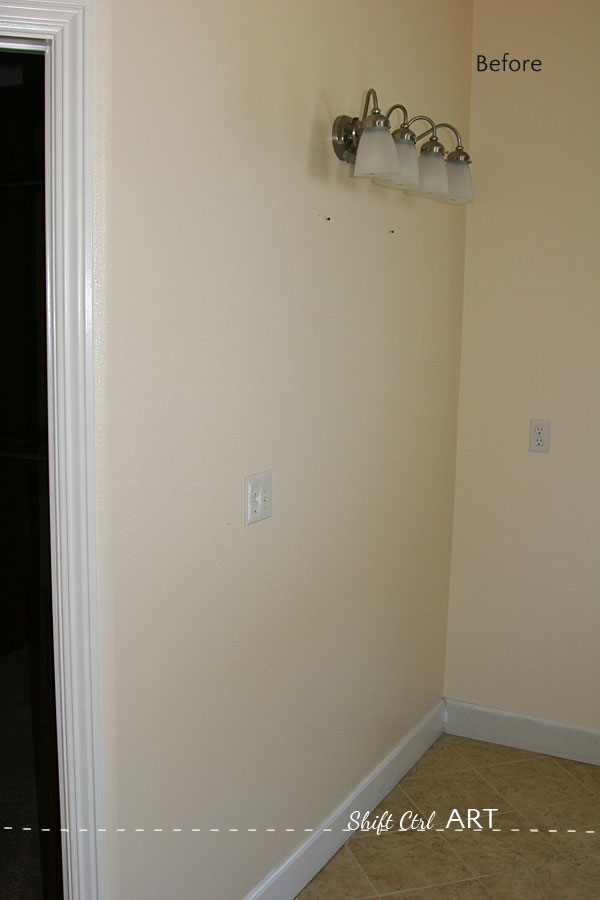
Before, this wall was just empty. I think the previous owners might have just had a table or other piece of furniture here. It looked like this before and then on the right after we moved the sconce outlet and switch.
We are using IKEA kitchen cabinets in the bathroom. The kitchen cabinets are a bit too deep for a bench so we shortened the cabinets in depth from the usual 24 inches to 20 inches. Our handyman ran the four sides of each of the four cabinets through his tables saw, removing 4 inches.
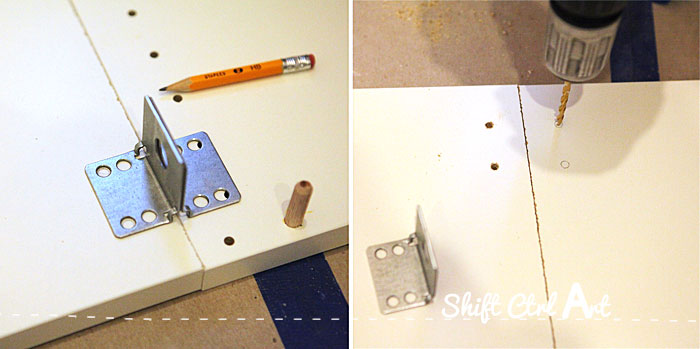
With the factory back removed from the cabinets a few adjustments need to be made. Here is where we took over the project. First of all the pre-drilled holes for the angle brackets got removed when the back 4 inches got cut off, so we had to pre-drill for those as you see above. We used the shelf holes to line up the new holes.
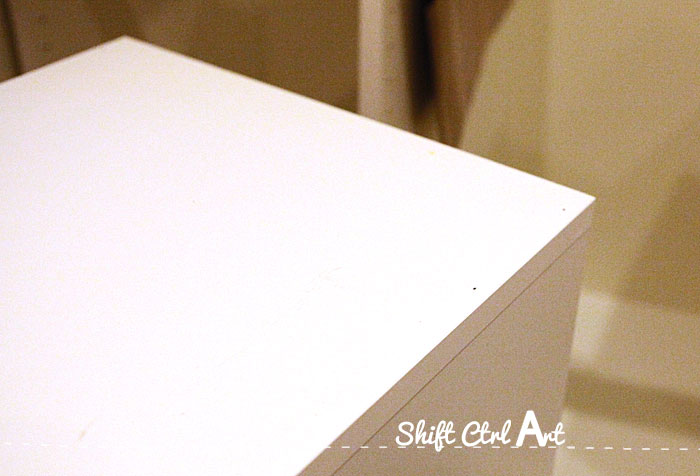
Also, the space for the back dowel and tightening screw and nut were removed leaving only the ones in the front, so we glued the sides and secured them with a couple of nails in each side.
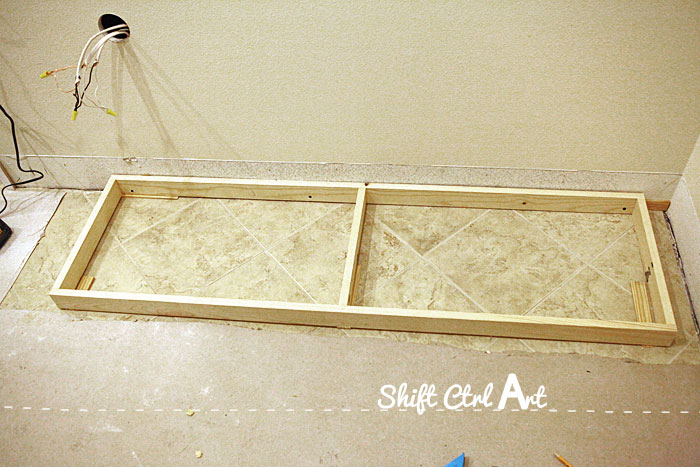
Next we fashioned a toe-kick out of some 1x3 pine which is really just 2 1/2 inch tall. Just a simple square with a cross bracket in the center to support the inner edges of the two cabinets.
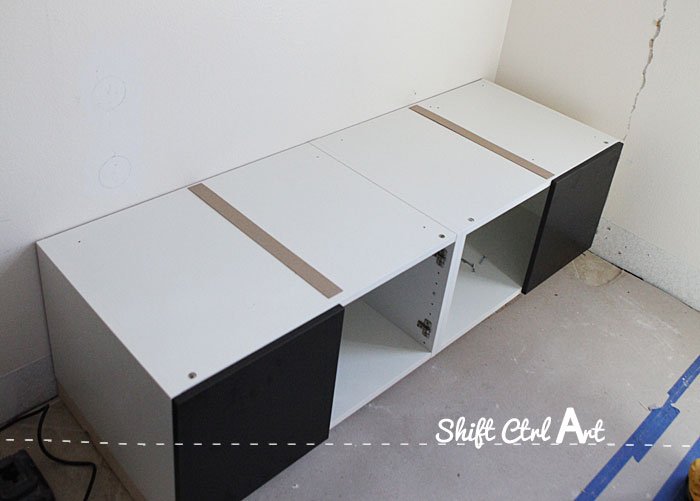
Here are the two cabinets set on top of the toe-kick. We used the "over the fridge" cabinets for our seating bench. They are 30 x 15 inches each. The doors and trim are all Gnosjö.
To make the whole unit look more built-in, we used quite a bit of panels and filler pieces. Before adding a "table top" which we cut out of the biggest panel that IKEA carries - it comes in a 3x8 ft sheet, we added two pieces of cardboard shims to the middle of each cabinet. We did this because the sides of the cabinets come up just a smidge over the top panels. By shimming the middle, the table top won't dip when you fasten the top.
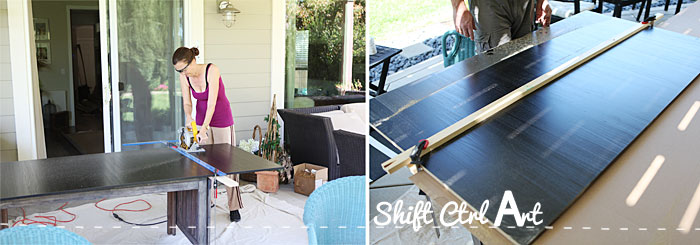
Next we cut the top. Here you can see how big that 8x3 feet of panel is. We cut it to length first, then to width.

We secured the top to the bench with screws, then attached the tower part. This part we made out of two 15 inch wide base cabinets. They are 30 inches tall each. They had also been shortened by 4 inches in depth.
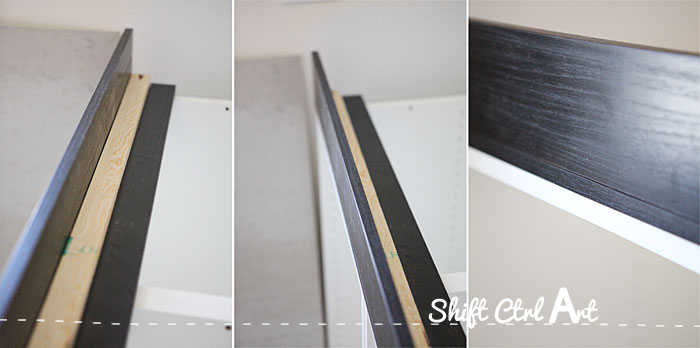
To make everything look more built-in, we made a filler piece corner for the room between the tower and the wall. The width of this corner is matching the corner on the vanity across from the bench and tower. We used regular toe kick for this part and some inexpensive 1x2.
We lined up the inexpensive 1x2 by using the filler piece that would later be scribed to the wall. Then nailed in the 1x2.
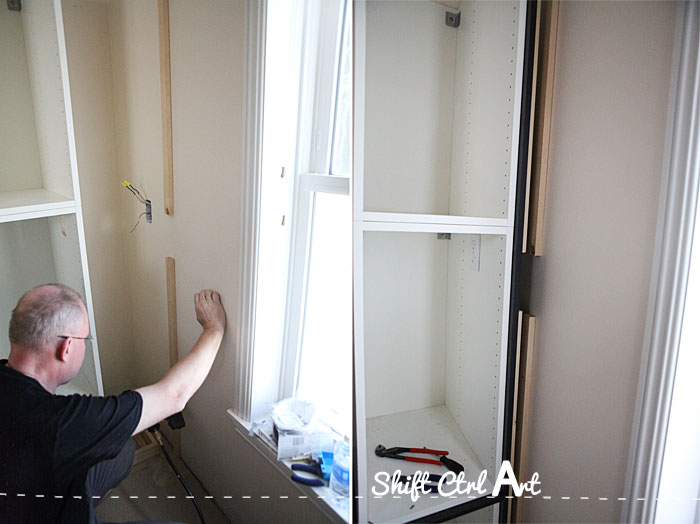
On the left Dh is fastening some more 1x2 to the wall and on the right one filler piece has been fastened to the side of the tower and bench.
Next we had to scribe a filler piece to fit between the decorative filler piece and the wall. Hint: our walls are not super straight... We did this by temporary attaching the filler piece so it is flush on the right hand side to the outside of the cabinet. Where the tip of the arrow is pointing. Then we used a scribing tool that I ran along the wall while the pencil made a line on some tape on the filler piece. We added the tape to be able to see the line. I searched for several tutorials online and this was by far the best one I found. We also tried the method of using a scrap piece of filler instead of the scribing tool like he does in the video and I actually like that method better.
Next we had to saw along the line. Normally a saw blade is configured so that the underside is the clean cut, but when you scribe, the line is on the nice side, so after some research and watching the above video, I found out that they make saw blades specifically for this where the teeth go in the opposite direction, making the upper side the nice side. After a quick trip to Lowe's we had one of those and Dh made the cut with our jig saw.
Then I could nail the piece into place with my new super handy Kobalt pin nailer that I got recently. The nails are super, super small - 23 gauge instead of the bigger 18 gauge of a finish nailer that you would usually use for baseboard etc. They are so small you do not need to fill them in really. I am just going to jot the nail heads with a black sharpie marker and you won't see them at all.
You would think this would be called a finish nailer as you are finished after using this... but no... it's a pin nailer. Confusing.
Because we shortened the cabinets, the shelves no longer have any back support either. The way we solved this was by drilling new holes for the shelf supports to go in the middle row of holes in the cabinets now that the whole back row of holes had been removed.
We clamped some scrap wood to each shelf after marking where the new half round support hole should go, then DH drilled right between the shelf and scrap wood. He pre-drilled first with a smaller drill bit, then he drilled with a drill bit large enough for the shelf support metal plug thingy to fit. Yes, that was totally the technical term for that.
Then the shelves were added to the cabinets. On the right you can see the new shelf support in the hole we drilled.
Dh also finished off the electrical box inside the tower. Now we have a place to charge toothbrushes and his shaver out of sight. That makes me excited.
We cut some more paneling to go at the end of the bench, the other side of the tower. The last thing we cut was a top for the tower. It both finishes everything off nicely and it closes the hole in the top of the tower. Because we are using base cabinets, they did not come with a closed top.
We spent about 5 hours building this unit.
Before:
And here is the built-in IKEA bench and tower again.
Next, I need to finish spackeling and re-texturing the walls and paint them and we need to finish the vanity on the opposite side.
We had the counter top people come out on Saturday for a pre-planning visit. They will come back and measure for the pan in the next week or so. Then there will be a bit of waiting while the pan is made - it could be as much as a couple of weeks. Once it is installed we can attach the rest of the Hardiebacker board in the shower and then schedule the inspector for the second visit: the pan test and Hardie/drywall inspection where he needs to see that the pan can hold water for 24 hours and that there are enough screws in the Hardie and new drywall.
Catch up on the previous posts of the master here:
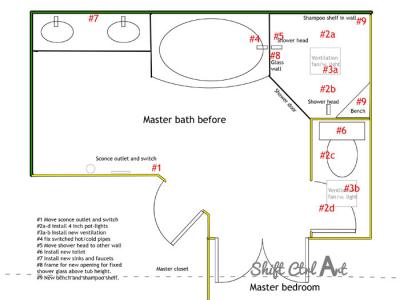
Planning and floor plans
Before pictures and mood board
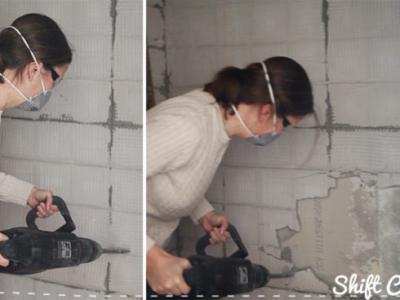
Demoing
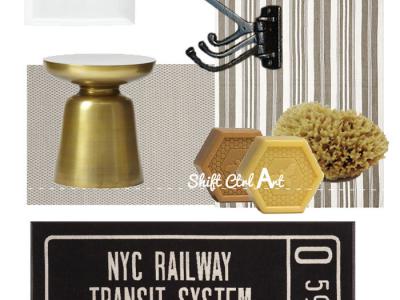
Bathroom accessories
Plumbing, electrical and new construction
Fun times ahead!
Next: Progress in the toilet room - a Bondo experiment and new paint and cabinet
Share
Before, this wall was just empty. I think the previous owners might have just had a table or other piece of furniture here. It looked like this before and then on the right after we moved the sconce outlet and switch.
We are using IKEA kitchen cabinets in the bathroom. The kitchen cabinets are a bit too deep for a bench so we shortened the cabinets in depth from the usual 24 inches to 20 inches. Our handyman ran the four sides of each of the four cabinets through his tables saw, removing 4 inches.
With the factory back removed from the cabinets a few adjustments need to be made. Here is where we took over the project. First of all the pre-drilled holes for the angle brackets got removed when the back 4 inches got cut off, so we had to pre-drill for those as you see above. We used the shelf holes to line up the new holes.
Also, the space for the back dowel and tightening screw and nut were removed leaving only the ones in the front, so we glued the sides and secured them with a couple of nails in each side.
Next we fashioned a toe-kick out of some 1x3 pine which is really just 2 1/2 inch tall. Just a simple square with a cross bracket in the center to support the inner edges of the two cabinets.
Here are the two cabinets set on top of the toe-kick. We used the "over the fridge" cabinets for our seating bench. They are 30 x 15 inches each. The doors and trim are all Gnosjö.
To make the whole unit look more built-in, we used quite a bit of panels and filler pieces. Before adding a "table top" which we cut out of the biggest panel that IKEA carries - it comes in a 3x8 ft sheet, we added two pieces of cardboard shims to the middle of each cabinet. We did this because the sides of the cabinets come up just a smidge over the top panels. By shimming the middle, the table top won't dip when you fasten the top.
Next we cut the top. Here you can see how big that 8x3 feet of panel is. We cut it to length first, then to width.
We secured the top to the bench with screws, then attached the tower part. This part we made out of two 15 inch wide base cabinets. They are 30 inches tall each. They had also been shortened by 4 inches in depth.
To make everything look more built-in, we made a filler piece corner for the room between the tower and the wall. The width of this corner is matching the corner on the vanity across from the bench and tower. We used regular toe kick for this part and some inexpensive 1x2.
We lined up the inexpensive 1x2 by using the filler piece that would later be scribed to the wall. Then nailed in the 1x2.
On the left Dh is fastening some more 1x2 to the wall and on the right one filler piece has been fastened to the side of the tower and bench.
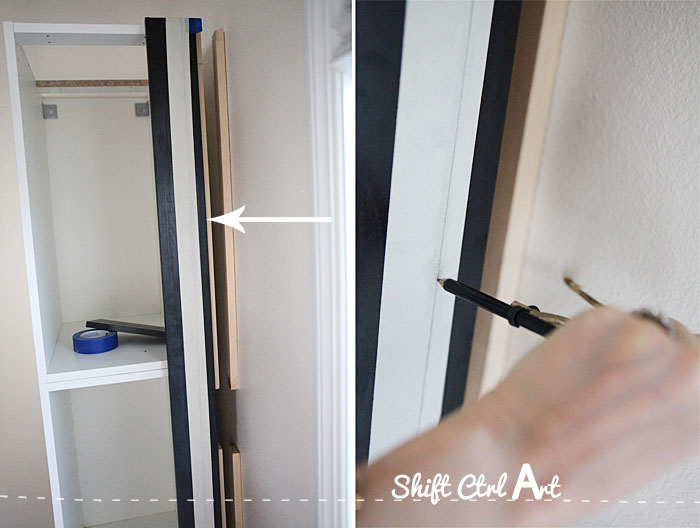
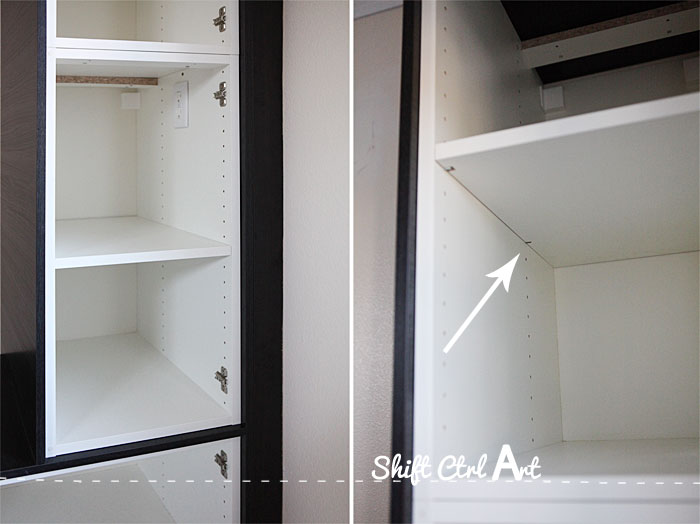
Next we had to scribe a filler piece to fit between the decorative filler piece and the wall. Hint: our walls are not super straight... We did this by temporary attaching the filler piece so it is flush on the right hand side to the outside of the cabinet. Where the tip of the arrow is pointing. Then we used a scribing tool that I ran along the wall while the pencil made a line on some tape on the filler piece. We added the tape to be able to see the line. I searched for several tutorials online and this was by far the best one I found. We also tried the method of using a scrap piece of filler instead of the scribing tool like he does in the video and I actually like that method better.
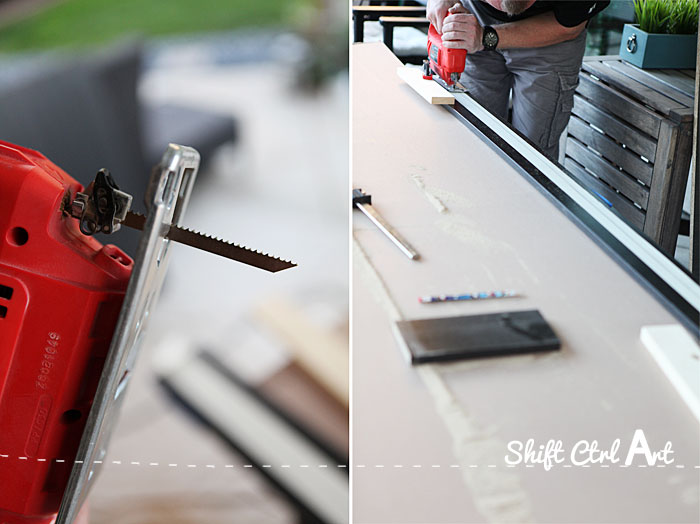
Next we had to saw along the line. Normally a saw blade is configured so that the underside is the clean cut, but when you scribe, the line is on the nice side, so after some research and watching the above video, I found out that they make saw blades specifically for this where the teeth go in the opposite direction, making the upper side the nice side. After a quick trip to Lowe's we had one of those and Dh made the cut with our jig saw.
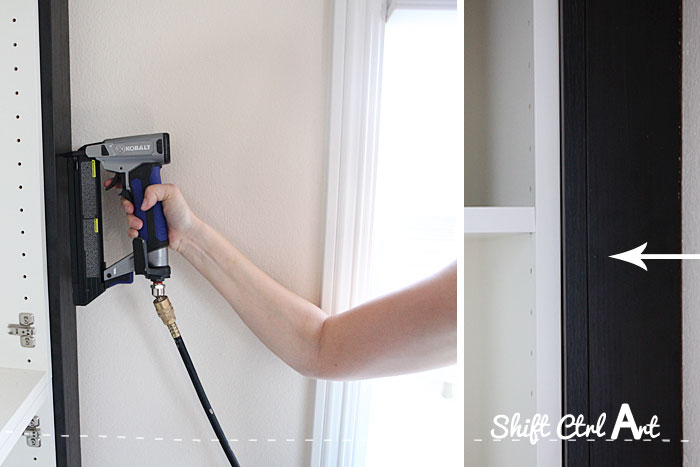
Then I could nail the piece into place with my new super handy Kobalt pin nailer that I got recently. The nails are super, super small - 23 gauge instead of the bigger 18 gauge of a finish nailer that you would usually use for baseboard etc. They are so small you do not need to fill them in really. I am just going to jot the nail heads with a black sharpie marker and you won't see them at all.
You would think this would be called a finish nailer as you are finished after using this... but no... it's a pin nailer. Confusing.
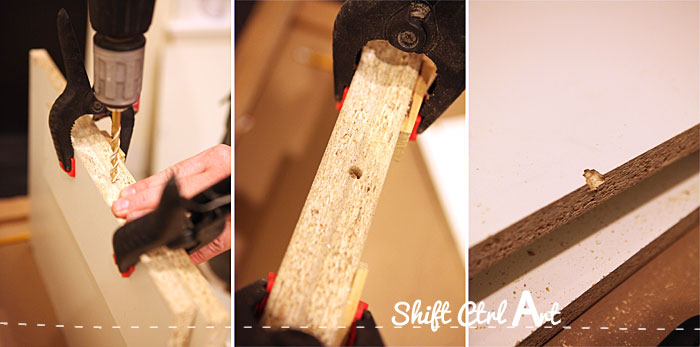
Because we shortened the cabinets, the shelves no longer have any back support either. The way we solved this was by drilling new holes for the shelf supports to go in the middle row of holes in the cabinets now that the whole back row of holes had been removed.
We clamped some scrap wood to each shelf after marking where the new half round support hole should go, then DH drilled right between the shelf and scrap wood. He pre-drilled first with a smaller drill bit, then he drilled with a drill bit large enough for the shelf support metal plug thingy to fit. Yes, that was totally the technical term for that.
Then the shelves were added to the cabinets. On the right you can see the new shelf support in the hole we drilled.
Dh also finished off the electrical box inside the tower. Now we have a place to charge toothbrushes and his shaver out of sight. That makes me excited.
We cut some more paneling to go at the end of the bench, the other side of the tower. The last thing we cut was a top for the tower. It both finishes everything off nicely and it closes the hole in the top of the tower. Because we are using base cabinets, they did not come with a closed top.
We spent about 5 hours building this unit.
Before:
And here is the built-in IKEA bench and tower again.
Next, I need to finish spackeling and re-texturing the walls and paint them and we need to finish the vanity on the opposite side.
We had the counter top people come out on Saturday for a pre-planning visit. They will come back and measure for the pan in the next week or so. Then there will be a bit of waiting while the pan is made - it could be as much as a couple of weeks. Once it is installed we can attach the rest of the Hardiebacker board in the shower and then schedule the inspector for the second visit: the pan test and Hardie/drywall inspection where he needs to see that the pan can hold water for 24 hours and that there are enough screws in the Hardie and new drywall.
Catch up on the previous posts of the master here:
Planning and floor plans
Before pictures and mood board
Demoing
Bathroom accessories
Plumbing, electrical and new construction
Fun times ahead!
Next: Progress in the toilet room - a Bondo experiment and new paint and cabinet

About Katja Kromann
I am a Danish American decorating life in Seattle. I love all things design and DIY.
I can’t think of anything more fun than coming up with project, making it, photographing it and sharing it with you on my websites.
Since 2018 I have been making Ceramics, nearly full time.
AHomeForCeramics.com AHomeForDesign.com AHomeForCrafts.com AHomeForFood.com My Portfolio
Categories
Master bath progress: Shortened built-in IKEA seating bench and cabinet tower is posted in the category Master Suite


