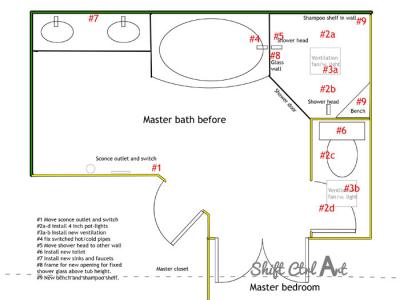
Demoing the master bathroom
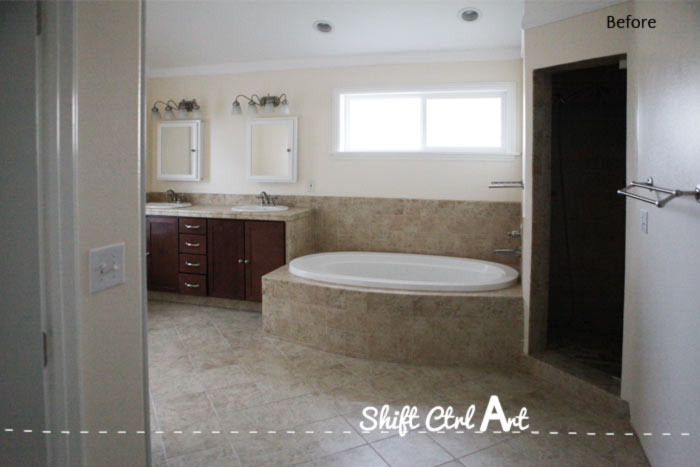
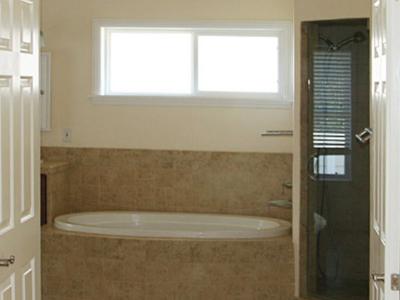
This weekend it was definitely happening in our master bathroom. We tore almost all of it out. Back to the studs - except for the floor, which we have decided to work with in the new design to save some money. You can see the mood board I came up with to put some more oompf in this bathroom.
Then of course I went on and on about the planning a couple of days ago, but here we are, ready for some action already!
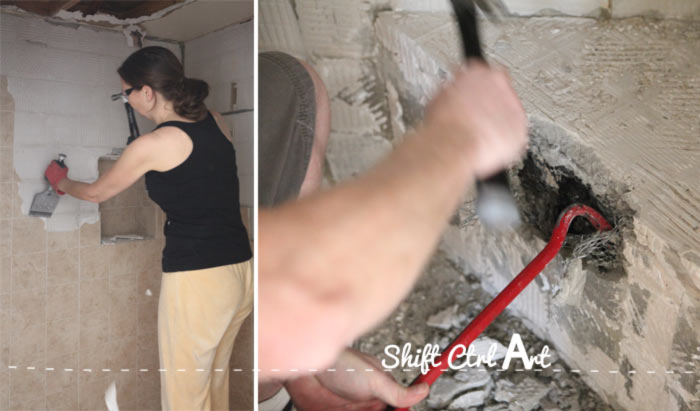
This weekend we had a go at it. Day 1 of demo. This was also our anniversary too - 17 years. I'll take a day of demo over a bouquet of roses any time. But we still went out to dinner in the evening. It doesn't have to be either, or - right?
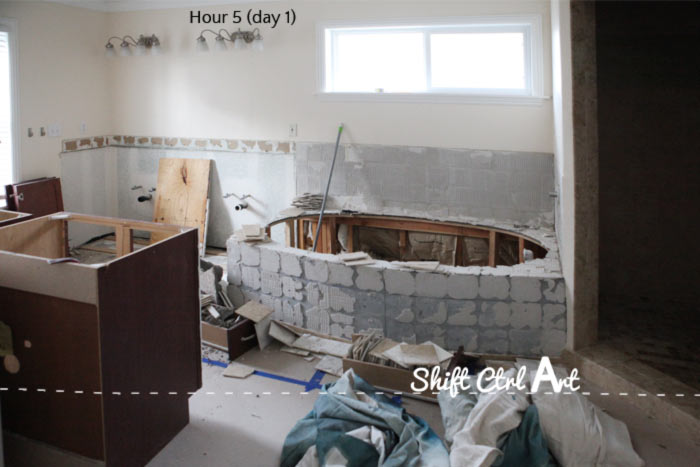
On the first day of demo we only put in a couple or so hours each and got to this point.
We had talked with our handyman about a time estimate for him to do all the work, but it came back outside our budget, which is why dh and I decided to step in and provide some (wo)man power to this project ourselves.
I am going to keep track of how much time we spend during this remodel and I will show you the estimate we got for each bullet point and then I will post how long it actually took. Of course I will compare hours to hours, so if dh and I work 2 hours together on something, it will say 4 hours.
Masking 1 hour, actual time spent 0.5
Remove sinks/faucets, vanity, tub faucet, shower stall heads and faucets, vent fans, toilet, towel bars 4.5 hours, actual 2 hours.
Remove tub 6 hours, actual 10 minutes - lucky break - no glue was used!
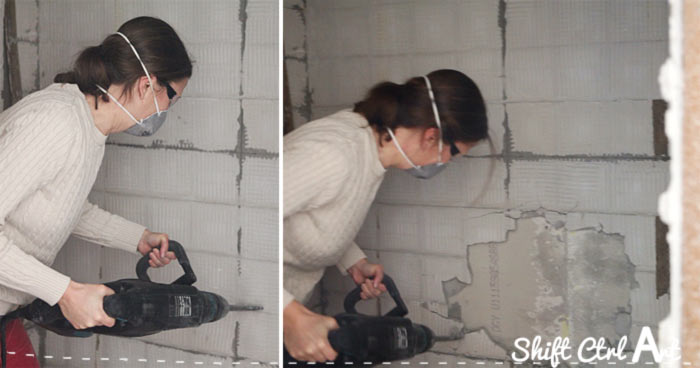
Tile removal 16 hours, we did it in 9 hours.
Demo shower stall 16 hours, actual 9 hours.
Remove debris.3 hours, we spent 3.75 hours.
Total estimate: 46.5 hours. We spent 25 hours - about 6 of those was by our handyman who came in and helped on the third day.
On day two we started demoing tile in the shower and then quickly discovered that they had installed the shower in a very - shall we say - unusual way. Like someone who has a lot of extra material lying around that they want to stick somewhere.
Usually you would find backing paper, then wire, then about 1/2 inch of float, then thin set, then tile on the walls. Well these guys had decided to first drywall everything with green board (drywall for wet location), then adding a layer of 1/4 inch and in some places 1/2 inch Hardie backer board on top of that?. Then... just for kicks, they had added wire and a full one inch slab of float on top of that. Virtually indestructible.
The bottom of the pan was similar. Layer after layer. Build up after build up of different materials. And still we found a leak in the pan too. We are so happy that we can now install a better system and make it leak proof.
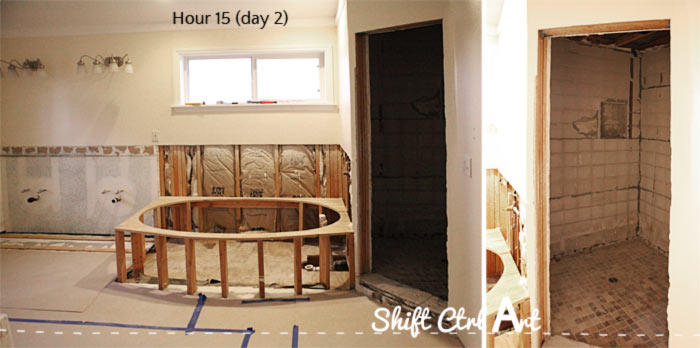
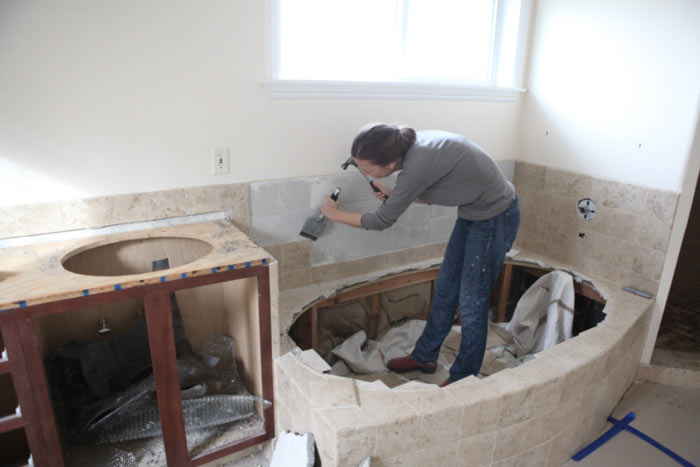
By the end of day two we were back to the studs in the bathroom itself and we had removed all tile except on the floor in the shower.
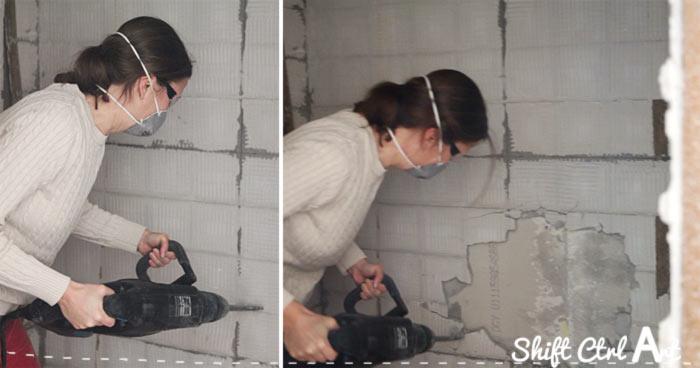
On the third day we got really serious and I went and rented a demolition hammer for half a day. (cost about 55 dollars - totally worth it) to make short order of those shower walls. They were so thick and it would have taken us days to take them out manually.
In full disclosure this is where we are going a little HGTV on you. I did 10 minutes of demolition with that 20 lbs hammer while having my picture taken, then handed it off to our handyman who joined us on the third day and he spent 3 hours taking out those walls and the floor while dh and I took 40 trips up and down the stairs to quickly remove the debris as it was coming down.
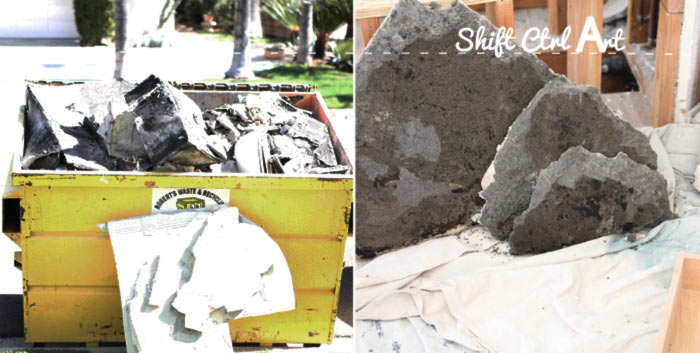
Here you can see how wet that cement from the stall floor was. It was almost all sand and not the right ratio cement. And you can see that we completely filled the waste bin, and we even had a second bin delivered to have room for all the debris.
So this is where we started on day 1 again:
And this is where we were on day 3 - 25 hours into our project and with the demo phase crossed off.
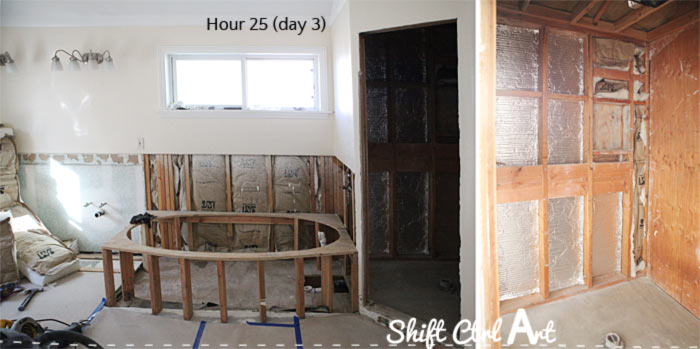
Back to the studs! Yeah!
Here are my best tips for a successful demolition:
First go on the Paleo diet. I am only half way kidding. Compared to our remodel in 2010, I was so much less tired and sore this time around compared to then. I used to need a nap in the afternoon. Really need one. I don't anymore. I just recently started taking fermented cod liver oil in the morning too after reading this study. Recommend.
Other tips are:
- Wear sensible shoes and other protective gear like gloves and glasses of course.
- Drink lots of water.
- Have your waste bin already at the curb to save time on debris haul.
- Have the right tools and rent power tools for the bigger jobs.
- Hire out the heaviest parts of the jobs if necessary.
- Keep your work area tidy by sweeping often and clean up each night, so it is more enjoyable when you come back.
Remember how we were deciding between several lamps:
Thanks everybody for weighing in on the lamp debate. We ended up choosing these lamps:
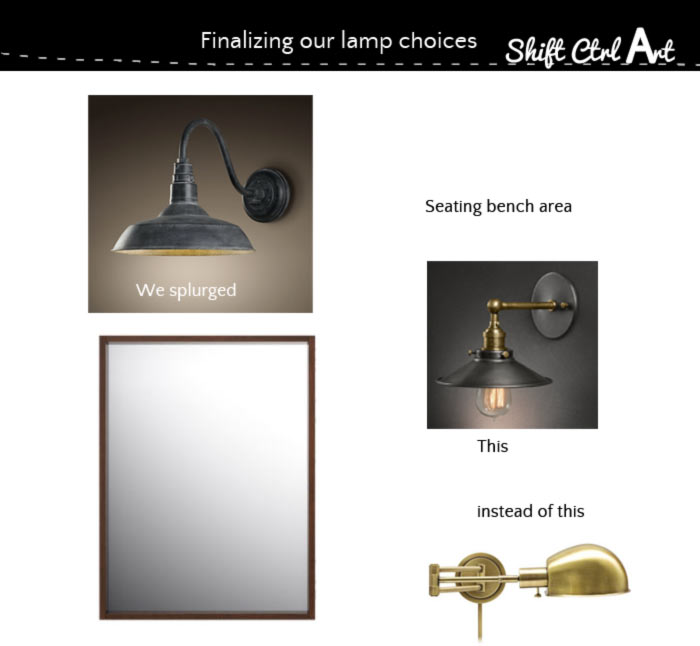
On Monday during President's day Restoration Hardware had a 100 dollar off coupon. That sealed the deal and we ordered the lamps we loved the most and then we chose a new secondary lamp for the seating bench area. The one pictured is aged steel, but the one we got is weathered zinc like the main lamp, and it has a bit of brass to tie in with the other brass accents we are bringing in at the end. The secondary lamp ended up being cheaper than the swing arm lamp, so while it was still a splurge to get those lamps, we did save with the coupon and by getting the cheaper secondary lamp.
Next two phases that are coming up are:
Electrical/Plumbing. I have called the plumber, he might come tomorrow. I have ordered all the plumbing and electrical items and they are arriving very soon.
Construction is the following phase. We are re-framing one of the walls in the shower to make way for a glass enclosure. We are consulting a contractor/friend to verify the right method to do that.
Yesterday morning I went down to the City to talk to them about the method we want to use for rebuilding the shower and had my method pre-approved.
I am also waiting to get a quote for a shower pan.
Things are moving along.
One last thing.
 My blog was nominated again this year for the annual Apartment Therapy award the Homies in the DIY and Project category. I am totally excited about the votes I have gotten so far. I have already begged for some votes on Facebook, but I am not above doing some more begging right here. If you are so inclined, I would be forever grateful if you would swing by Apartment Therapy and vote for Shift Ctrl Art and any other blogs you like over there.
I have a couple of friends in the top 5... oh how I would like to be more adjacent to them

Follow this link - you have to be signed in, but it only takes 3 seconds and I will smile really big while you do that. Voting ends tomorrow, Friday.
Thanks so much for your support!
Next: Master bath - plumbing, electrical and new construction

About Katja Kromann
I am a Danish American decorating life in Seattle. I love all things design and DIY.
I can’t think of anything more fun than coming up with project, making it, photographing it and sharing it with you on my websites.
Since 2018 I have been making Ceramics, nearly full time.
AHomeForCeramics.com AHomeForDesign.com AHomeForCrafts.com AHomeForFood.com My Portfolio