Turning to the Master bathroom - before pictures and mood board.
Are you ready for some more yellow tile and paint? I have you covered. And then some. Here we go.
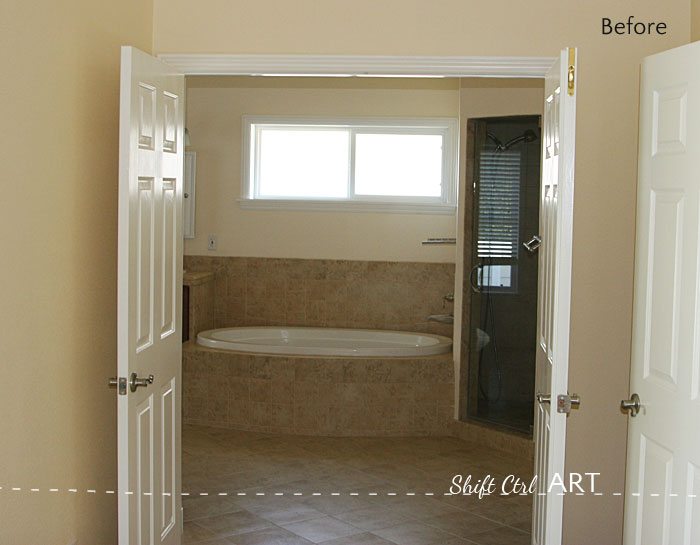
This is the view to the master bathroom from the master bedroom, through the double doors. They are two 3 feet wide doors. On the right you see the door leading out the to hall way with the craft closet.
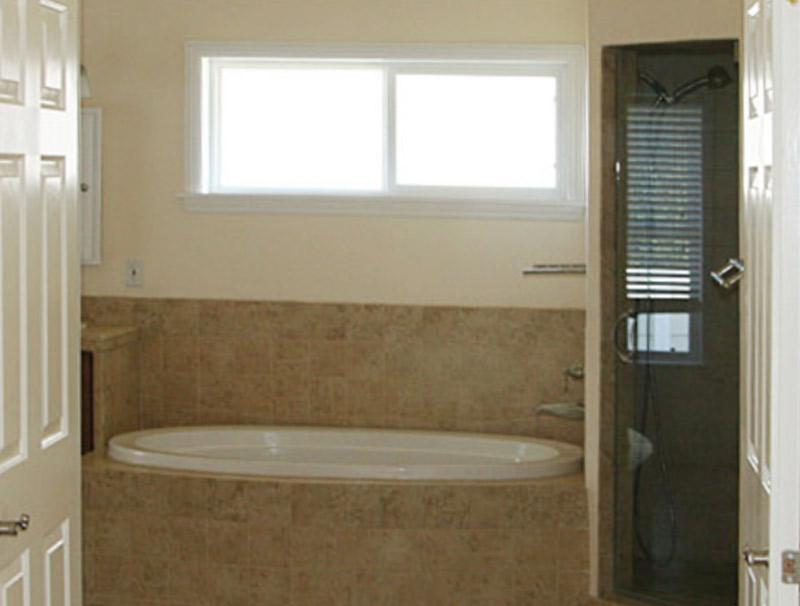
The focal point is the roman tub. It's really big and deep and B LOVES to take his baths here. (After I tell him 200 times it is time to take a bath )
)
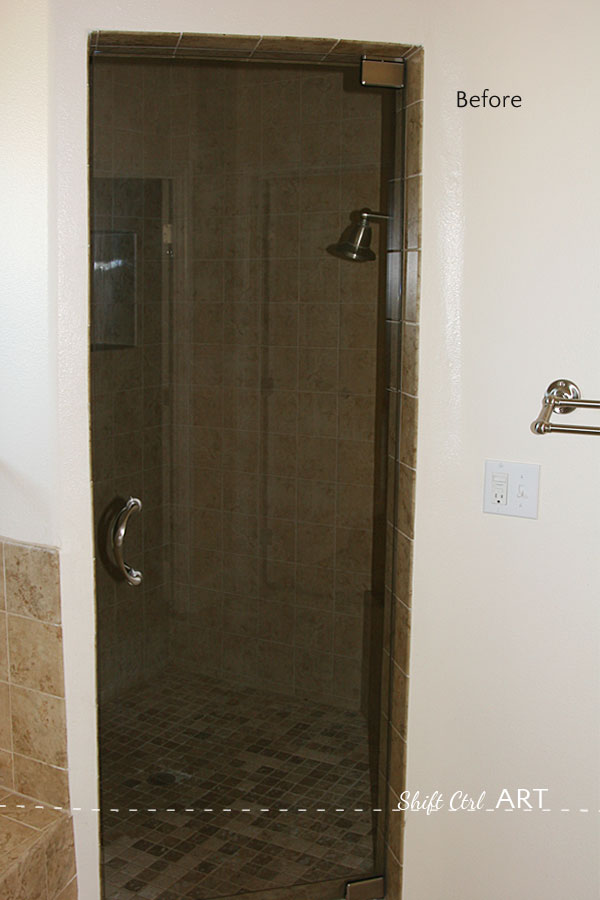
To the right is the shower. It's very dark in there. And the fan is LOUD. We have some plans for that.
Before I forget: Enjoy the look of the glass shower door for a bit longer. Take it in.
We have changed out the fans in the other bathrooms to this one, which is only 0.3 sones at the low setting. That is whisper quiet. To the point where you ask: Is it on? The low setting will clear out up to 80 cubic feet, which is more than enough for our shower. The larger setting goes up to 110 cubic feet. You can hear that setting, but it is far quieter than any fan I could find at the two big box stores.
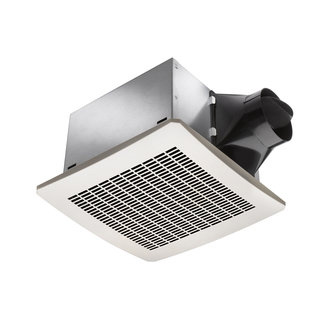
Delta dual speed 80/110

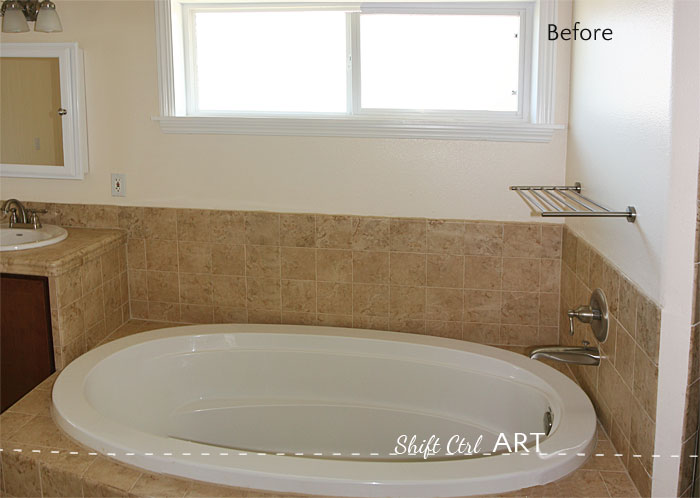
Next to the tub is our vanity. And more yellow tile. I told you, I have you covered... Above two medicine cabinets that could have been recessed, but are not. Also because the center row of drawers are so small, I have to have my make-up in one of the mirror cabinets, which is really impractical. When I open the door to access my stuff, I no longer have a mirror to look at.
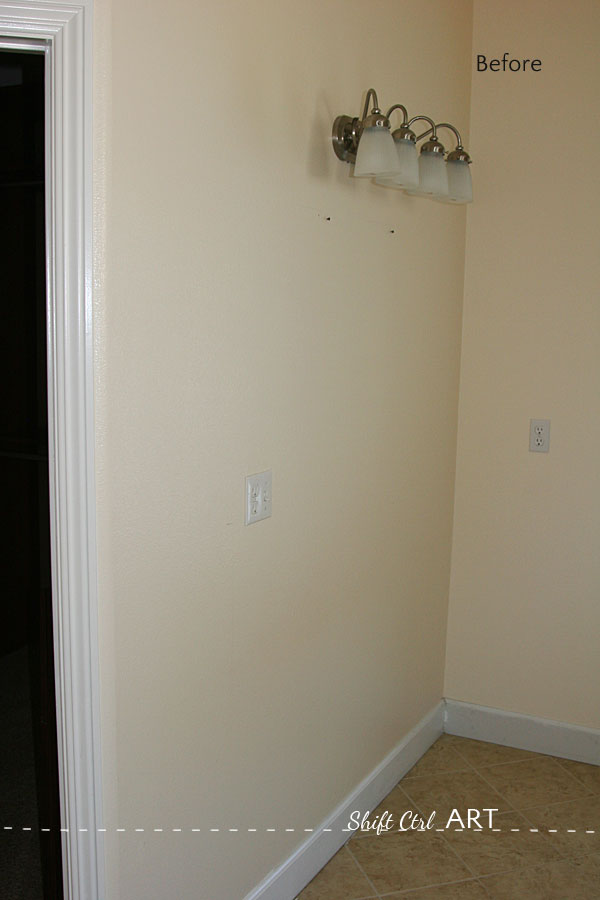
This is the opposite wall to the vanity. It's uhm... empty... 6 feet of wall space - not utilized. I often wonder what they put here? A big vanity table? Maybe... I have a better idea.
Oh and did you enjoy the glass shower door? Me too - for almost 4 years. Then one evening in November last year, when we were all downstairs one evening:
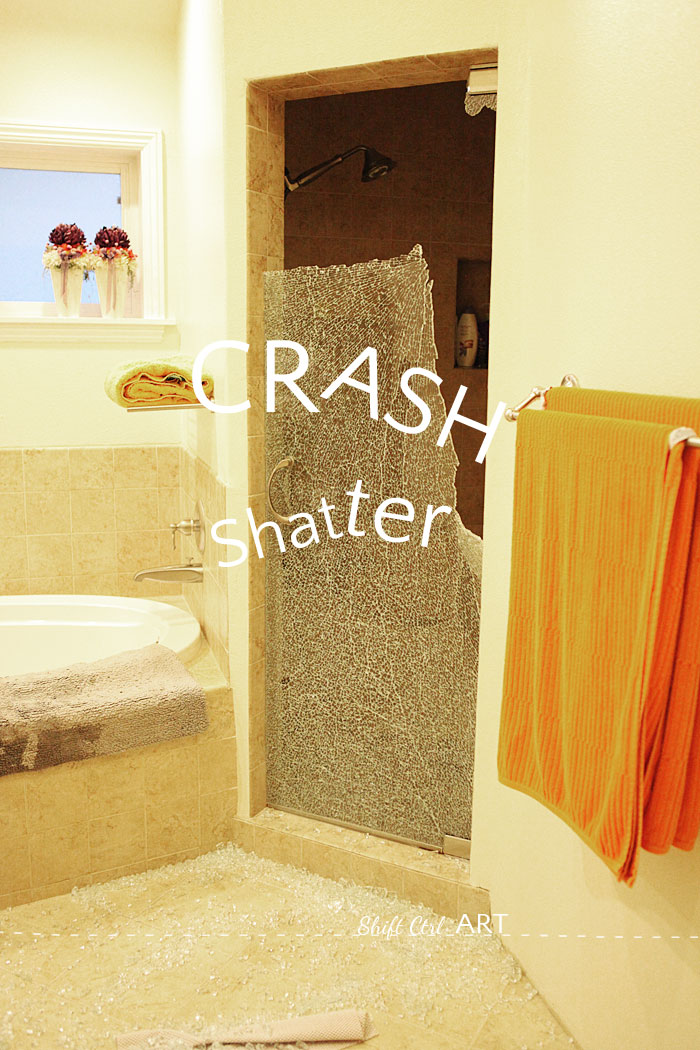
A very loud sound. And it wouldn't stop. At first I thought the neighbor's house was getting broken into or something. Then we realized the sound came from upstairs and we all RUSHED up to find this lovely sight. There went that door... From the position of the hinges we could see that the door was not installed perfectly - the top and bottom hinges did not line up, creating a bit of tension on the glass. And with a wood house...
So on our list is to get a new glass door.
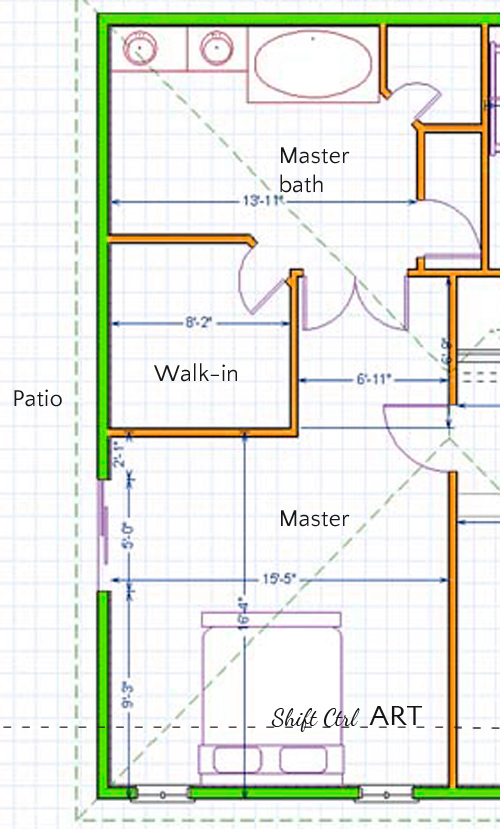
Here is a floor plan of the master so you can better visualize the space. I forgot to put in the window between the vanity and the blank wall. There is a window there...
So I have been going back and forth on how much to rip out in the Master. As with everything else, that yellow tile was put in in 2006, so it is fairly new. All locals that I have polled have "loved" the tile. It's not my thing, but it would be really expensive to rip it all out.
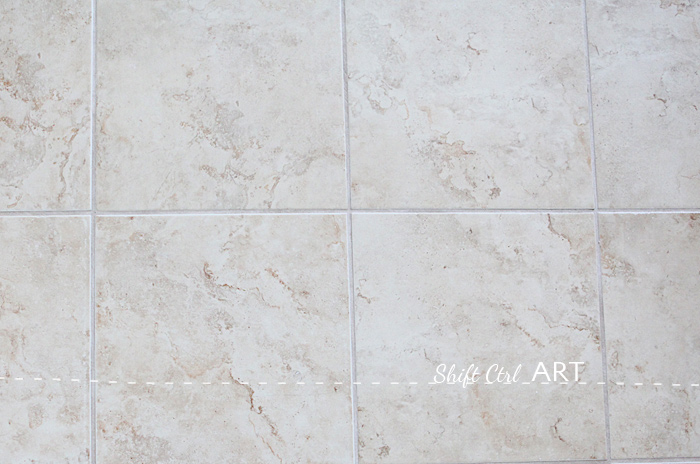
Here is a close-up of the tile. It changes personality according to the light that hits it like an FBI agent on a mission. Here it looks very beige. Other times it looks much more yellow.
The tile is installed over cement board which would have to come out as well. New Hardie backer board would have to be installed, sealed, coated, etc... then a TON of tiling. Just the floor would be at least $3000 in my estimation. Soooo that got me thinking. What if we keep the floor tile and save that money.
What could I do that would make this room work and look better?
It needs some more contrast and it needs some interest. It's just so monochromatic and yellow right now.
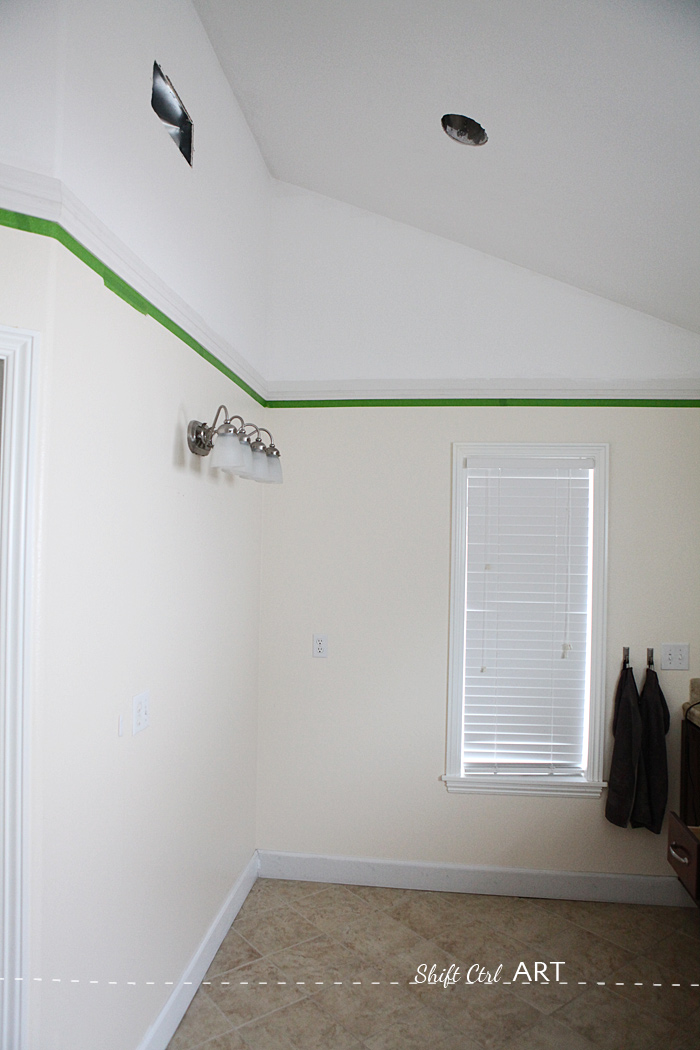
First order of business is of course to give it my favorite anti-triangle treatment with chair rail installed at ceiling height just like we did in the Master:
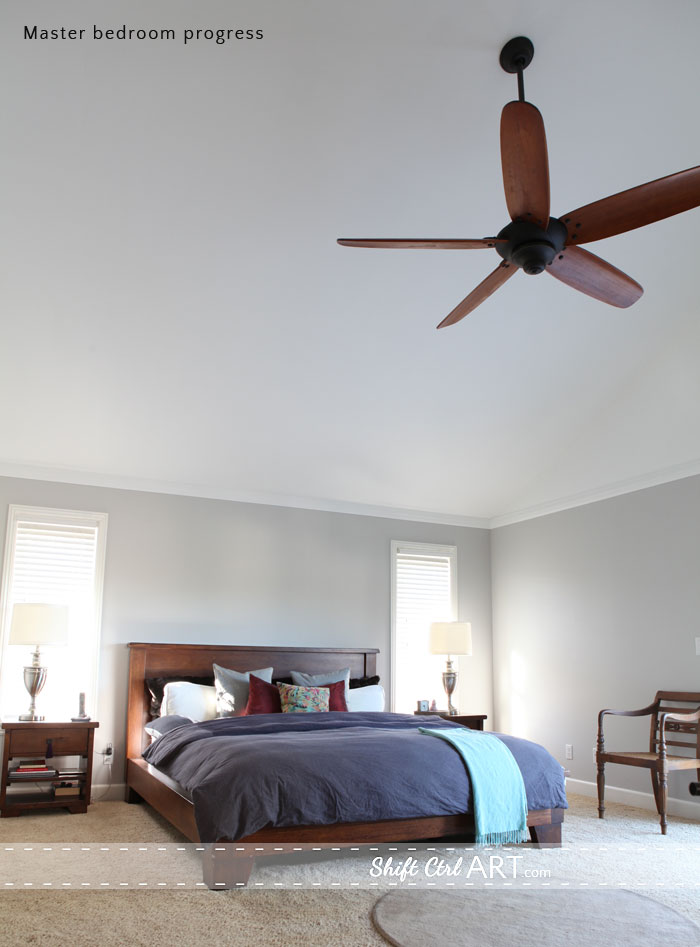
You can see before and after pictures of that process here.
Here are some things I pulled together to update the Master without doing a complete gut job.
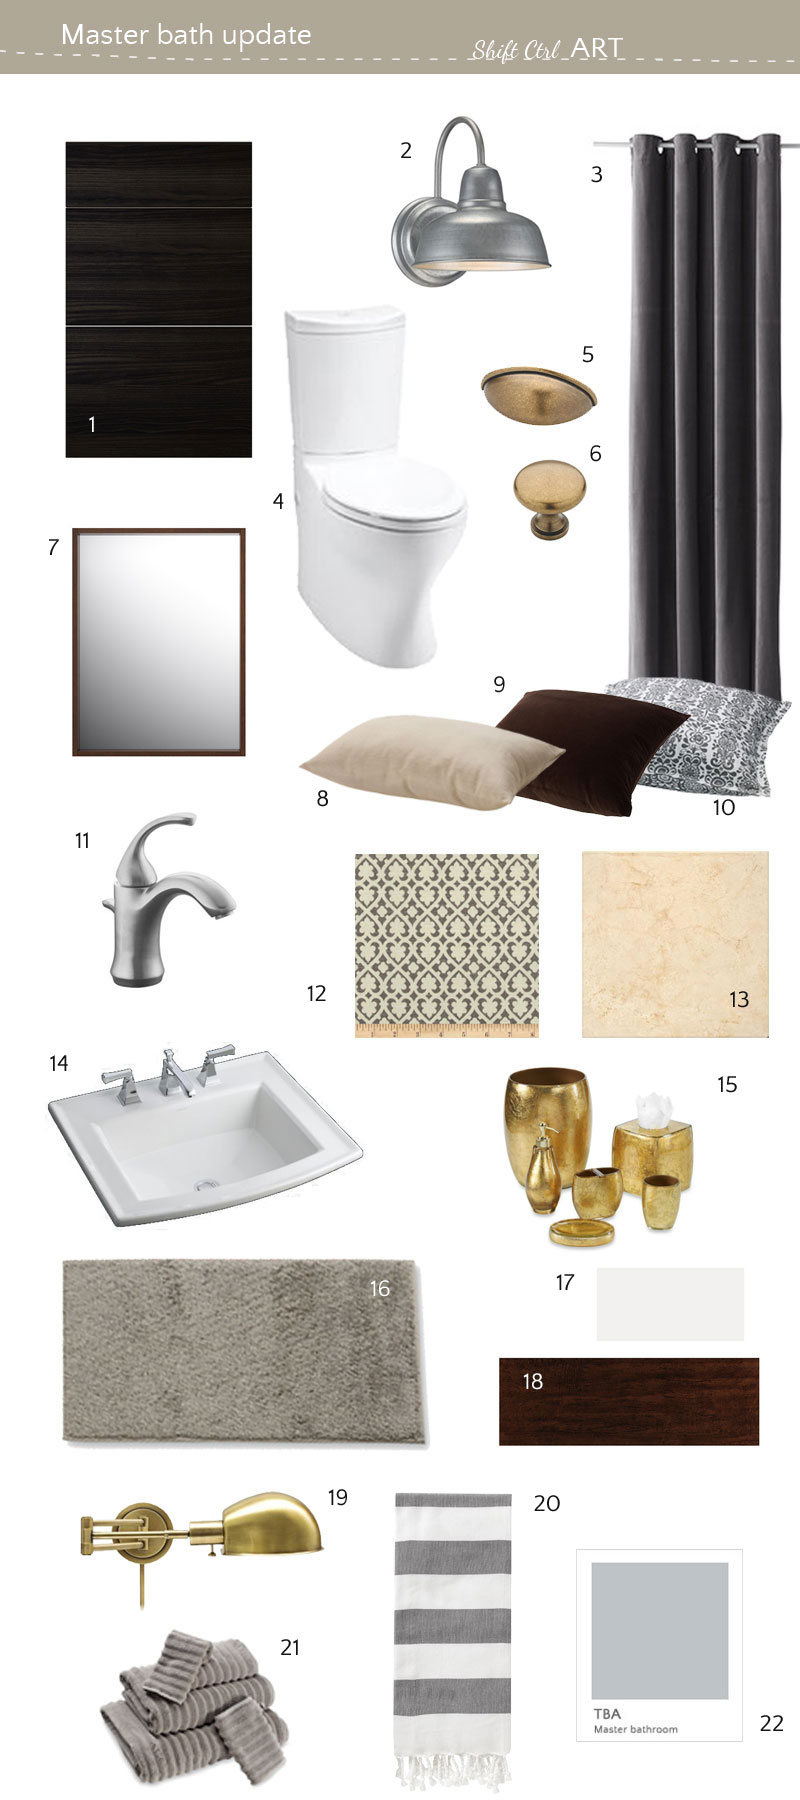
Mood board
Then we would use the Walnut ceramic tile as the new back splash. This would create some great contrast and tie in with the floor we have planned for the Master bedroom.
We would get a new vanity out of IKEA cabinets with wider drawers in the middle. On the blank wall I am thinking to do a shallow tower on the right on top of a 6 ft long seating bench. In the tower I would like to have an outlet so that we can charge tooth brushes and shaving stuff out of sight.
To tie into the existing tile I would use some brass accents as you see in the mood board. And some yellow with gray fabric for the seating bench.
I will reveal more of the plans as we go.
Last week we had the ceiling chair rail installed. Here is a sneak peek.
The bulk of the tile work, we are hoping to take on sometime in June and July. It will be in phases. First the shower by itself, then the bath tub and vanity.
I am going to research a new counter top I learned about from some guests we had last month. They have a store up north that we will visit to get more details and pricing. So far it sounds VERY interesting and if it works out, you will be seeing some solid white counter tops on the new vanity and possibly around the tub as well.
I am already excited. You?
Sharing over at Design your Dwelling
Quick question. I was researching floor plan tools yesterday to make a better, updated and perhaps less colored floor plan. I could not find the one that I have seen other bloggers use. I am assuming for free. Do you know the name of it?
Next: read more about how I planned the remodel and see the pictures of the demo.
Share
This is the view to the master bathroom from the master bedroom, through the double doors. They are two 3 feet wide doors. On the right you see the door leading out the to hall way with the craft closet.
The focal point is the roman tub. It's really big and deep and B LOVES to take his baths here. (After I tell him 200 times it is time to take a bath
)To the right is the shower. It's very dark in there. And the fan is LOUD. We have some plans for that.
Before I forget: Enjoy the look of the glass shower door for a bit longer. Take it in.
We have changed out the fans in the other bathrooms to this one, which is only 0.3 sones at the low setting. That is whisper quiet. To the point where you ask: Is it on?
The low setting will clear out up to 80 cubic feet, which is more than enough for our shower. The larger setting goes up to 110 cubic feet. You can hear that setting, but it is far quieter than any fan I could find at the two big box stores.Delta dual speed 80/110
Next to the tub is our vanity. And more yellow tile. I told you, I have you covered... Above two medicine cabinets that could have been recessed, but are not. Also because the center row of drawers are so small, I have to have my make-up in one of the mirror cabinets, which is really impractical. When I open the door to access my stuff, I no longer have a mirror to look at.
This is the opposite wall to the vanity. It's uhm... empty... 6 feet of wall space - not utilized. I often wonder what they put here? A big vanity table? Maybe... I have a better idea.
Oh and did you enjoy the glass shower door? Me too - for almost 4 years. Then one evening in November last year, when we were all downstairs one evening:
A very loud sound. And it wouldn't stop. At first I thought the neighbor's house was getting broken into or something. Then we realized the sound came from upstairs and we all RUSHED up to find this lovely sight. There went that door... From the position of the hinges we could see that the door was not installed perfectly - the top and bottom hinges did not line up, creating a bit of tension on the glass. And with a wood house...
So on our list is to get a new glass door.
Here is a floor plan of the master so you can better visualize the space. I forgot to put in the window between the vanity and the blank wall. There is a window there...
So I have been going back and forth on how much to rip out in the Master. As with everything else, that yellow tile was put in in 2006, so it is fairly new. All locals that I have polled have "loved" the tile. It's not my thing, but it would be really expensive to rip it all out.
Here is a close-up of the tile. It changes personality according to the light that hits it like an FBI agent on a mission. Here it looks very beige. Other times it looks much more yellow.
The tile is installed over cement board which would have to come out as well. New Hardie backer board would have to be installed, sealed, coated, etc... then a TON of tiling. Just the floor would be at least $3000 in my estimation. Soooo that got me thinking. What if we keep the floor tile and save that money.
What could I do that would make this room work and look better?
It needs some more contrast and it needs some interest. It's just so monochromatic and yellow right now.
First order of business is of course to give it my favorite anti-triangle treatment with chair rail installed at ceiling height just like we did in the Master:
You can see before and after pictures of that process here.
Here are some things I pulled together to update the Master without doing a complete gut job.
Mood board
- Gnosjö cabinetsBarn
- Wall uprban galvanized outdoor wall sconce
- Sanela curtain
- Kohler Persuade Curv
- Brainerd 3 inch tumbled Brass pull
- Brainerd Brass Knob
- Molger mirror
- Pillow
- pillow
- pillow
- Kohler forte faucet
- Waverly Soul Mate Pumice
- Our current tile.
- Kohler Archer sinks
- Nicole Miller Golden rule accessories
- Bath mat
- White subway tiles
- Interceramic Colonial wood walnut ceramic 6x20
- House of Troy Addison swing arm lamp
- Hammam stripe hand towel
- Turkish Ribbed bath towels
- paint - TBA two shades darker than Filtered light, which we used in the master.
Then we would use the Walnut ceramic tile as the new back splash. This would create some great contrast and tie in with the floor we have planned for the Master bedroom.
We would get a new vanity out of IKEA cabinets with wider drawers in the middle. On the blank wall I am thinking to do a shallow tower on the right on top of a 6 ft long seating bench. In the tower I would like to have an outlet so that we can charge tooth brushes and shaving stuff out of sight.
To tie into the existing tile I would use some brass accents as you see in the mood board. And some yellow with gray fabric for the seating bench.
I will reveal more of the plans as we go.
Last week we had the ceiling chair rail installed. Here is a sneak peek.
The bulk of the tile work, we are hoping to take on sometime in June and July. It will be in phases. First the shower by itself, then the bath tub and vanity.
I am going to research a new counter top I learned about from some guests we had last month. They have a store up north that we will visit to get more details and pricing. So far it sounds VERY interesting and if it works out, you will be seeing some solid white counter tops on the new vanity and possibly around the tub as well.
I am already excited. You?
Sharing over at Design your Dwelling
Quick question. I was researching floor plan tools yesterday to make a better, updated and perhaps less colored floor plan. I could not find the one that I have seen other bloggers use. I am assuming for free. Do you know the name of it?
Next: read more about how I planned the remodel and see the pictures of the demo.

About Katja Kromann
I am a Danish American decorating life in Seattle. I love all things design and DIY.
I can’t think of anything more fun than coming up with project, making it, photographing it and sharing it with you on my websites.
Since 2018 I have been making Ceramics, nearly full time.
AHomeForCeramics.com AHomeForDesign.com AHomeForCrafts.com AHomeForFood.com My Portfolio
Categories
Turning to the Master bathroom - before pictures and mood board. is posted in the category Master Suite


