Master bath - plumbing, electrical and new construction
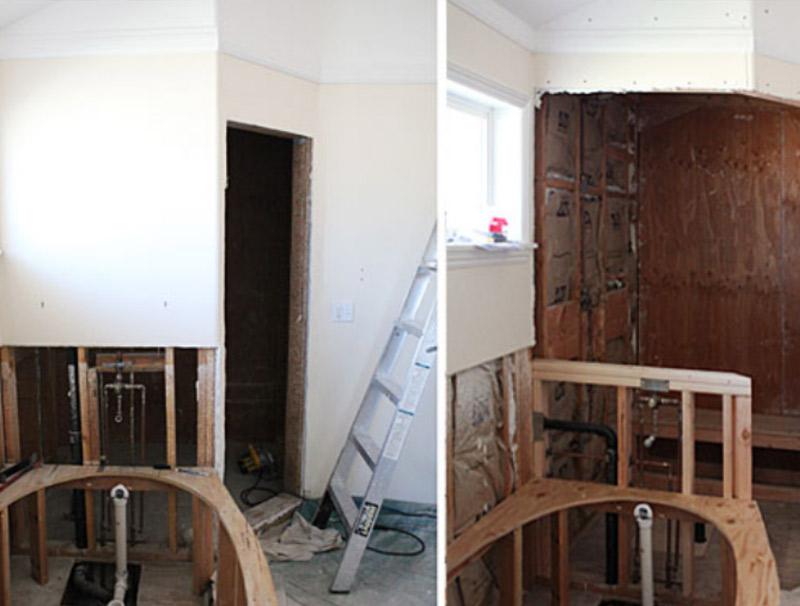
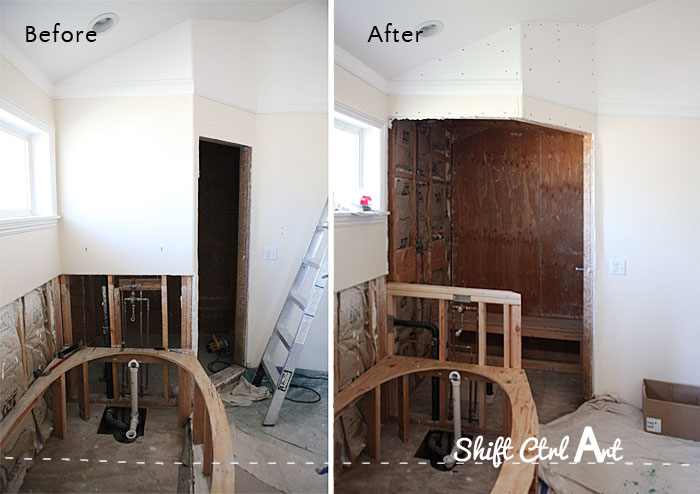
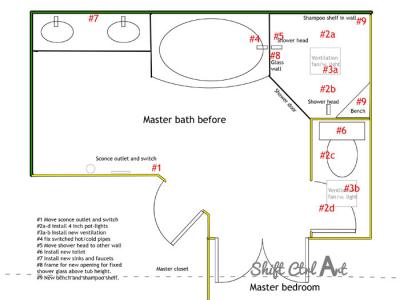
Last time we had just completed demo of the old master bathroom and it looked like this:
Next we started taking apart the left shower wall to get more light into the shower. We want to put some glass there. The old shower was so dark.
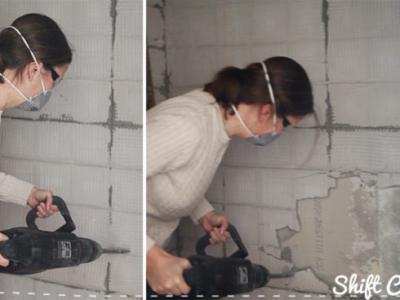
B and dh had a bit of a go at it before our handyman came in and took the rest down.
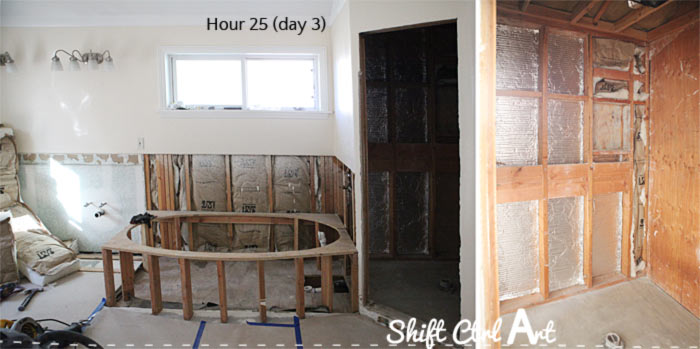
He wasn't sure we could take the wall down, so before he came in, we had our friend and contractor come in to assess the situation. He came up with a plan for making the corner of our shower hold up without any studs. On the left there you can see the nice new framing and piece of plywood that holds up the corner ceiling of the shower, oh by being tied into the roof. Not going anywhere. Our handyman and I re-fastned the drywall into the new framing over the shower door and new opening.
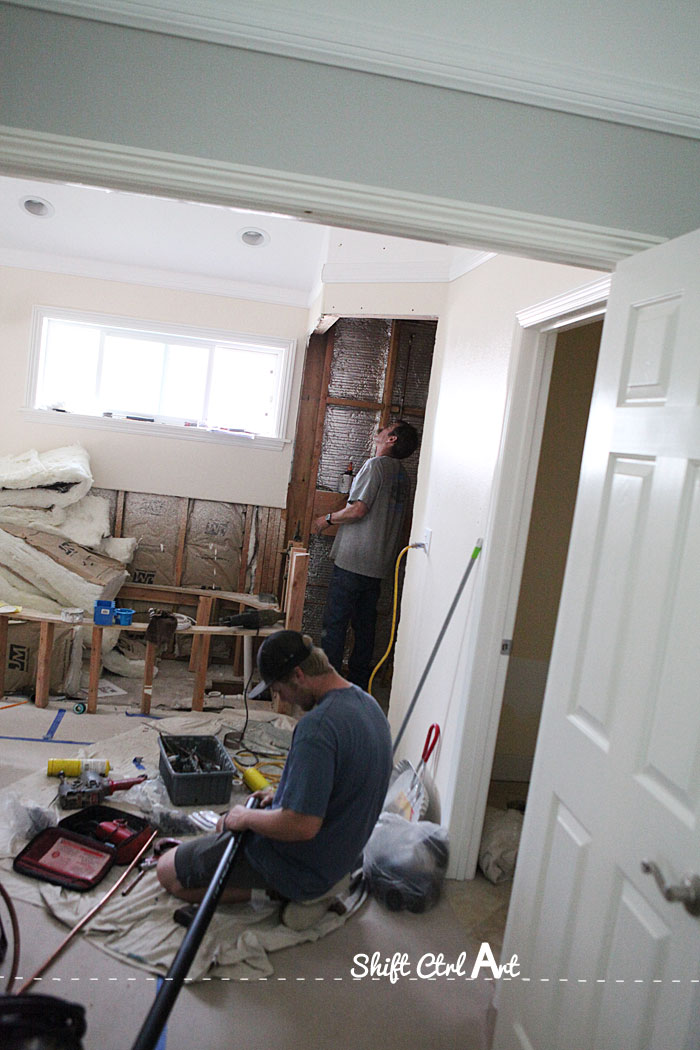
Next the plumber came in. He had 4.5 hours of work moving shower heads, vents and other exciting stuff. I know you want the FULL details so here they are.
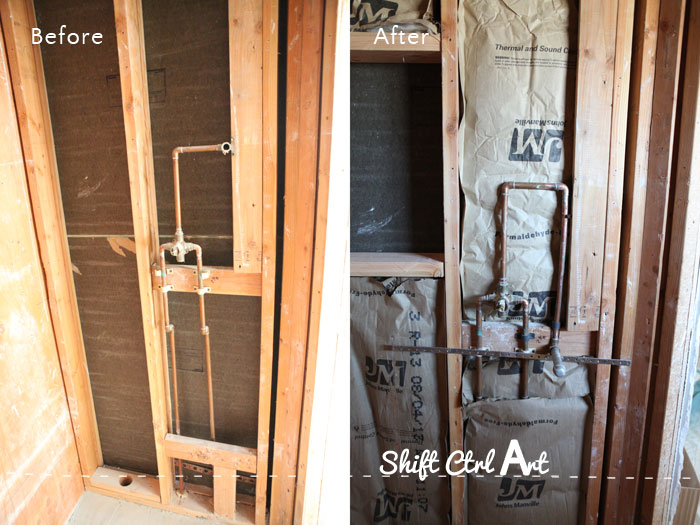
On the right side of the shower we had a weirdly low shower head. Think Lisa La Porta from HGTV low. We are turning that into a hand held shower on a sliding bar instead. Our plumber suggested we lower the pipe so that the shower hose folds nicely into the bar. We happily accepted that idea.
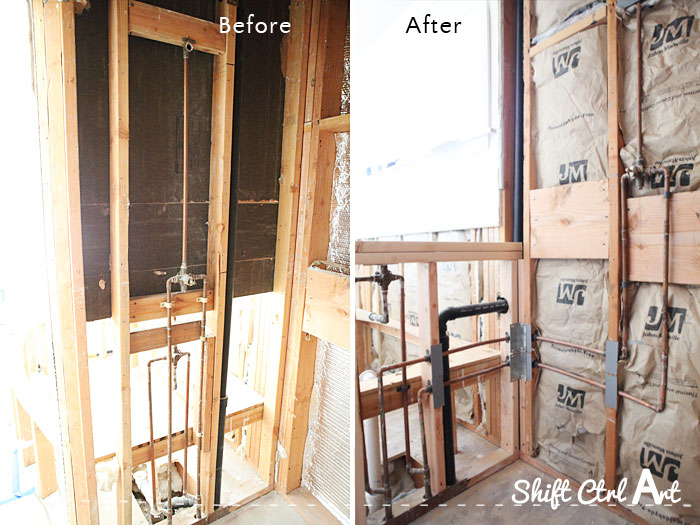
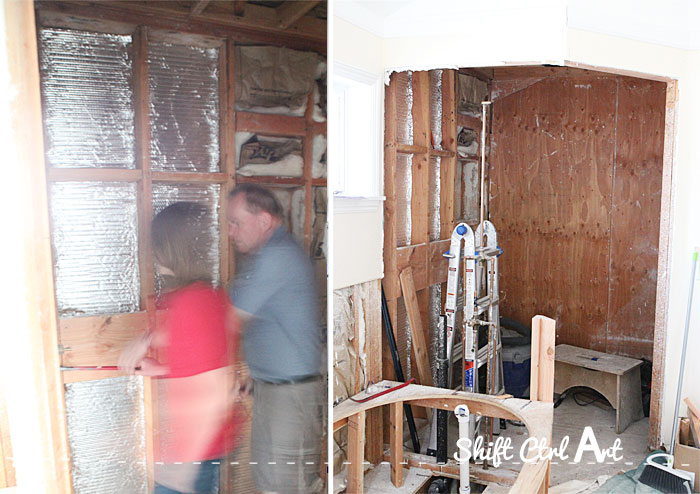
Then, where the glass is going, he moved the shower stuff away over to the adjacent wall as you see here on the right.
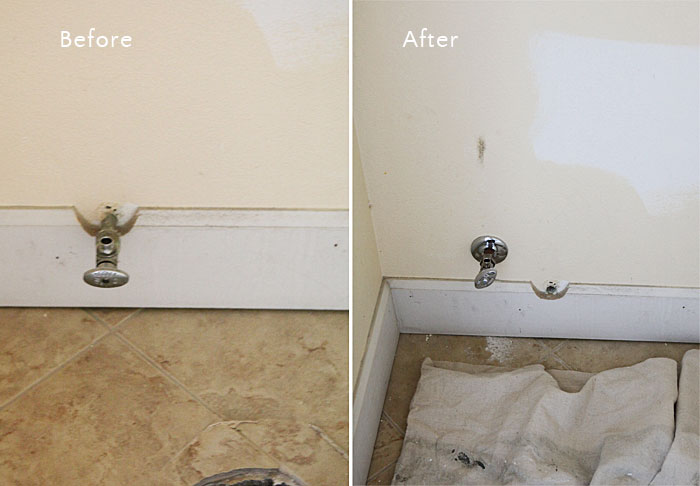
In the toilet room I had him move the spout over and up so it does not come out in the middle of the baseboard, because that just looks weird.

After the plumber left, we got busy again and finished the new framing of the half wall that our handyman had started. It couldn't be finished until after the plumber had been there. In the middle above you can see some stellar framing we cut and then installed in the corner there to go around the new black vent pipe and the two copper pipes - hot/cold water for the shower.
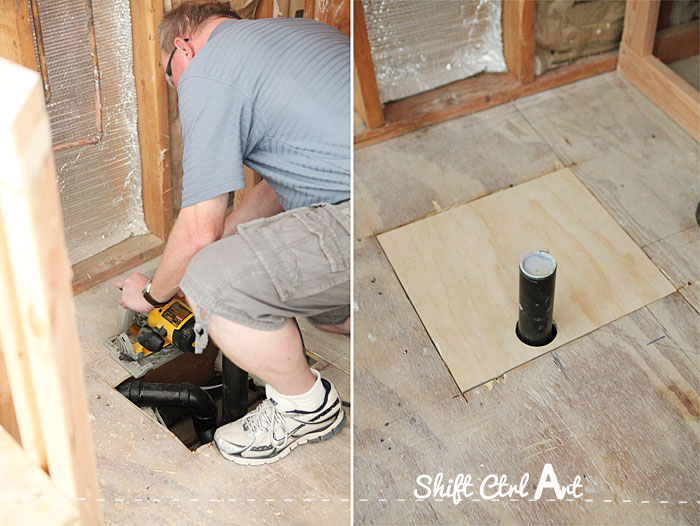
We had the drain moved to a better position by the plumber. Then dh cut a clean square around it and we fashioned a new piece of sub floor to be fastened as soon as we pass inspection.
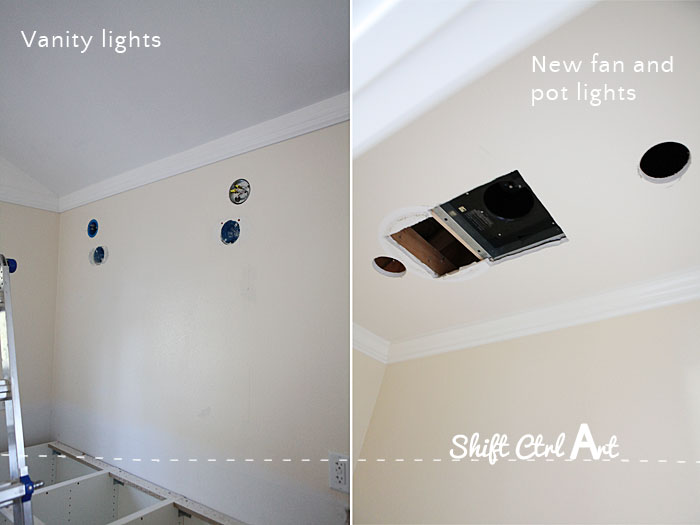
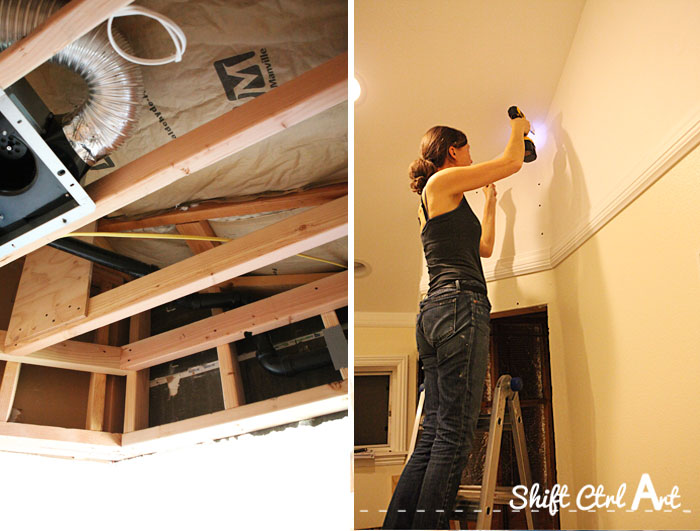
Our handyman installed the new vents and prepped for pot lights in the shower and toilet room which you see on the right. We moved the outlets up and centered over the sinks on the right. No they were not centered in the old configuration. We actually are not moving the sinks. Funny.
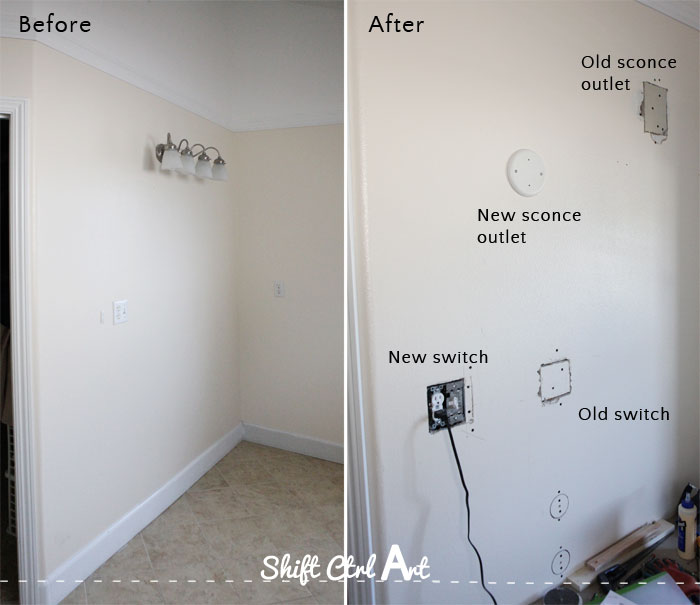
On the previous empty wall where we want to put a bench and storage tower, we - mostly dh - moved the sconce outlet and switch. The wire wasn't long enough to the switch, so we had to make a connecting box inside the bench. That is why you see those two plugged circles under the old switch.
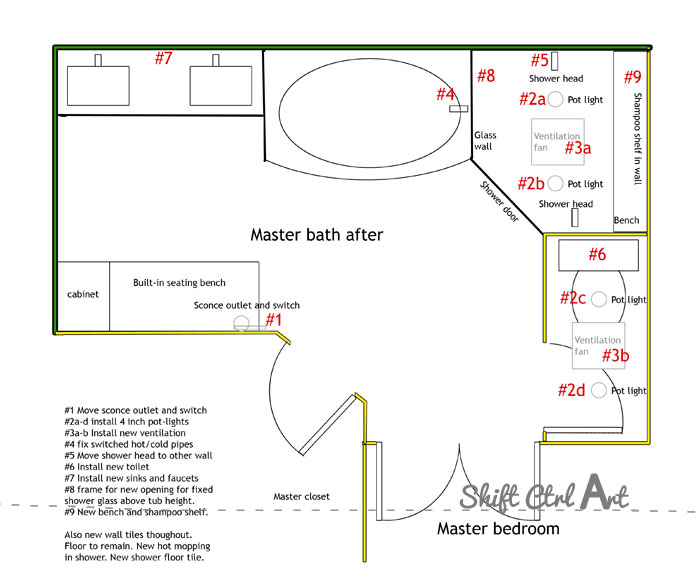
Here is the new floor plan again:
The biggest visible change at this point is of course the shower with the new framing and plumbing so you can get an idea of how much lighter it will be to take a shower in there in the hopefully not too distant future.
Our handyman spent about 6 hours on constructing the corner ceiling and building the frame for the bench and the first part of the half wall. He spent 3 hours on vents and electrical for the pot lights.
We spent 3 hours finishing the half wall and making the sub floor repair. We spent 7 hours on electrical by the built in bench and the vanity lights.
That brings rough electrical to 10 hours and rough plumbing to 4 1/2 hours and construction to 9 hours. The original quote was 18 hours for electrical, 6 hours for plumbing and 10 hours for construction, so pretty close.
This completes phase 2 and 3. Next up is phase 5 - cabinets, which we are well underway with. Phase 4 was originally shower prep for hot mopping etc, but we are now going with a solid shower pan instead which does not require hot mopping. Instead all the cabinets need to be installed as the shower pan is being made by the counter top people. More about that next time.
Oh and the inspector just left. We passed!!!! Woohooo. On to the next thing....
Next: Master bath progress: Shortened built-in IKEA seating bench and cabinet tower
Share
Next we started taking apart the left shower wall to get more light into the shower. We want to put some glass there. The old shower was so dark.
B and dh had a bit of a go at it before our handyman came in and took the rest down.
He wasn't sure we could take the wall down, so before he came in, we had our friend and contractor come in to assess the situation. He came up with a plan for making the corner of our shower hold up without any studs. On the left there you can see the nice new framing and piece of plywood that holds up the corner ceiling of the shower, oh by being tied into the roof. Not going anywhere. Our handyman and I re-fastned the drywall into the new framing over the shower door and new opening.
Next the plumber came in. He had 4.5 hours of work moving shower heads, vents and other exciting stuff. I know you want the FULL details so here they are.
On the right side of the shower we had a weirdly low shower head. Think Lisa La Porta from HGTV low. We are turning that into a hand held shower on a sliding bar instead. Our plumber suggested we lower the pipe so that the shower hose folds nicely into the bar. We happily accepted that idea.
Then, where the glass is going, he moved the shower stuff away over to the adjacent wall as you see here on the right.
In the toilet room I had him move the spout over and up so it does not come out in the middle of the baseboard, because that just looks weird.
After the plumber left, we got busy again and finished the new framing of the half wall that our handyman had started. It couldn't be finished until after the plumber had been there. In the middle above you can see some stellar framing we cut and then installed in the corner there to go around the new black vent pipe and the two copper pipes - hot/cold water for the shower.
We had the drain moved to a better position by the plumber. Then dh cut a clean square around it and we fashioned a new piece of sub floor to be fastened as soon as we pass inspection.
Our handyman installed the new vents and prepped for pot lights in the shower and toilet room which you see on the right. We moved the outlets up and centered over the sinks on the right. No they were not centered in the old configuration. We actually are not moving the sinks. Funny.
On the previous empty wall where we want to put a bench and storage tower, we - mostly dh - moved the sconce outlet and switch. The wire wasn't long enough to the switch, so we had to make a connecting box inside the bench. That is why you see those two plugged circles under the old switch.
Here is the new floor plan again:
The biggest visible change at this point is of course the shower with the new framing and plumbing so you can get an idea of how much lighter it will be to take a shower in there in the hopefully not too distant future.
Our handyman spent about 6 hours on constructing the corner ceiling and building the frame for the bench and the first part of the half wall. He spent 3 hours on vents and electrical for the pot lights.
We spent 3 hours finishing the half wall and making the sub floor repair. We spent 7 hours on electrical by the built in bench and the vanity lights.
That brings rough electrical to 10 hours and rough plumbing to 4 1/2 hours and construction to 9 hours. The original quote was 18 hours for electrical, 6 hours for plumbing and 10 hours for construction, so pretty close.
This completes phase 2 and 3. Next up is phase 5 - cabinets, which we are well underway with. Phase 4 was originally shower prep for hot mopping etc, but we are now going with a solid shower pan instead which does not require hot mopping. Instead all the cabinets need to be installed as the shower pan is being made by the counter top people. More about that next time.
Oh and the inspector just left. We passed!!!! Woohooo. On to the next thing....
Next: Master bath progress: Shortened built-in IKEA seating bench and cabinet tower

About Katja Kromann
I am a Danish American decorating life in Seattle. I love all things design and DIY.
I can’t think of anything more fun than coming up with project, making it, photographing it and sharing it with you on my websites.
Since 2018 I have been making Ceramics, nearly full time.
AHomeForCeramics.com AHomeForDesign.com AHomeForCrafts.com AHomeForFood.com My Portfolio
Categories
Master bath - plumbing, electrical and new construction is posted in the category How To | Master Suite


