Advent decoration - Shrinky Dinks & clay mushrooms
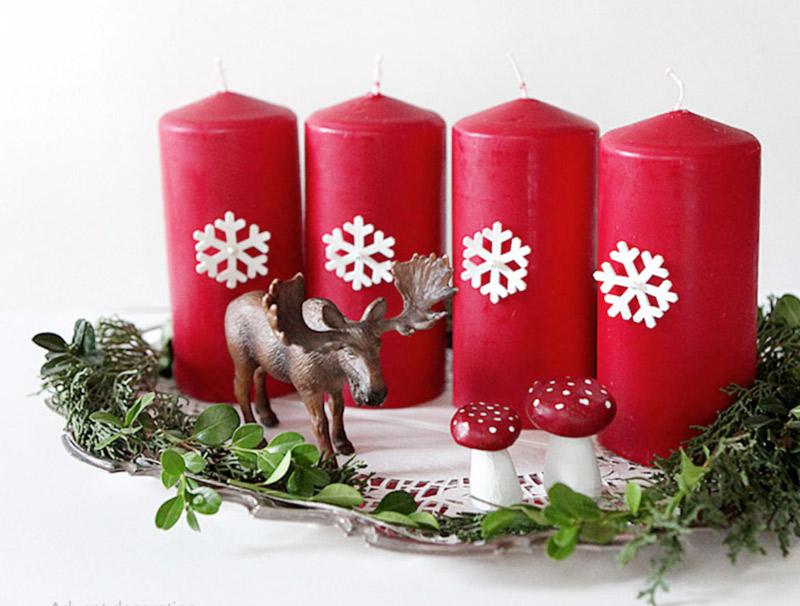
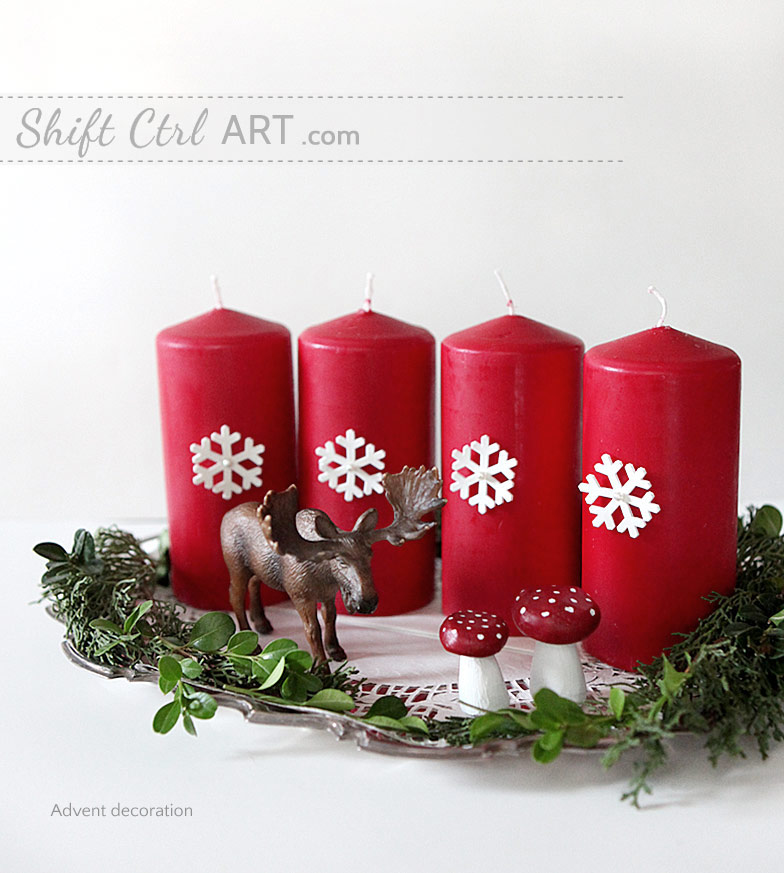
It's a Scandinavian tradition to make an advent wreath or decoration with four candles. You light one candle each Sunday up till Christmas, or if you are like me, you light all four and burn a fourth every Sunday, or, also like me, you forget to light it until Christmas eve.
I did two projects for this, first up is that snow flake on the candle. It's made with Shrinky Dink. Here is what I used:
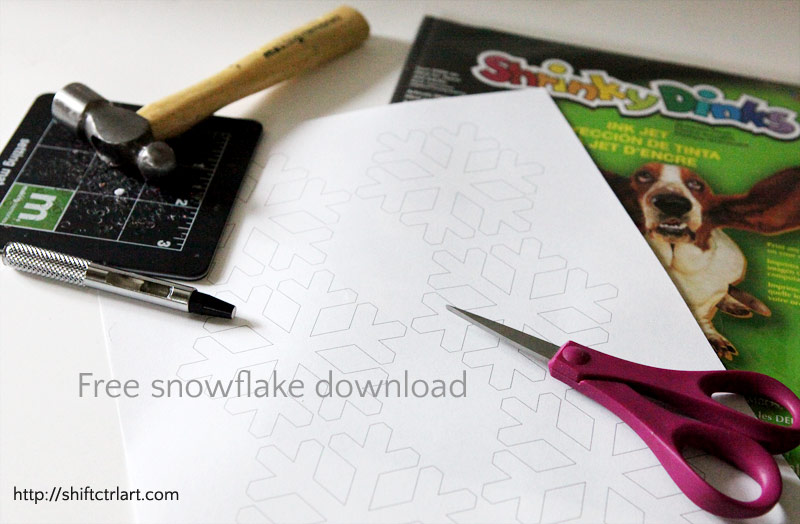
I used printable Shrinky Dinks and printed out a sheet of snow flakes. Here is a FREE download with 6 snowflakes, if you want to re-create it.
Remember to punch any holes before baking them. I used the largest eyelet hole punch from my Making Memories toolkit from my scrapbooking days.
I set the oven to 300F and baked them for 3 minutes when it was just two flakes in the oven. When I put more in at the same time, I had to add a bit more time. Just keep watching them. And know that the Shrinky Dink looks all weird in the middle of the process. That's ok.
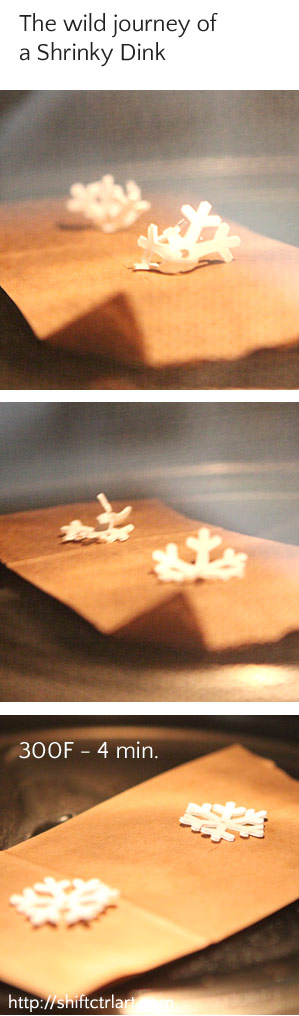
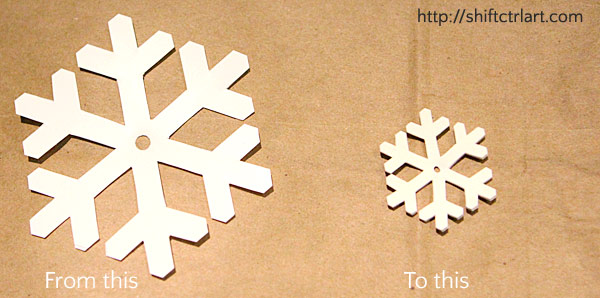
As you can see it flattens out in the end unless it gets hopelessly entangled or you are using too big of a piece. These snowflakes started out 4 inches and ended up around 1 1/4 inch, and 1/16th - 1/8th thickness.
I had one flake where one part did not want to lay down flat, so I used two knifes to flatten it down while it was still in the oven. It cools and hardens really quickly, but is HOT when just finished.
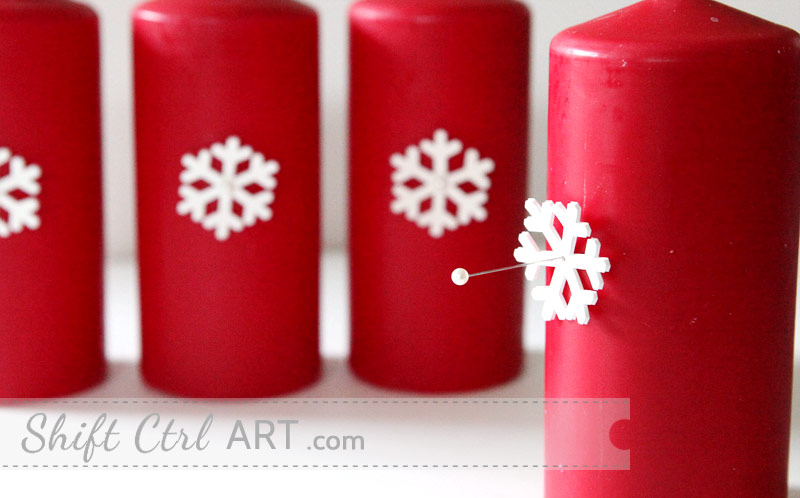
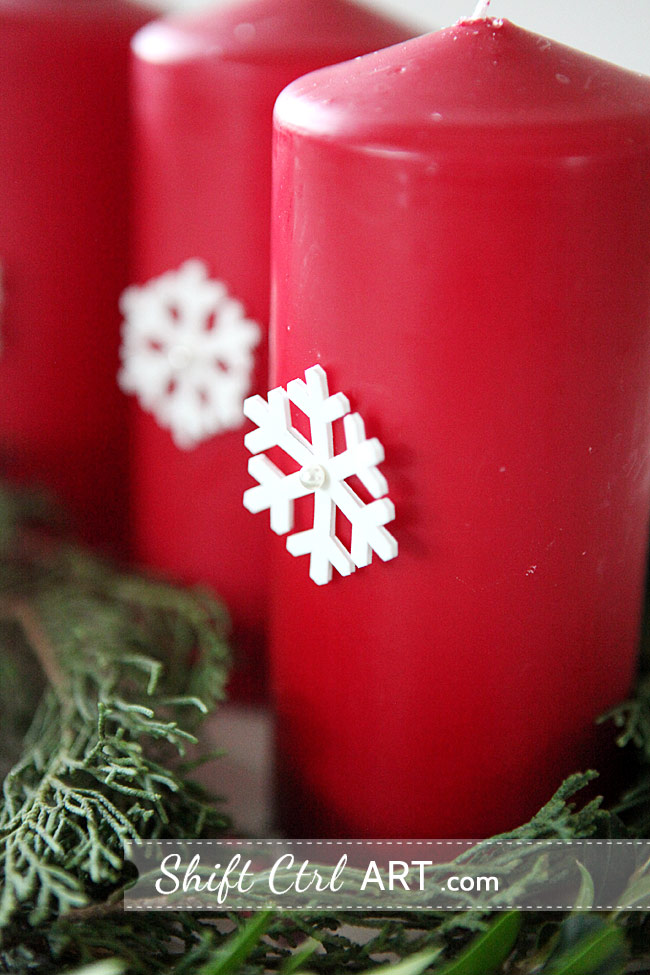
I attached the snowflakes with pearl pins. Just the regular kind from the notions department. They go in like butter.
Here you can see how thick the flake gets.

(Image by Julie)
Next up, the little mushrooms. I saw these a couple of days ago on a blog by a friend of mine, Julie. Her blog is called Danish Mum in Bayern. She has recipes and Christmas decorations on her blog as well. I was so inspired by the little mushrooms her son had made at school. She had used them in her advent wreath. I quickly asked her if I could replicate that project and she said yes.
So here are the supplies I got out.
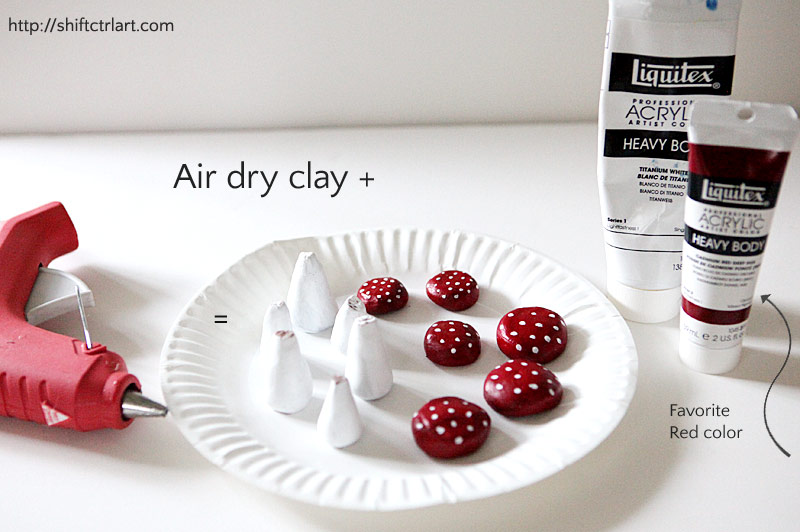
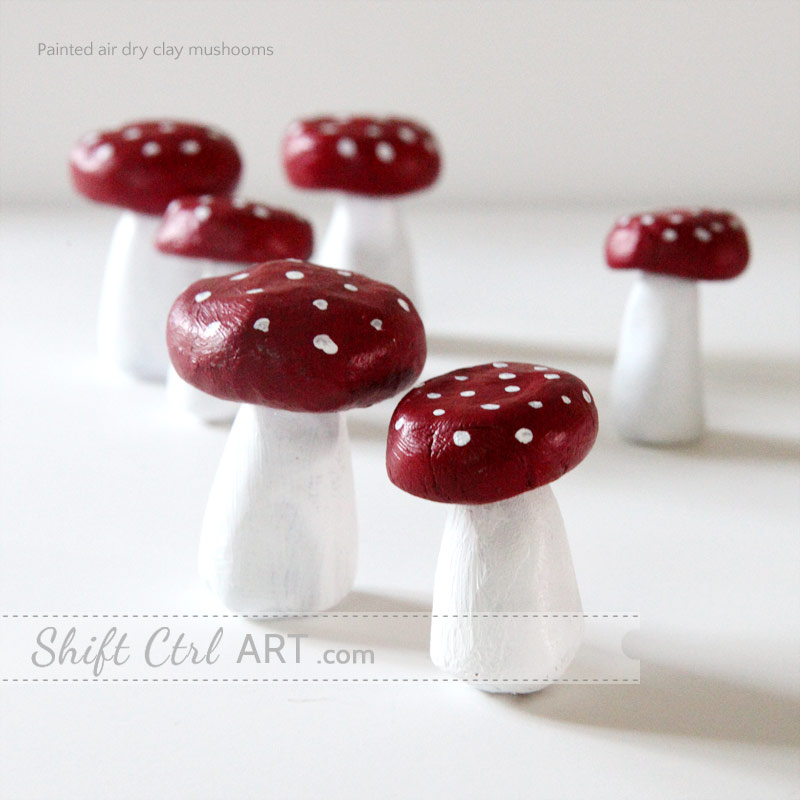
Air dry clay (pictured painted after baking), glue gun, paint. I already had the clay, so that is why I used that. If you need to buy supplies for making this, look into Fimo clay which is already colored and skip the step of painting them.
Here is how I made mine:
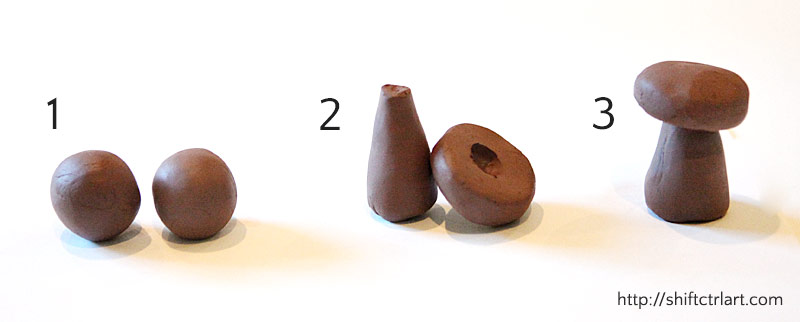
For each mushroom make two clay balls the same size. I made 6 mushrooms, 3 larger, 3 smaller. For the bigger ones I used 1 inch balls, for the smaller ones 3/4 inch balls.
Roll one into a cone. Make sure it has a significant surface to stand on. Flatten the other one for the cap. If you have ridges you can smooth them out with the back of your nail and even a tiny bit of water.
Scoop out a bit of clay from the inside middle of the caps. I baked mine separately and then hot glued them. In hindsight I recommend attaching them using water and smooshing
 , then baking them. Here is why:
- I thought they would be difficult to dry, but I baked them at 200F for 45 minutes and that worked like a charm.
- The hot glue does not stick very well to the clay.
- Most important: they need to be balanced to stand well, which is much easier to do while still pliable.
Here is what they looked like out of the oven.
And here they are glued and finished.
That Cadmium Deep Red Hue by Liquitex is my favorite red in the whole world. I used it to make this painting in 2006:
Now I had all my supplies to make my advent project.
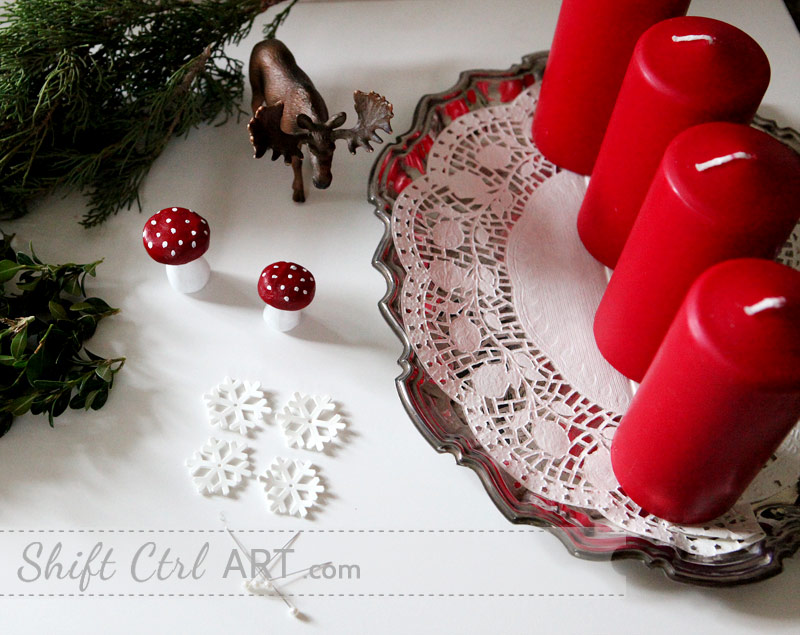
I got a bit of greenery from my yard. A vintage silver plated tray from my Mother-in-law (Thanks
 ), a moose from my son's basket of animals, and a paper doily. The candles are from IKEA.
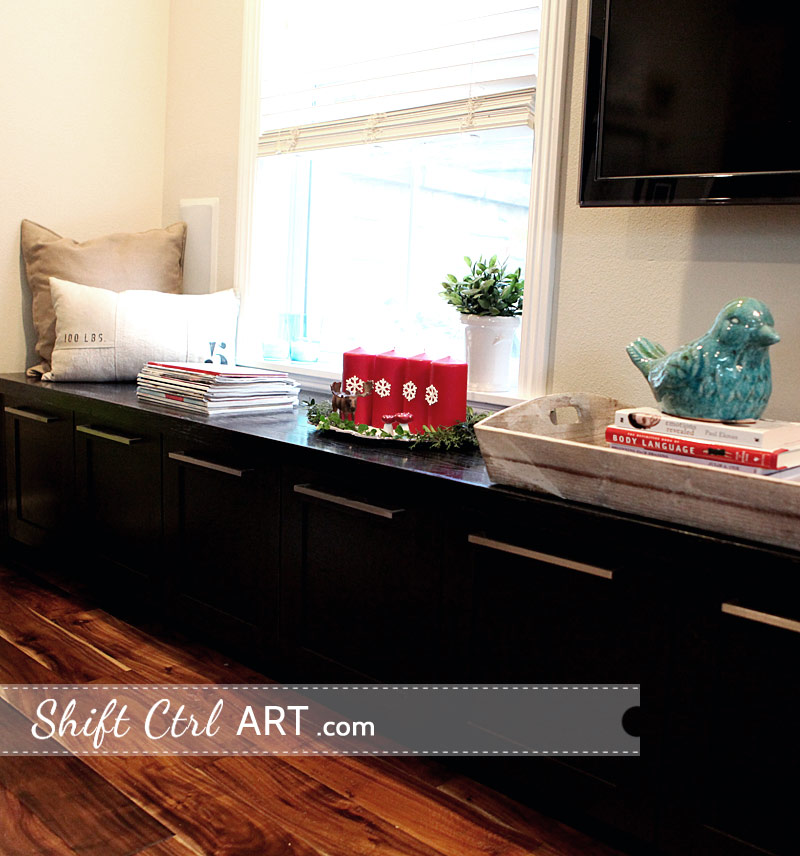
And there you have my advent decoration anno 2012. By the way, if you plan on burning these candles all the way down to the snowflakes, you should probably remove them at that point. Don't burn the candles down all the way without removing the greenery, the doily and anything else flamable. Also, please ready my disclaimer.

About Katja Kromann
I am a Danish American decorating life in Seattle. I love all things design and DIY.
I can’t think of anything more fun than coming up with project, making it, photographing it and sharing it with you on my websites.
Since 2018 I have been making Ceramics, nearly full time.
AHomeForCeramics.com AHomeForDesign.com AHomeForCrafts.com AHomeForFood.com My Portfolio