Our Patio progress: paint, sprinklers, flower bed, and new concrete - the progress
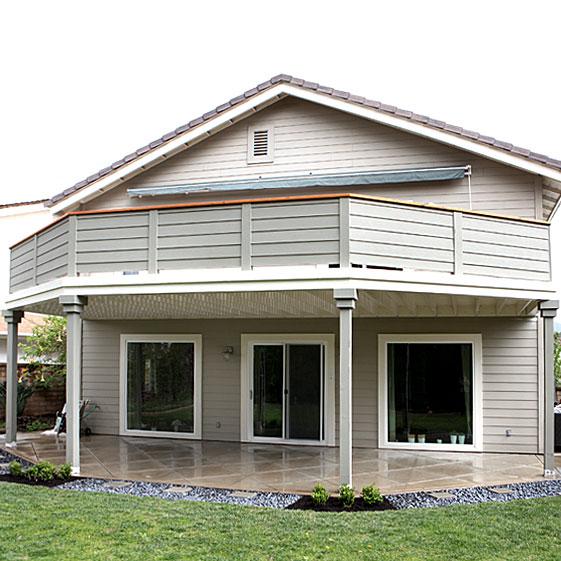
Ready for some progress pictures?
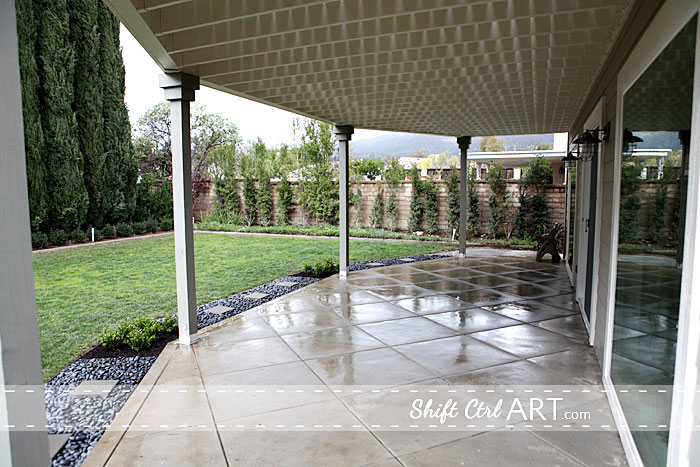
Yesterday I showed you all the work, today I am showing you the progress we have made on our biggest project this year - the Patio and deck remodel.
Ta-daa!
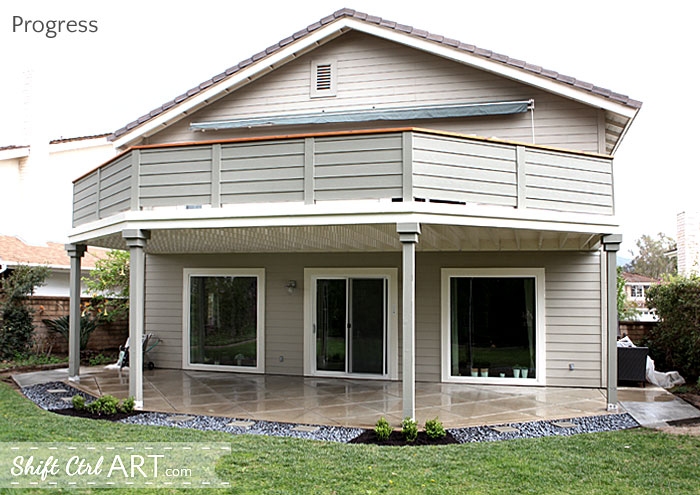
We started out having everything Power washed, then we had new hand rails put onto the guard rail on the deck, then we had new concrete poured to extend the paths, moved the sprinklers and added the pebble beds and Boxwoods.
Here is the before picture, so you can compare.
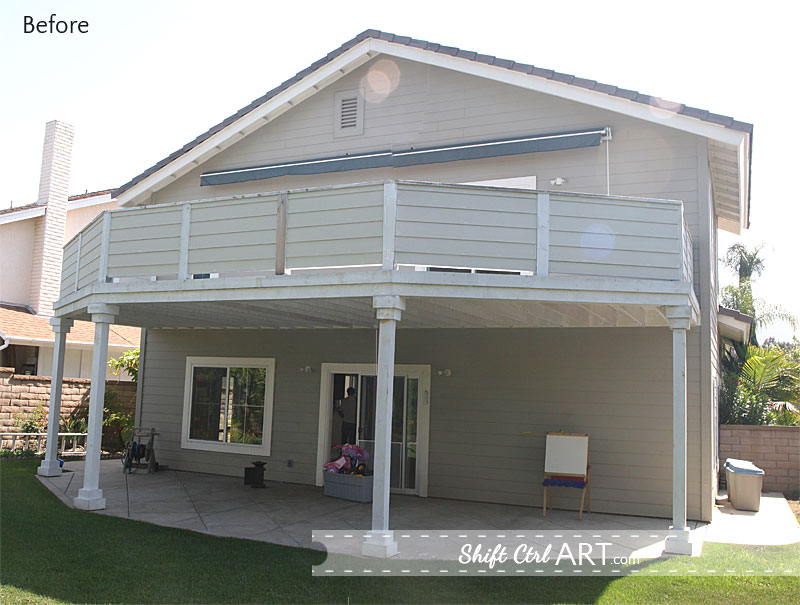
This picture is from when we looked at the house before buying it and before we had the big windows added to the living and dining room.
Looking at the house from this angle the dining room is on the left and the living room is on the right, behind the easel. No window from the living room to the back yard. Have you ever heard of such a thing? I am just SO happy that we were able to fix that.
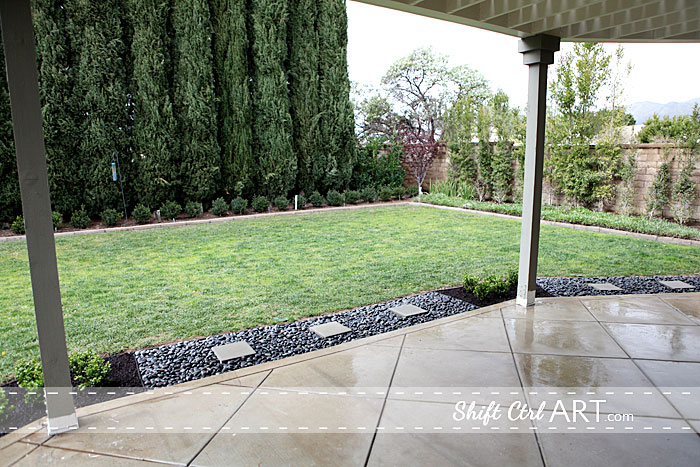
This is the view looking into the back yard. The huge cypresses were probably planted in 1984 around when the original house was built. We put in the row of Boxwoods a couple years ago to camouflage the big trunks and to add another layer. I added some of the hedge plantings and the rest was planted by our landscaper.
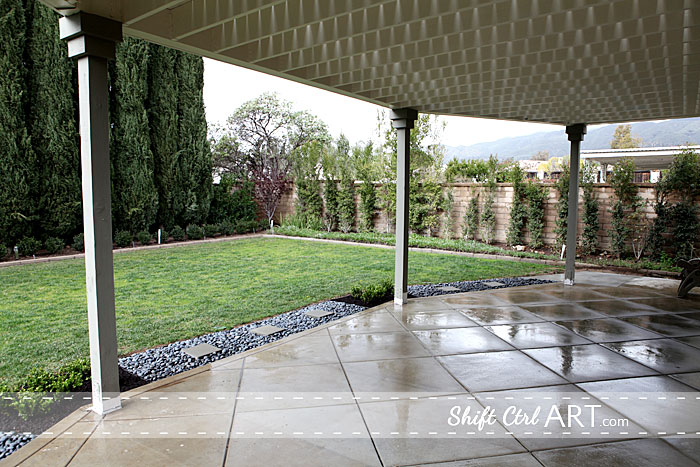
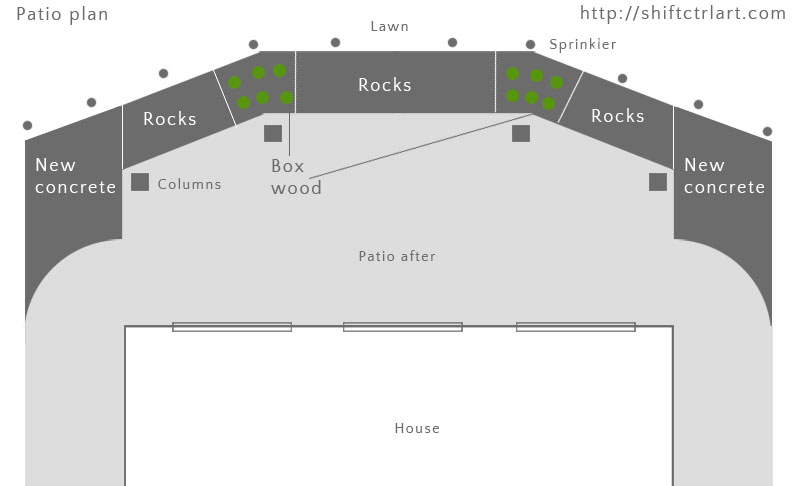
But back to the patio work. As you can see we still need to add trim to the feet of the columns. They will be made out of redwood which should last a bit longer than the fir that was on before and with the sprinklers being moved out, as you can see in the plan I drew up for the project here, it should last a whole lot longer. See the before plan here (scroll down)
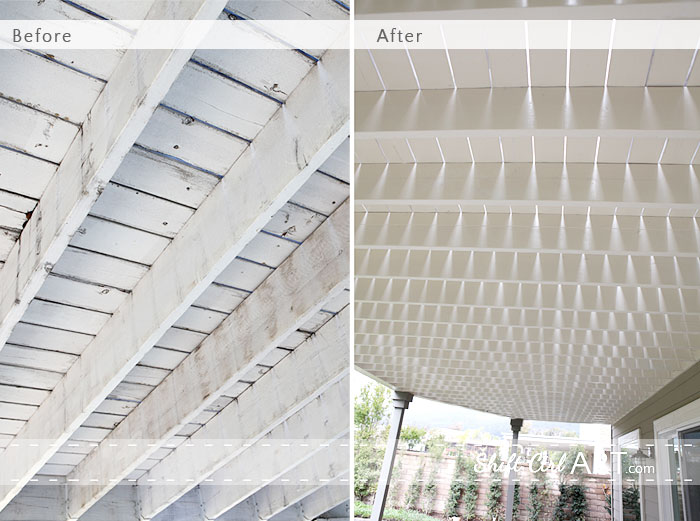
The ceiling was painted Dunn Edwards Antique China to match the rest of the trim of the house. Looks so much better than the primer that was nearly gone before.
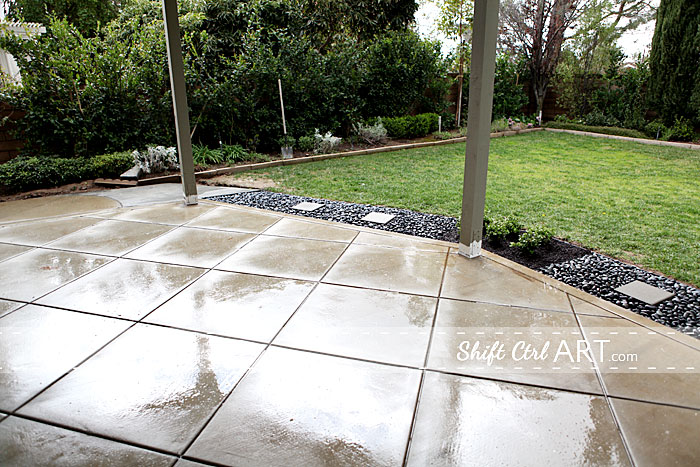
I planted all those wax leafed Ligustrum that you see over there, along the wall, and I added a few bushes in front. I love the layered look and I will continue to build on that as the spring and summer progress.
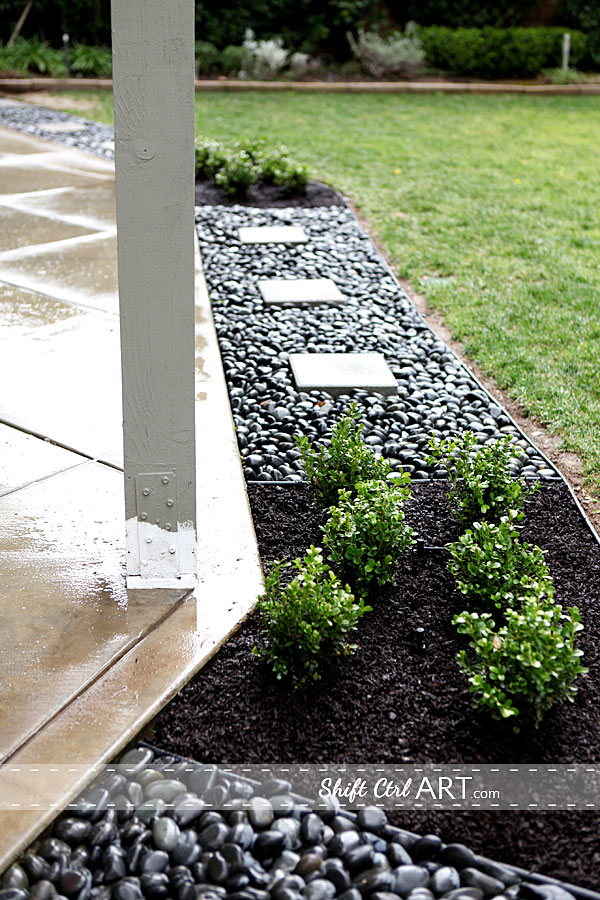
The pebbles we put in, I thought were called River rock, but after some research and going to both Lowe's and Home Depot and not finding them, I found out they are called Mexican Beach Pebbles. I found some at a local stone yard. We used about 11 bags at about 18 dollars each.
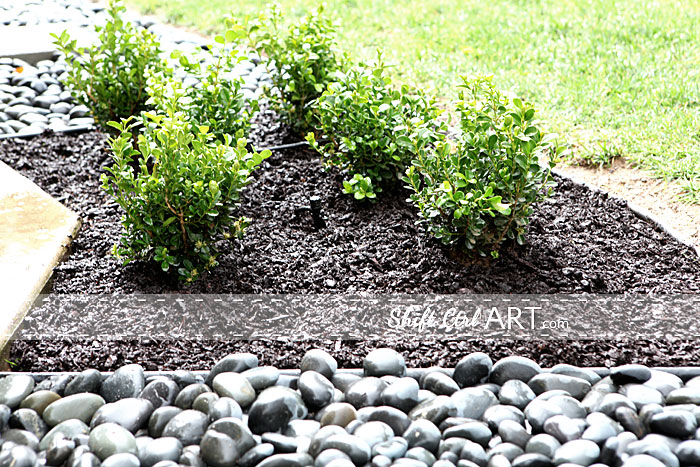
Here you can see the drip line that was put in, to water the Boxwoods.
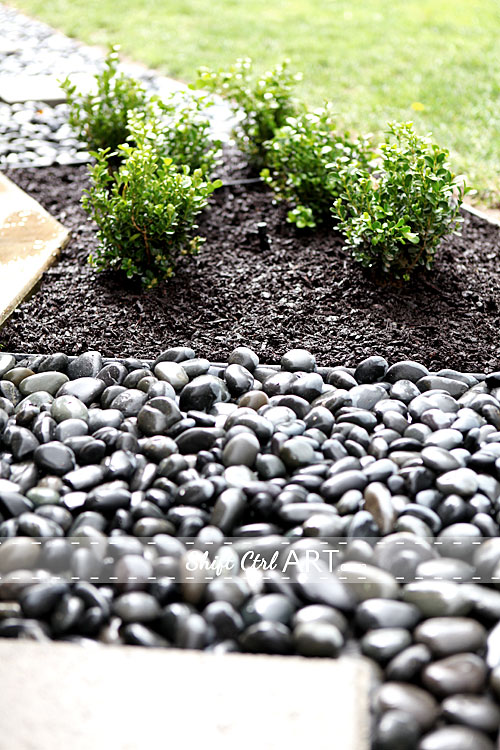
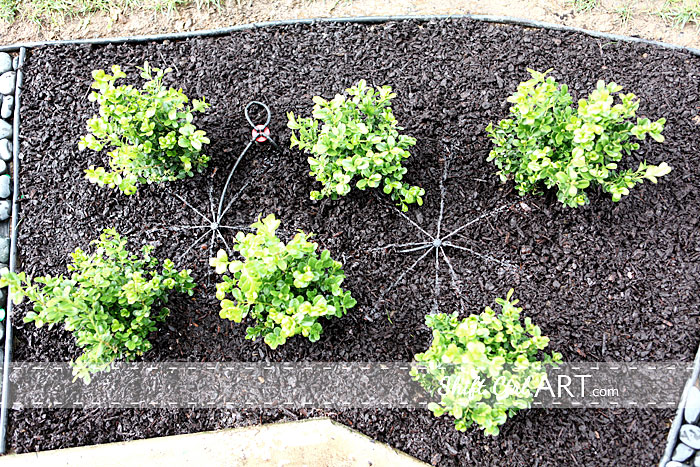
And here I turned them on so you can see the action. Looks like two little water spiders, right?
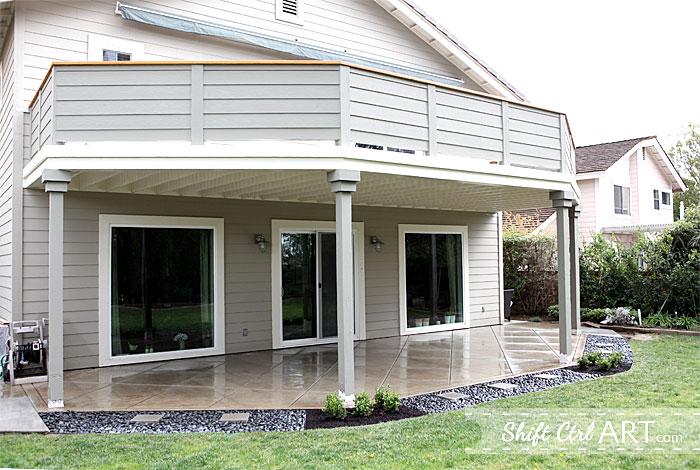
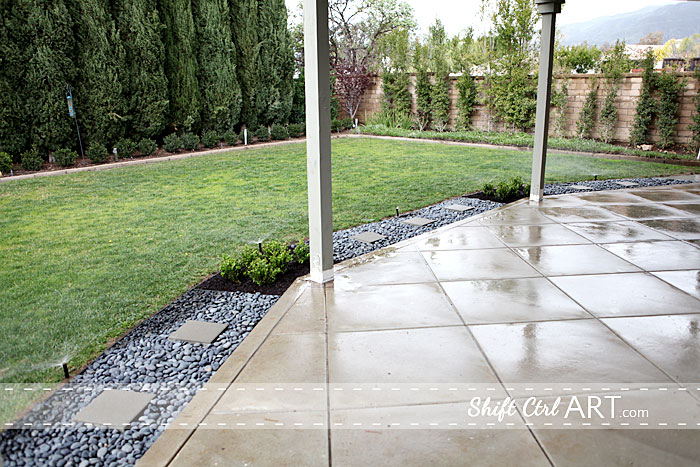
And the sprinklers in action. Some of the pebbles get wet, but the columns aren't anymore. Success!!
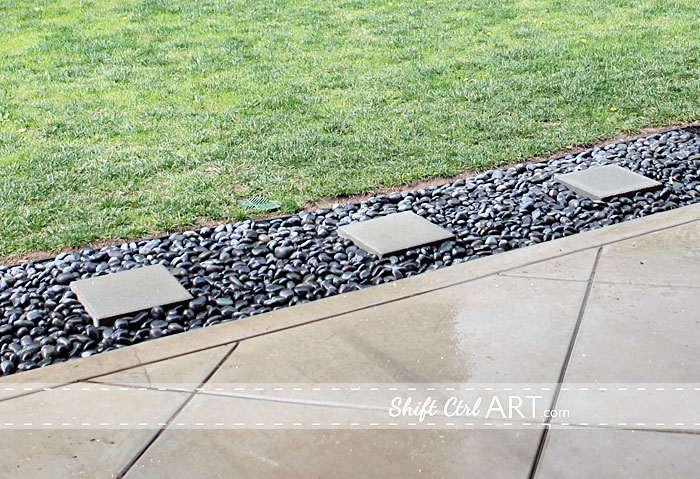
At the last minute we decided to add some pavers in the rock beds. One, because they would provide some means of stepping over the rocks and onto the grass, and two, they are much cheaper - at $1.07 a pop, than the rocks, three, it adds even more texture and one more tone of gray. We had some paver sand added under each of them so that they are stable when you thread on them.

Next for the this project is the trim on the columns and then we are beginning the last leg of the project which is adding plywood and a rubber concrete membrane to the deck, so that the deck becomes solid and we will be able to sit out in the rain on the patio without getting wet. Then after that - decorating!!! Can't wait.
So that was part of my weekend - mulching the beds on Saturday. On Sunday? Did I mention? Oh we just went SKIING!!! For the first time in 16 years (Dh and I went on our honeymoon). I am so sore right now. I will share some pictures later. It was FUN. We are all agreeing that it will definitely not be another 16 years before we go again. I can't believe we didn't go sooner. Living in Southern California definitely has its perks, one of them being able to go skiing only 1.5 hours away.
That was my weekend. How was your weekend? Did you work on the house or go some place? Have you ever gone skiing before?
Next: Our Patio progress: Columns make-over and a couple of bandits caught snooping
Share
Yesterday I showed you all the work, today I am showing you the progress we have made on our biggest project this year - the Patio and deck remodel.
Ta-daa!

We started out having everything Power washed, then we had new hand rails put onto the guard rail on the deck, then we had new concrete poured to extend the paths, moved the sprinklers and added the pebble beds and Boxwoods.
Here is the before picture, so you can compare.

This picture is from when we looked at the house before buying it and before we had the big windows added to the living and dining room.
Looking at the house from this angle the dining room is on the left and the living room is on the right, behind the easel. No window from the living room to the back yard. Have you ever heard of such a thing? I am just SO happy that we were able to fix that.

This is the view looking into the back yard. The huge cypresses were probably planted in 1984 around when the original house was built. We put in the row of Boxwoods a couple years ago to camouflage the big trunks and to add another layer. I added some of the hedge plantings and the rest was planted by our landscaper.

But back to the patio work. As you can see we still need to add trim to the feet of the columns. They will be made out of redwood which should last a bit longer than the fir that was on before and with the sprinklers being moved out, as you can see in the plan I drew up for the project here, it should last a whole lot longer. See the before plan here (scroll down)


The ceiling was painted Dunn Edwards Antique China to match the rest of the trim of the house. Looks so much better than the primer that was nearly gone before.

I planted all those wax leafed Ligustrum that you see over there, along the wall, and I added a few bushes in front. I love the layered look and I will continue to build on that as the spring and summer progress.

The pebbles we put in, I thought were called River rock, but after some research and going to both Lowe's and Home Depot and not finding them, I found out they are called Mexican Beach Pebbles. I found some at a local stone yard. We used about 11 bags at about 18 dollars each.

Here you can see the drip line that was put in, to water the Boxwoods.


And here I turned them on so you can see the action. Looks like two little water spiders, right?


And the sprinklers in action. Some of the pebbles get wet, but the columns aren't anymore. Success!!

At the last minute we decided to add some pavers in the rock beds. One, because they would provide some means of stepping over the rocks and onto the grass, and two, they are much cheaper - at $1.07 a pop, than the rocks, three, it adds even more texture and one more tone of gray.

Next for the this project is the trim on the columns and then we are beginning the last leg of the project which is adding plywood and a rubber concrete membrane to the deck, so that the deck becomes solid and we will be able to sit out in the rain on the patio without getting wet. Then after that - decorating!!! Can't wait.
So that was part of my weekend - mulching the beds on Saturday. On Sunday? Did I mention? Oh we just went SKIING!!! For the first time in 16 years (Dh and I went on our honeymoon). I am so sore right now. I will share some pictures later. It was FUN. We are all agreeing that it will definitely not be another 16 years before we go again. I can't believe we didn't go sooner. Living in Southern California definitely has its perks, one of them being able to go skiing only 1.5 hours away.
That was my weekend. How was your weekend? Did you work on the house or go some place? Have you ever gone skiing before?
Next: Our Patio progress: Columns make-over and a couple of bandits caught snooping

About Katja Kromann
I am a Danish American decorating life in Seattle. I love all things design and DIY.
I can’t think of anything more fun than coming up with project, making it, photographing it and sharing it with you on my websites.
Since 2018 I have been making Ceramics, nearly full time.
AHomeForCeramics.com AHomeForDesign.com AHomeForCrafts.com AHomeForFood.com My Portfolio
Categories
Our Patio progress: paint, sprinklers, flower bed, and new concrete - the progress is posted in the category Before & After | Outdoor Living
