Master walk-in closet make-over and how to fix a too small round hole in drywall
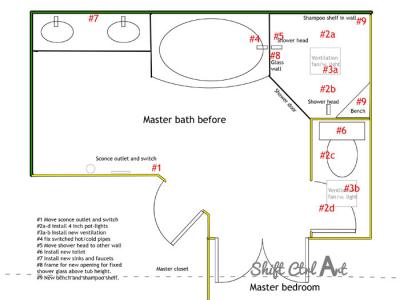
Last weekend we finished the cabinetry work and the counter top guy came and measured for our new shower pan on Sunday, so now we wait while it is being made. It should take a couple of weeks.
In the meantime we have been working on the master closet as this is also getting a bit of a makeover during our master suite remodel.
A couple of weeks ago our handyman came in to help us re-locate our access to the attic in our walk-in closet.
But first let's back up to what our walk-in closet looked like in 2009 when we first moved in:
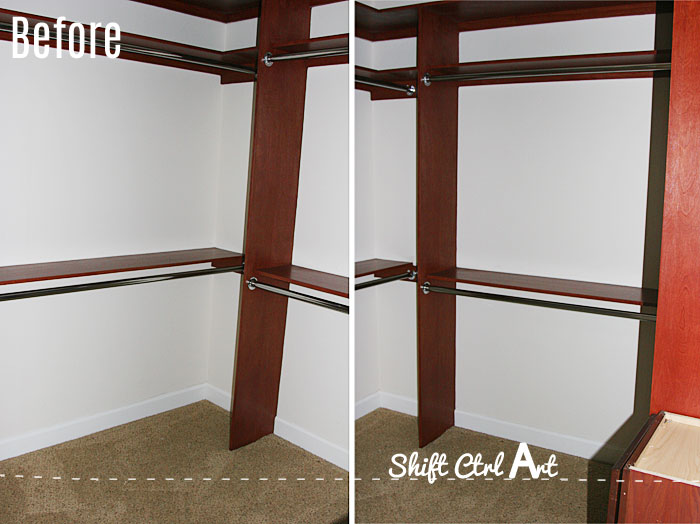
Not at all bad. Two things stand out to me: The wood is very red-looking which isn't my favorite. There is a complete lack of drawers and shelves except for the shelves under the hanging spaces.
My underwear looks ridiculous on a hanger, so that is something we want to address. By installing some drawers. Other than that this room is really nice. It is 8x8 ft with one of the corners cut off where the door is.
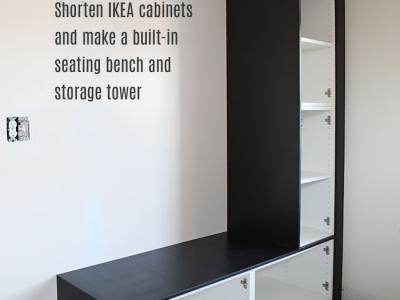
The master closet is accessed from the bathroom. In the below picture is where we just put that built-in seating bench and tower and on the left there, you see a door, which goes into the closet.
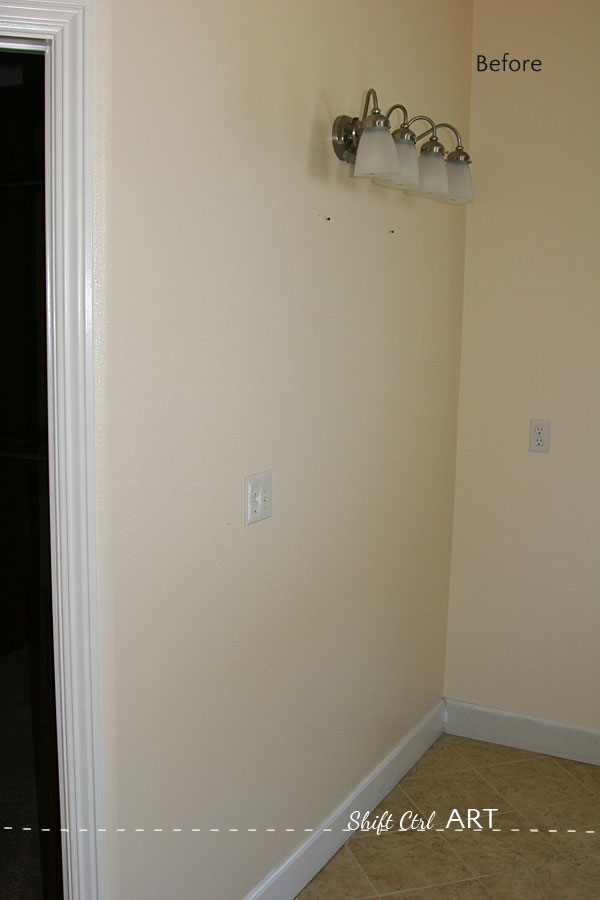
In the original before picture I didn't get a good picture of the ceiling, so here is that part, just before work begins.
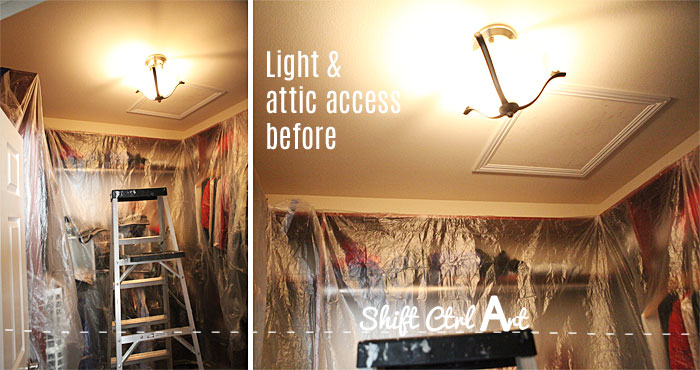
I really wanted four recessed can lights in here - one in each corner. The problem? Oh a little attic access door right where one pot-light would go. So I asked our handyman how difficult it would be to move thatsucker access. A couple of hours. Great! Let's do it.
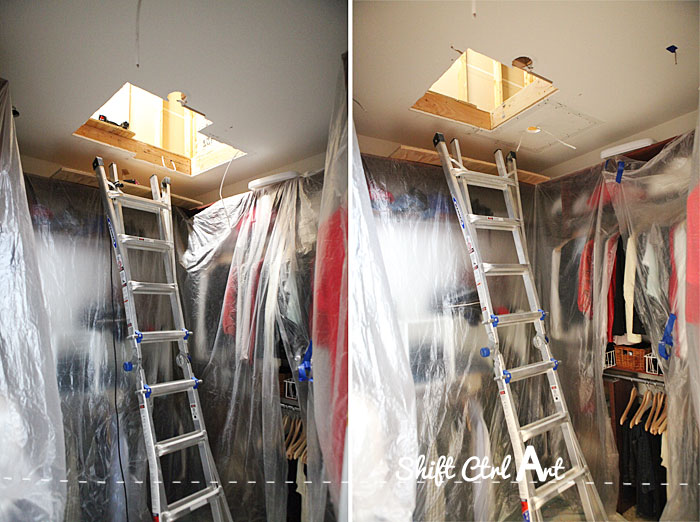
Here you can see he has cut the new opening on the left and on the right, he has made the new framing for it and put some drywall over the old hole and drilled for the pot light.
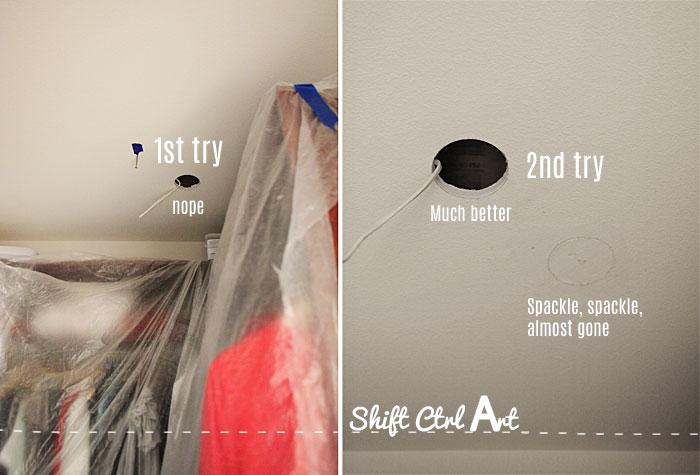
Oh and about the pot lights. Don't get the fancy idea that you can place those over the phone... Because when you get back home, you immediately discover that that placement is just plain wrong and you now just won some more drywall repair and texturing. Yay! Not.
But at least it looks so much better in the right spot.
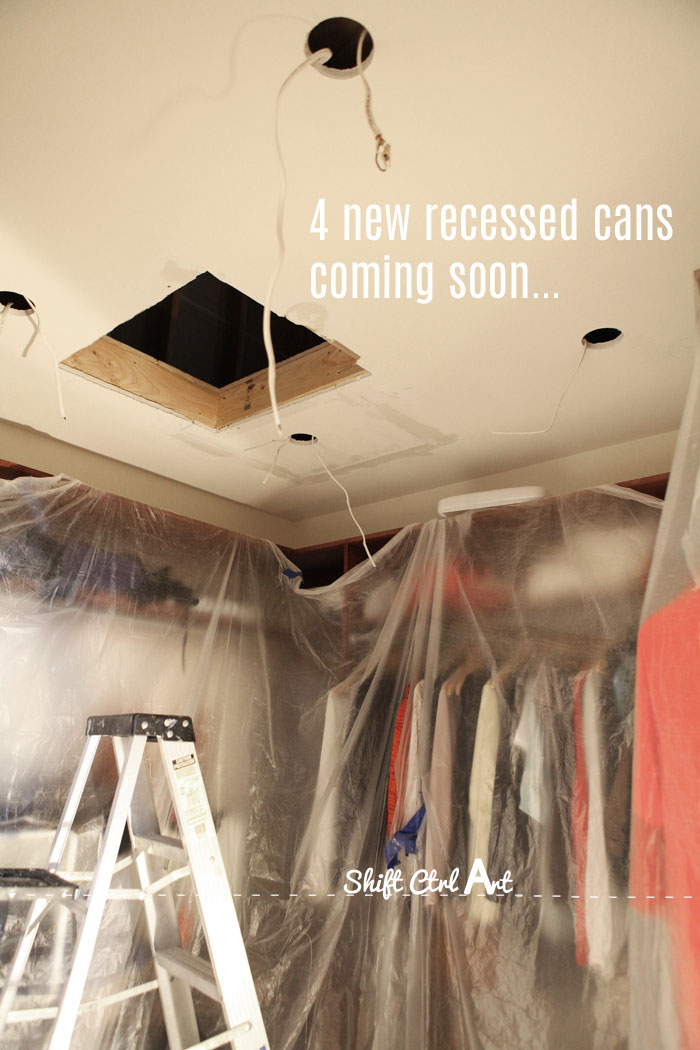
Here I have a coat of mud on the ceiling. It's beginning to look better.
Next, Dh built a new frame for the opening.
But oh wait... I am skipping over the whole part where we bought an attic ladder for 97 bucks which had the smallest opening allowance, only to find that it didn't fold up enough to fit up in the small attic space. Then we had a worthwhile discussion of the possibility of getting a 250 dollar ladder instead that would fit. I have to say I vetoed that right quick. I am not getting a 250 dollar ladder for a small 8x8 attic that we have used with the frequency of oh let me count... oh yeah: Never! $97 I was barely OK with. So now we are just sticking with a really nice upgraded flat stock trim around the attic access.
I am so fine with that.
Here Dh is putting it together.
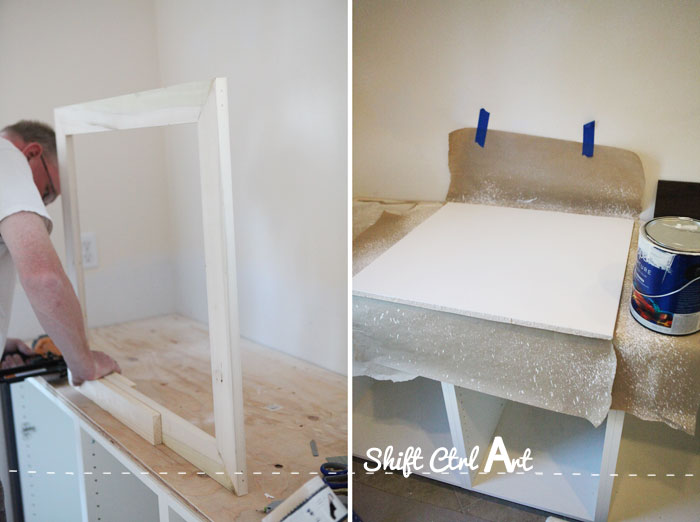
Dh is fashioning the frame out of 1x3 that I picked up at Lowe's. Then he cut a fresh piece of drywall for the openng, which I textured and painted last night (on the right).
Ok, so you think we are near the end... But last Wednesday this fun thing happened when Dh went to install the can lights. Just so you know that it is all not smooth sailing around here. Full disclosure and all that.
I had taken B to his Biology and 3d animation classes, when Dh called. Here is the convo, pretty much.
Dh: "The holes for the pot-lights are too small! I went to put in the first light and it got stuck and when I took it out again, I ripped the drywall."
That would the the drywall that I just spent hours mudding and sanding and mudding and sanding and mudding and sanding, then texturing and priming and painting.
That drywall.
Me: "What? That can't be. I discussed with the handyman that they should be 4 1/4 inches. The cans have a sticker and it says the hole should be 4 1/4. Are you in the closet or in the toiliet room?"
I don't often ask my husband if he is in the closet by the way.
Dh: "In the closet". (Only in relationship to this project)
Me:"Could you measure the opening?"
DH: "It's 4 inches".
At this point I am frantically trying to figure out how a 4 1/4 inch hole saw which I saw that our handyman had brought can drill a 4 inch hole...
Me: "Can you check the ones in the toilet room?"
Dh: "They are 4 1/4".
Me: "Oh (realizing what happened)...The holes in the closet were drilled again a couple days later because we moved them, apparently, he picked a smaller hole saw the second time. How bad is the damage?"
Dh: "It needs to be re-mudded"
Me:censored
In addition to the drywall repair, we were now faced with problem of having to install 4 1/4 inch cans into 4 inch holes. This presents a real problem because a hole saw has a guide drill in the middle that keeps the cup of the saw from running off. With a big hole already cut, there is nothing to hold the guide drill. What to do, what to do.
Did we have to cut out squares around each hole, fill in with a whole piece of drywall, then re-drill with the right size? That sounded like an awful lot of work and way too much mudding and sanding to me. Dh floated the idea to cut the holes bigger with a knife. I didn't like that because it's just not fun to spend a lot of time doing a professional looking job just to have the last step look like you had no clue what you were doing the whole time.
Then Dh had the most brilliant idea ever. Here is what he made:
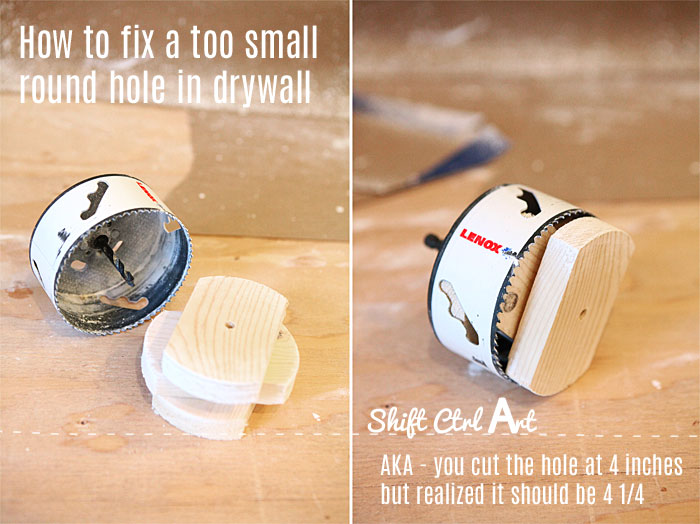
On the left you see a regular old hole saw, on the right he has filled the cavity with wooden circles that he cut with our 4 1/4 inch hole saw. Cutting drywall with that size gives you a hole of 4 1/4, but of course the cut-out is smaller and fits right inside the hole saw thereby giving you a way to guide the drill into the 4 inch holes. He then went on to fix the 4 holes in the ceiling like it was no big deal. And stuff.
Then there was just the damage to worry about on that one hole, which I then mudded and sanded and mudded and sanded and mudded and sanded and textured and primed and painted. Hmpf.
As much as I enjoy the satisfaction of seeing this project coming together, there is nothing I loathe more than having to re-do something I already did. It's pretty much one of my least favorite thing to do, so I was happy that it didn't turn out to be a marathon fix thanks to my husband's brilliant idea
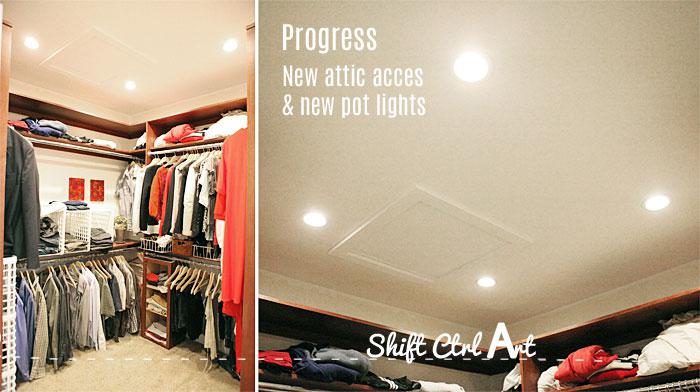
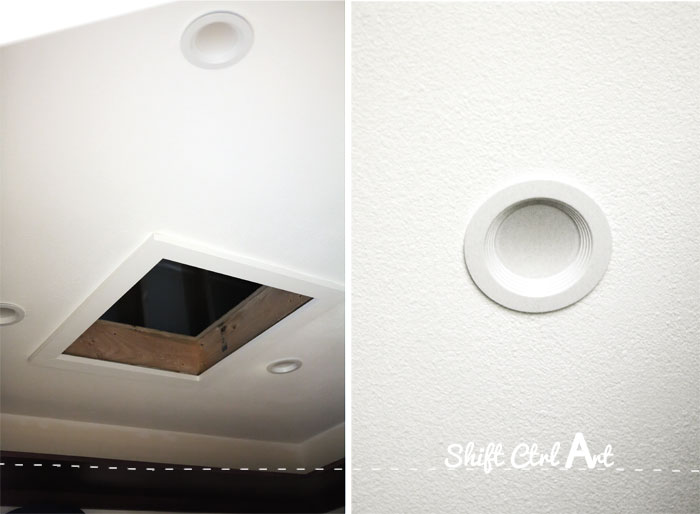
So let us look at what the ceiling looked like before one more time:

And here it is now:
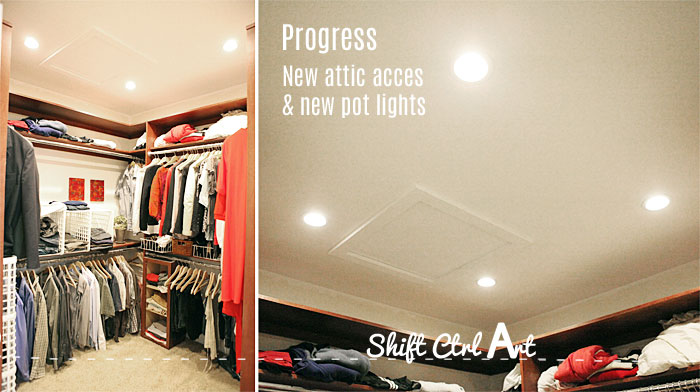
Here are the rest of the plans for this room
Draw plans for adding shelving and drawers
Install shelving
Spray paint all shelves
Paint the walls
Install hardwood floor
Install drawer units (on top of the floors)
Make a hair dryer station
We are planning on installing the shelves this weekend, then possibly painting them next weekend or the weekend after. After that, this room will take a break while we finish the bathroom. Then, after we install the hardwood floors in the bedroom, we will install floors in here and then we can finish this project with the built-in drawers.
Next: Master bath pan installation and 9 rectangular sink options
Share
In the meantime we have been working on the master closet as this is also getting a bit of a makeover during our master suite remodel.
A couple of weeks ago our handyman came in to help us re-locate our access to the attic in our walk-in closet.
But first let's back up to what our walk-in closet looked like in 2009 when we first moved in:

Not at all bad. Two things stand out to me: The wood is very red-looking which isn't my favorite. There is a complete lack of drawers and shelves except for the shelves under the hanging spaces.
My underwear looks ridiculous on a hanger, so that is something we want to address. By installing some drawers. Other than that this room is really nice. It is 8x8 ft with one of the corners cut off where the door is.
The master closet is accessed from the bathroom. In the below picture is where we just put that built-in seating bench and tower and on the left there, you see a door, which goes into the closet.

In the original before picture I didn't get a good picture of the ceiling, so here is that part, just before work begins.

I really wanted four recessed can lights in here - one in each corner. The problem? Oh a little attic access door right where one pot-light would go. So I asked our handyman how difficult it would be to move that

Here you can see he has cut the new opening on the left and on the right, he has made the new framing for it and put some drywall over the old hole and drilled for the pot light.

Oh and about the pot lights. Don't get the fancy idea that you can place those over the phone... Because when you get back home, you immediately discover that that placement is just plain wrong and you now just won some more drywall repair and texturing. Yay! Not.
But at least it looks so much better in the right spot.

Here I have a coat of mud on the ceiling. It's beginning to look better.
Next, Dh built a new frame for the opening.
But oh wait... I am skipping over the whole part where we bought an attic ladder for 97 bucks which had the smallest opening allowance, only to find that it didn't fold up enough to fit up in the small attic space. Then we had a worthwhile discussion of the possibility of getting a 250 dollar ladder instead that would fit. I have to say I vetoed that right quick. I am not getting a 250 dollar ladder for a small 8x8 attic that we have used with the frequency of oh let me count... oh yeah: Never! $97 I was barely OK with. So now we are just sticking with a really nice upgraded flat stock trim around the attic access.
I am so fine with that.
Here Dh is putting it together.

Dh is fashioning the frame out of 1x3 that I picked up at Lowe's. Then he cut a fresh piece of drywall for the openng, which I textured and painted last night (on the right).

Ok, so you think we are near the end... But last Wednesday this fun thing happened when Dh went to install the can lights. Just so you know that it is all not smooth sailing around here. Full disclosure and all that.
I had taken B to his Biology and 3d animation classes, when Dh called. Here is the convo, pretty much.
Dh: "The holes for the pot-lights are too small! I went to put in the first light and it got stuck and when I took it out again, I ripped the drywall."
That would the the drywall that I just spent hours mudding and sanding and mudding and sanding and mudding and sanding, then texturing and priming and painting.
That drywall.
Me: "What? That can't be. I discussed with the handyman that they should be 4 1/4 inches. The cans have a sticker and it says the hole should be 4 1/4. Are you in the closet or in the toiliet room?"
I don't often ask my husband if he is in the closet by the way.
Dh: "In the closet". (Only in relationship to this project)
Me:"Could you measure the opening?"
DH: "It's 4 inches".
At this point I am frantically trying to figure out how a 4 1/4 inch hole saw which I saw that our handyman had brought can drill a 4 inch hole...
Me: "Can you check the ones in the toilet room?"
Dh: "They are 4 1/4".
Me: "Oh (realizing what happened)...The holes in the closet were drilled again a couple days later because we moved them, apparently, he picked a smaller hole saw the second time. How bad is the damage?"
Dh: "It needs to be re-mudded"
Me:
In addition to the drywall repair, we were now faced with problem of having to install 4 1/4 inch cans into 4 inch holes. This presents a real problem because a hole saw has a guide drill in the middle that keeps the cup of the saw from running off. With a big hole already cut, there is nothing to hold the guide drill. What to do, what to do.
Did we have to cut out squares around each hole, fill in with a whole piece of drywall, then re-drill with the right size? That sounded like an awful lot of work and way too much mudding and sanding to me. Dh floated the idea to cut the holes bigger with a knife. I didn't like that because it's just not fun to spend a lot of time doing a professional looking job just to have the last step look like you had no clue what you were doing the whole time.
Then Dh had the most brilliant idea ever. Here is what he made:

On the left you see a regular old hole saw, on the right he has filled the cavity with wooden circles that he cut with our 4 1/4 inch hole saw. Cutting drywall with that size gives you a hole of 4 1/4, but of course the cut-out is smaller and fits right inside the hole saw thereby giving you a way to guide the drill into the 4 inch holes. He then went on to fix the 4 holes in the ceiling like it was no big deal. And stuff.
Then there was just the damage to worry about on that one hole, which I then mudded and sanded and mudded and sanded and mudded and sanded and textured and primed and painted. Hmpf.
As much as I enjoy the satisfaction of seeing this project coming together, there is nothing I loathe more than having to re-do something I already did. It's pretty much one of my least favorite thing to do, so I was happy that it didn't turn out to be a marathon fix thanks to my husband's brilliant idea
So let us look at what the ceiling looked like before one more time:

And here it is now:

Here are the rest of the plans for this room
Draw plans for adding shelving and drawers
Install shelving
Spray paint all shelves
Paint the walls
Install hardwood floor
Install drawer units (on top of the floors)
Make a hair dryer station
We are planning on installing the shelves this weekend, then possibly painting them next weekend or the weekend after. After that, this room will take a break while we finish the bathroom. Then, after we install the hardwood floors in the bedroom, we will install floors in here and then we can finish this project with the built-in drawers.
Next: Master bath pan installation and 9 rectangular sink options

About Katja Kromann
I am a Danish American decorating life in Seattle. I love all things design and DIY.
I can’t think of anything more fun than coming up with project, making it, photographing it and sharing it with you on my websites.
Since 2018 I have been making Ceramics, nearly full time.
AHomeForCeramics.com AHomeForDesign.com AHomeForCrafts.com AHomeForFood.com My Portfolio
Categories
Master walk-in closet make-over and how to fix a too small round hole in drywall is posted in the category Master Suite
