Master bath - tile installation
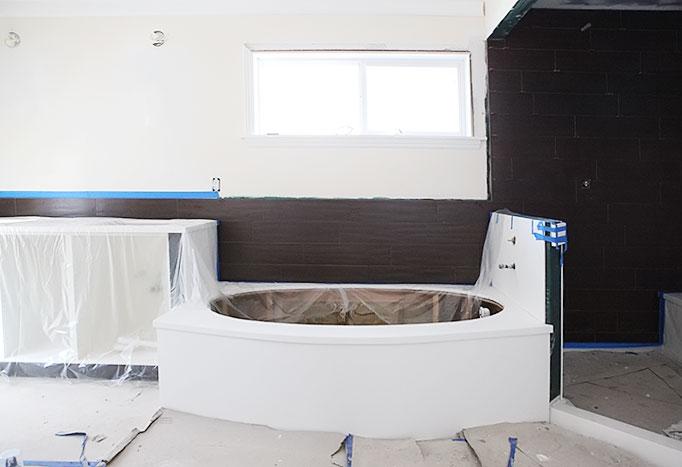
The day after the flooring guys had installed new flooring in our master bedroom, walk-in closet and hallway, the tilers came and put up tile on the back wall in the master bathroom.
I had been agonizing over finding the right tile. You see, this tile had to pull off a couple of big jobs.
First, It had to go with the new bedroom floor, as you will see both of them at the same time, so hue was of vital importance. Vital, I tell you.
Secondly, It had to fight in a competition with the tile flooring in the bathroom (the flooring that we chose to keep and work around), squash it, and come out the non disputed winner making the audience go: "what tile floor? I didn't really notice it". Certainly a tall order.
This is what the bathroom looked like before - take in all that tile, will you:
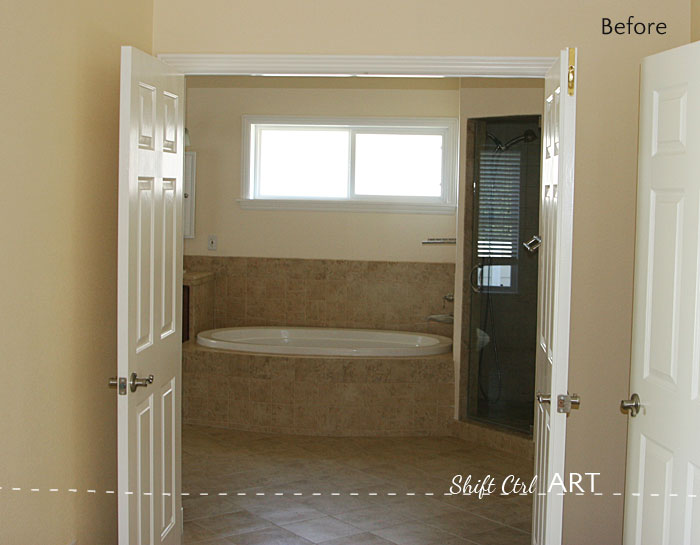
So the plan was to get rid of a lot of all that yellow/tan tile and add a lot of white to the space to brighten it up and make it feel more modern. If we only added white however, the floor would sort of end up as the focal point. The opposite of what I wanted.
So I needed something that would be a third surface without making you go: Wow this bathroom has THREE different tile jobs. Instead it needed to look planned and that third surface needed to be an attention grabber, but in a calming way so as to not play into the floor, but rather just drown it out.
That is one reason we went with solid slabs of white cultured marble for the three walls in the shower. It didn't feel like a tiled surface - because it's not - and it was comparable in price to tiling.
Then for the new focal point - away from the floor - enter these three tile.

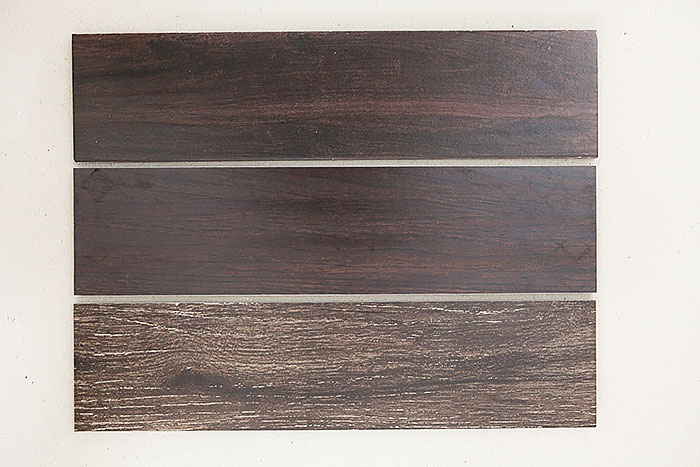
Number 1 is a tile from Lowe's at 2.39 per sq ft. Number 2 is an Emser Heritage Walnut tile at $2.99 per sq. ft. Number 3 is another 2.39 tile from Lowe's.
Number 1 was in the running for the longest time. It was readily available at Lowe's and the price was certainly right. Only problem, it didn't go very well with the hue of the floor. It was much more purple. More so than the picture will have you believe.
Number 3 was a different tile, where I loved the hue and the overall tile looked much prettier, but I ended up nixing it because it had too much pattern. It would make the wall look too busy and that would play into the floor instead of shushing it. If I were to tile a floor and didn't have to worry about matching up with another wood, I would choose this one because it would hide dirt very well.
So after 12 tile store visits, one of which ended up closing in the middle of it all causing further delays in our process, and countless hours of online searches, I found tile number 2. It had the right hue to play into the master bedroom flooring and it was a calm dark nice brown with a little bit of interest in that it looked like hand scraped wood.
I found a great tiler - again through Angie's list - Eric Duff tile and stone. He did a spectacular job. Our wall wasn't exactly straight, but he certainly made it look that way. He is the third person I have had tiling for us in this house and he has been blowing the other ones away by a mile.
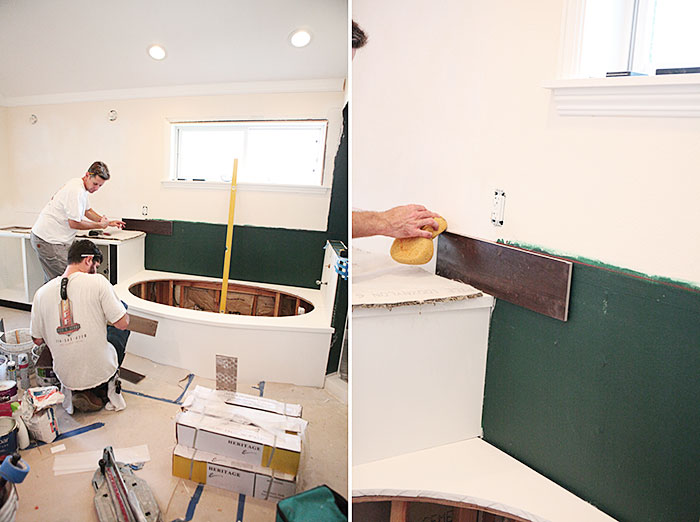
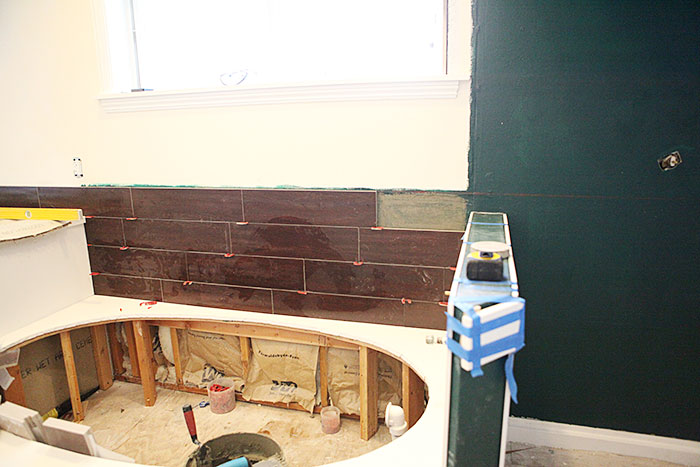
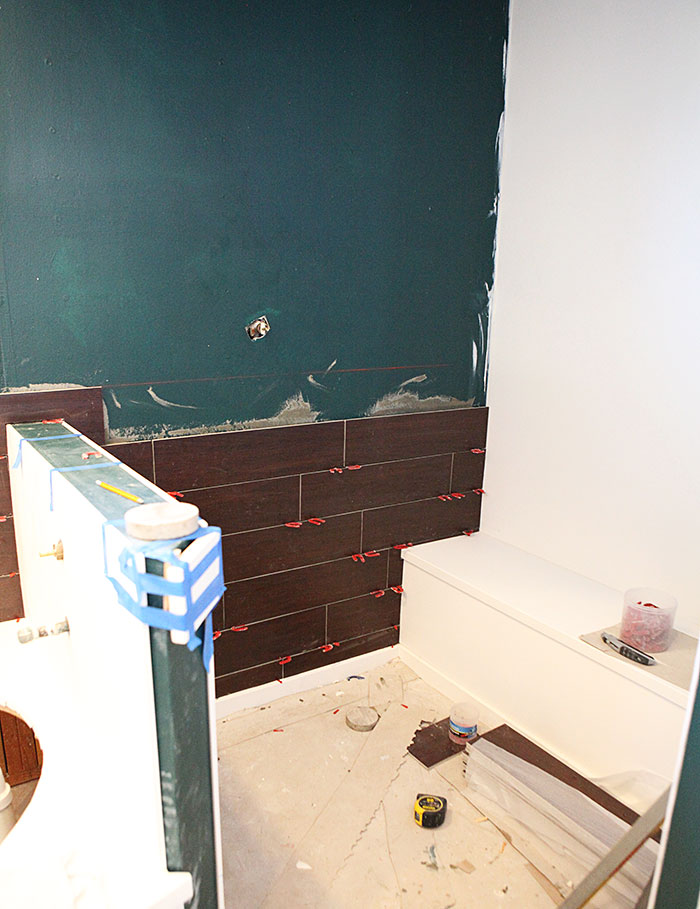
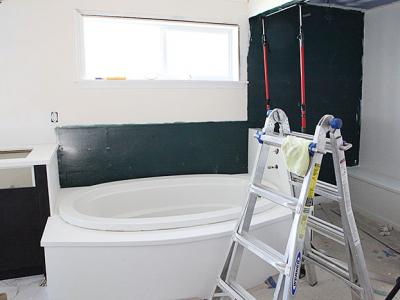
Here is what our bathroom looks like currently.
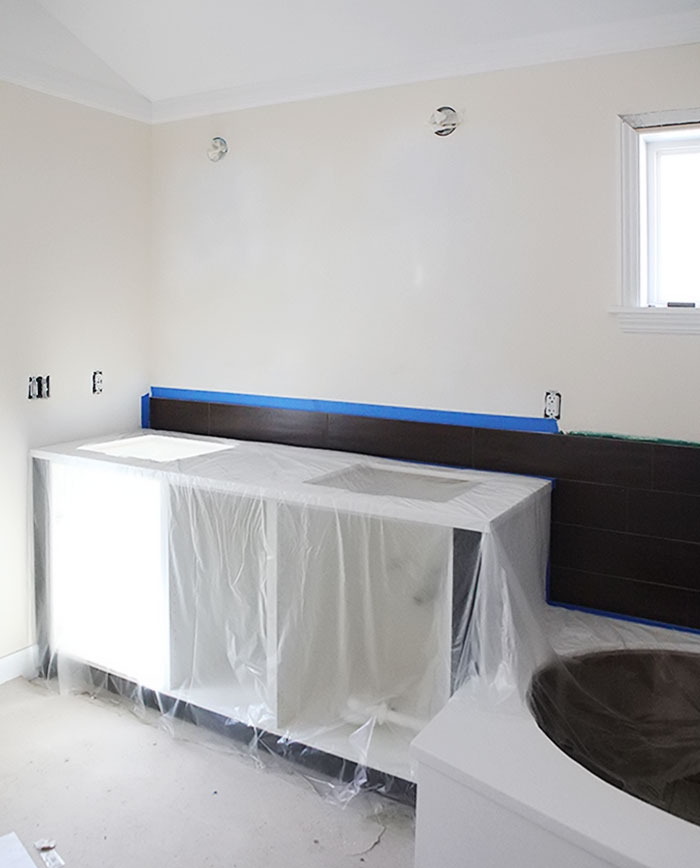
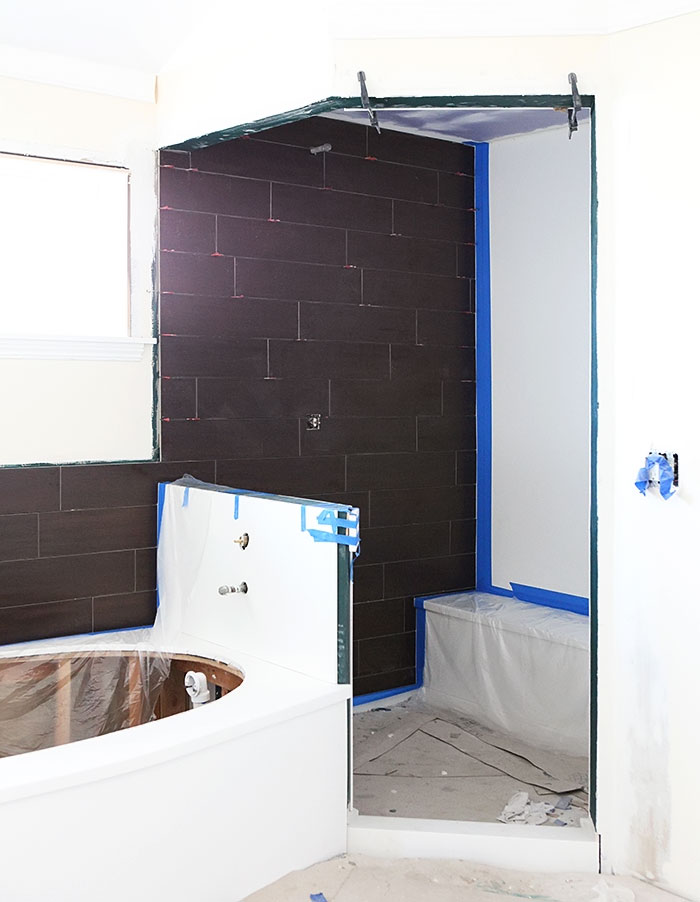
I am so so happy with this tile. It looks even better up than I had anticipated. Always a nice surprise.
While these pictures are showing the tile ungrouted, I am just noting here that we used a dark brown sanded grout called 'Sable brown'. Our grout joints are 1/8th of an inch. You almost can't tell that it hasn't been grouted here.
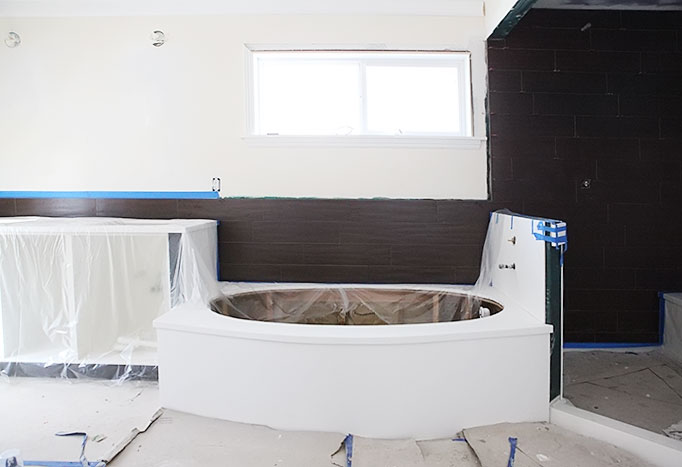
Our to-do list is certainly dwindling. Left to do is:
Finish the marble installation. They come and measure for the last pieces next Thursday, then it will take a couple of weeks before they come back and install them.
After I finish in the master bedroom in November, we start back up with all the finishes in here in the bathroom. Still to do for us:
Shower ceiling texture, prime and paint.
Some wall repair, texturing, priming and painting
Final baseboard and trim installation, prime and paint
Installing lamps, pot lights and finish electrical
Put up mirrors. I can't wait to show you what I got.
Installing sinks, faucets, tub faucet, shower heads
Hang the doors and install the hardware.
Clean up and accessorize.
I also need to call the glass place and they will come in and measure for the window and glass door for the shower.
Then we are ready for final inspection. And a reveal post.
Share
I had been agonizing over finding the right tile. You see, this tile had to pull off a couple of big jobs.
First, It had to go with the new bedroom floor, as you will see both of them at the same time, so hue was of vital importance. Vital, I tell you.
Secondly, It had to fight in a competition with the tile flooring in the bathroom (the flooring that we chose to keep and work around), squash it, and come out the non disputed winner making the audience go: "what tile floor? I didn't really notice it". Certainly a tall order.
This is what the bathroom looked like before - take in all that tile, will you:

So the plan was to get rid of a lot of all that yellow/tan tile and add a lot of white to the space to brighten it up and make it feel more modern. If we only added white however, the floor would sort of end up as the focal point. The opposite of what I wanted.
So I needed something that would be a third surface without making you go: Wow this bathroom has THREE different tile jobs. Instead it needed to look planned and that third surface needed to be an attention grabber, but in a calming way so as to not play into the floor, but rather just drown it out.
That is one reason we went with solid slabs of white cultured marble for the three walls in the shower. It didn't feel like a tiled surface - because it's not - and it was comparable in price to tiling.
Then for the new focal point - away from the floor - enter these three tile.

Number 1 is a tile from Lowe's at 2.39 per sq ft. Number 2 is an Emser Heritage Walnut tile at $2.99 per sq. ft. Number 3 is another 2.39 tile from Lowe's.
Number 1 was in the running for the longest time. It was readily available at Lowe's and the price was certainly right. Only problem, it didn't go very well with the hue of the floor. It was much more purple. More so than the picture will have you believe.
Number 3 was a different tile, where I loved the hue and the overall tile looked much prettier, but I ended up nixing it because it had too much pattern. It would make the wall look too busy and that would play into the floor instead of shushing it. If I were to tile a floor and didn't have to worry about matching up with another wood, I would choose this one because it would hide dirt very well.
So after 12 tile store visits, one of which ended up closing in the middle of it all causing further delays in our process, and countless hours of online searches, I found tile number 2. It had the right hue to play into the master bedroom flooring and it was a calm dark nice brown with a little bit of interest in that it looked like hand scraped wood.

I found a great tiler - again through Angie's list - Eric Duff tile and stone. He did a spectacular job. Our wall wasn't exactly straight, but he certainly made it look that way. He is the third person I have had tiling for us in this house and he has been blowing the other ones away by a mile.


Here is what our bathroom looks like currently.


I am so so happy with this tile. It looks even better up than I had anticipated. Always a nice surprise.
While these pictures are showing the tile ungrouted, I am just noting here that we used a dark brown sanded grout called 'Sable brown'. Our grout joints are 1/8th of an inch. You almost can't tell that it hasn't been grouted here.

Our to-do list is certainly dwindling. Left to do is:
Finish the marble installation. They come and measure for the last pieces next Thursday, then it will take a couple of weeks before they come back and install them.
After I finish in the master bedroom in November, we start back up with all the finishes in here in the bathroom. Still to do for us:
Shower ceiling texture, prime and paint.
Some wall repair, texturing, priming and painting
Final baseboard and trim installation, prime and paint
Installing lamps, pot lights and finish electrical
Put up mirrors. I can't wait to show you what I got.
Installing sinks, faucets, tub faucet, shower heads
Hang the doors and install the hardware.
Clean up and accessorize.
I also need to call the glass place and they will come in and measure for the window and glass door for the shower.
Then we are ready for final inspection. And a reveal post.

About Katja Kromann
I am a Danish American decorating life in Seattle. I love all things design and DIY.
I can’t think of anything more fun than coming up with project, making it, photographing it and sharing it with you on my websites.
Since 2018 I have been making Ceramics, nearly full time.
AHomeForCeramics.com AHomeForDesign.com AHomeForCrafts.com AHomeForFood.com My Portfolio
