Powder room reveal
During Thanksgiving break, we tackled re-drywalling the powder bathroom off our entryway. It also became obvious that the flooring was too far gone, so we had to swap it out for a new floor.
Here is how that played out:
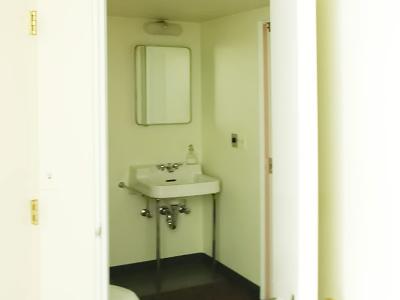
For reasons that are not quite clear to me, this is the only image I have of what the bathroom looked like right after we moved in and before the whole house re-pipe. If you want to get caught up on the re-pipe and all the other big items we checked off in 2018, you can read about that here. And how it all started here.
If you read those posts you already know that the previous owners took out the radiant heat system in favor of a split system with heat pump. Therefore all the radiators in the house are no longer operational (cry).
As you can see below, the radiator below is installed after the flooring, and the floor travels up the wall and becomes a sort of baseboard.
Our initial plan was to cut the baseboard part of the floor off to deal with that issue when we removed the radiators and then install flat baseboard identical to what was done elsewhere in the house. I will get back to that in a moment.
First, let's take a look at what the re-pipe situation left us with. So much drywall damage. And in odd shapes and difficult to patch. I got a quote from a couple of people to do it all for us but it was astronomical (please note that this word rhymes with "comical" - that can't be an accident). So while we did hire out the living room and the two bath remodels upstairs, we have tackled the rest of the re-drywalling ourselves. And we are not done.
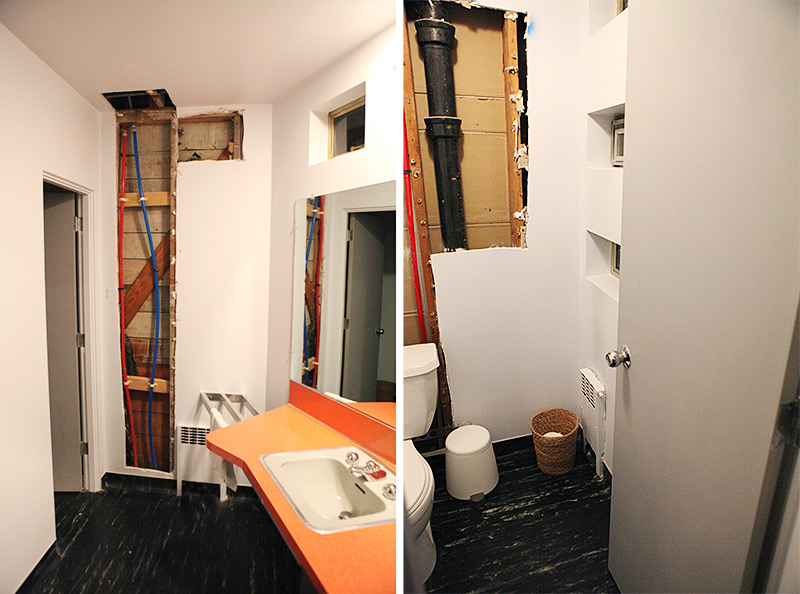
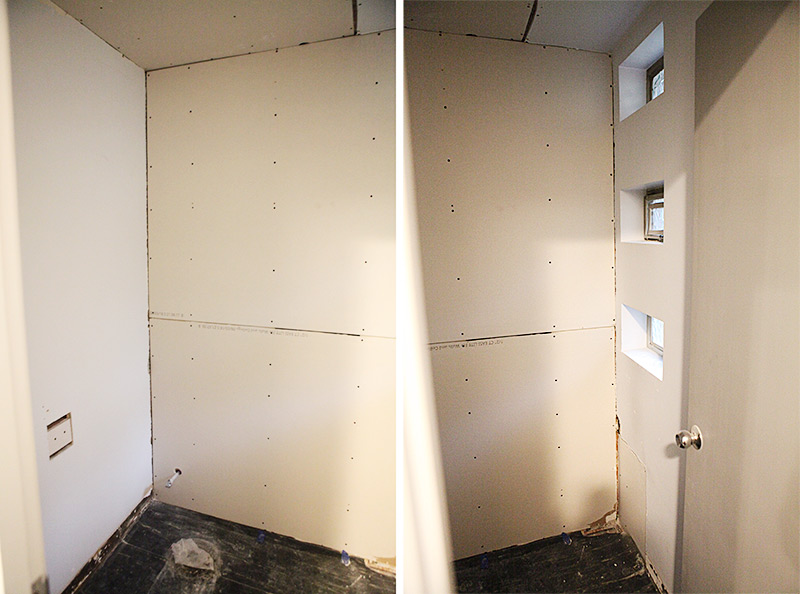
The powder room has a room when you enter first with the sink and then a smaller room where you find the throne itself. We took out the two small non functioning radiators, insulated the walls and put up new drywall. Then I mudded and taped and mudded some more and then I painted the room Sherwin Williams Pure White in a matte finish.
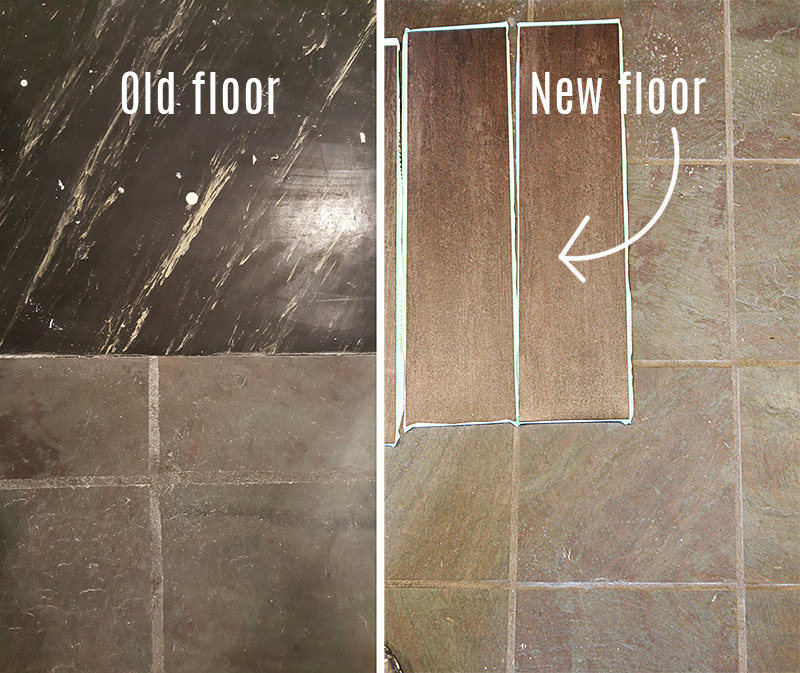
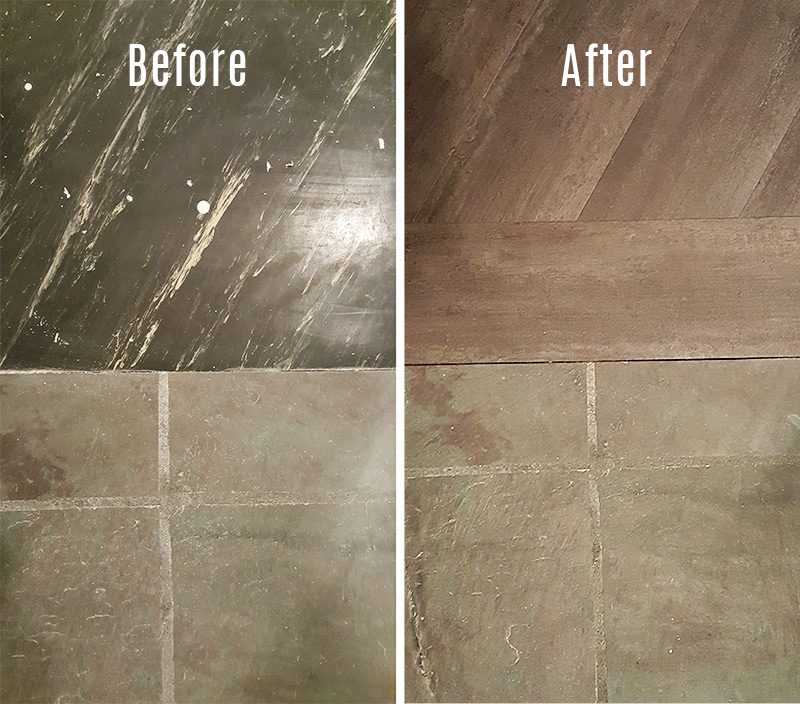
As mentioned earlier, the floor covering was missing where the radiators had been previously, so to fix that, we attempted to cut off the part of the flooring that acted as baseboards in hopes that we could then install baseboards over top and disguise that fact. I did suspect that there was a cove molding along the edges to facilitate the curve from floor to wall (there was), but I was hoping we could get it out without too much interruption (we couldn't). Unfortunately, the floor was too far gone and we couldn't save it.
So the search was on for a new floor.
It will probably surprise some people why we chose luxury vinyl as a replacement. Here is the thought process behind it: The floor next to the bathroom in the entry is slate tile. Original beautiful tile that I just love from 1953. And it continues out in front of the front entry outside. Very Mid-century Modern. And it very closely matches the rock wall of the fireplace that also continues into the entry, which we also love a whole lot. And putting in a whole different tile up against tile looks just ridiculous in my humble opinion, and matching it was not an option because of availability and there would not be enough room on the floor for the two floors to meet up level. I have a theory that the floor is deeper under the slate tile to accommodate for the difference in height. Or rather, the lack thereof.
Another option would be to put down a click floor of some sort. There still would not have been room to get to the same level, something I really appreciate in the original design. I looked at putting in a new linoleum and even found one that was really close in match to the original one, but since the floor was an unexpected expense and we have so many projects it came down to two things: The vinyl tile I found was something we could install ourselves and cost around 120 dollars in materials and second it really played nicely with the adjoining slate tile and dark panel walls in the entry way. By contrast, the linoleum that I found would be all in just under 1000 dollars in comparison and that was not in the budget.
While we all cry a few salty tears over that fact, see if you can find solace in the fact that the new floor looks really good with the original slate.
We took the old linoleum out and discovered that the plywood underneath was in exceptionally good condition. Something that did not surprise us. This house is so well built you almost can't believe it. We cleaned the floor with water and soap and then added a vinyl floor primer. Then we laid the new floor.
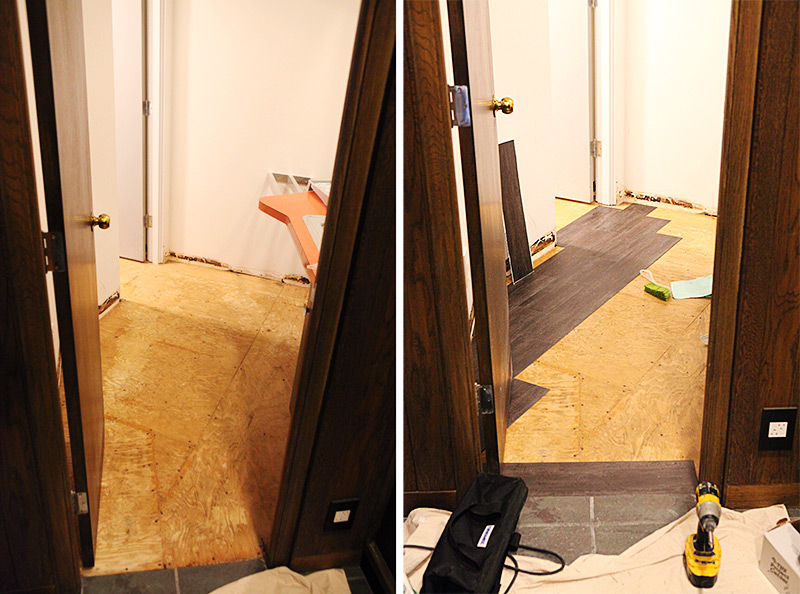
The room with the sink is five-sided so there were a million angles so we decided to make the "grain" to along the main long wall on the left and we decided to make a border along the transition to the tile floor. Below you see one of the many angled cuts Frank made.

Here you can see the before and after side by side. The new floor demands a whole lot less attention and that is on purpose.
And it comes to the exact level of the original floor, something that makes me very happy. (As you can see the tone of the floor changes in each photo of it, but in the below photo I have captured what it most closely looks like in real life. The camera has a hard time with this color for some reason)
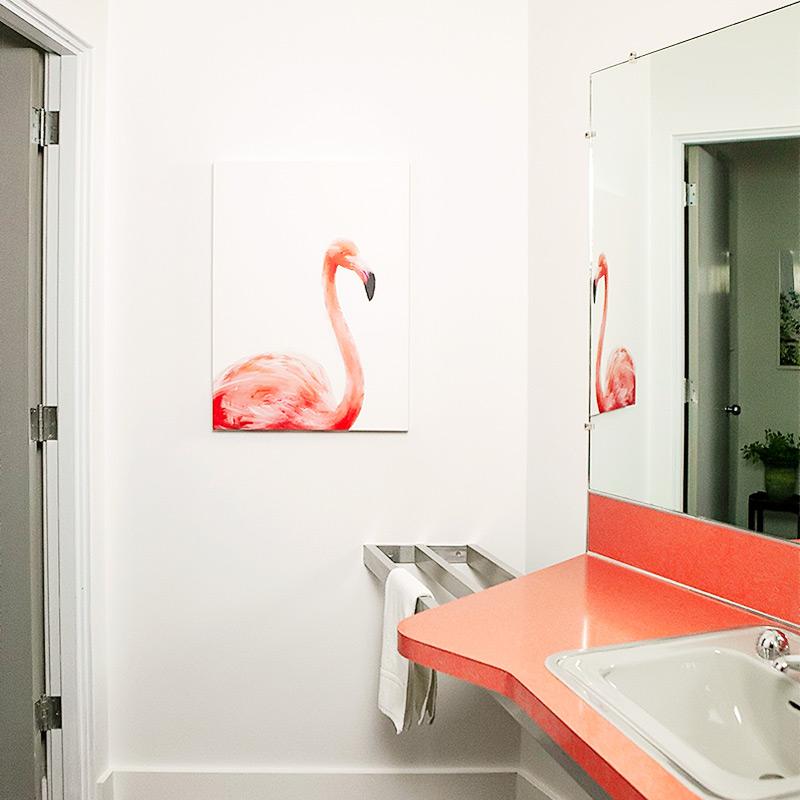
Here is the after and take a look at how the sink is getting all the attention in this bathroom. It is such a beautiful shape. And I love the aluminum situation that holds up the end of it and acts as a towel bar at the same time. So unique and Mid-mod. One of the many details I love about our home. And the sink color is even the Pantone color of the year 2109: Living Coral. What is old is new again.
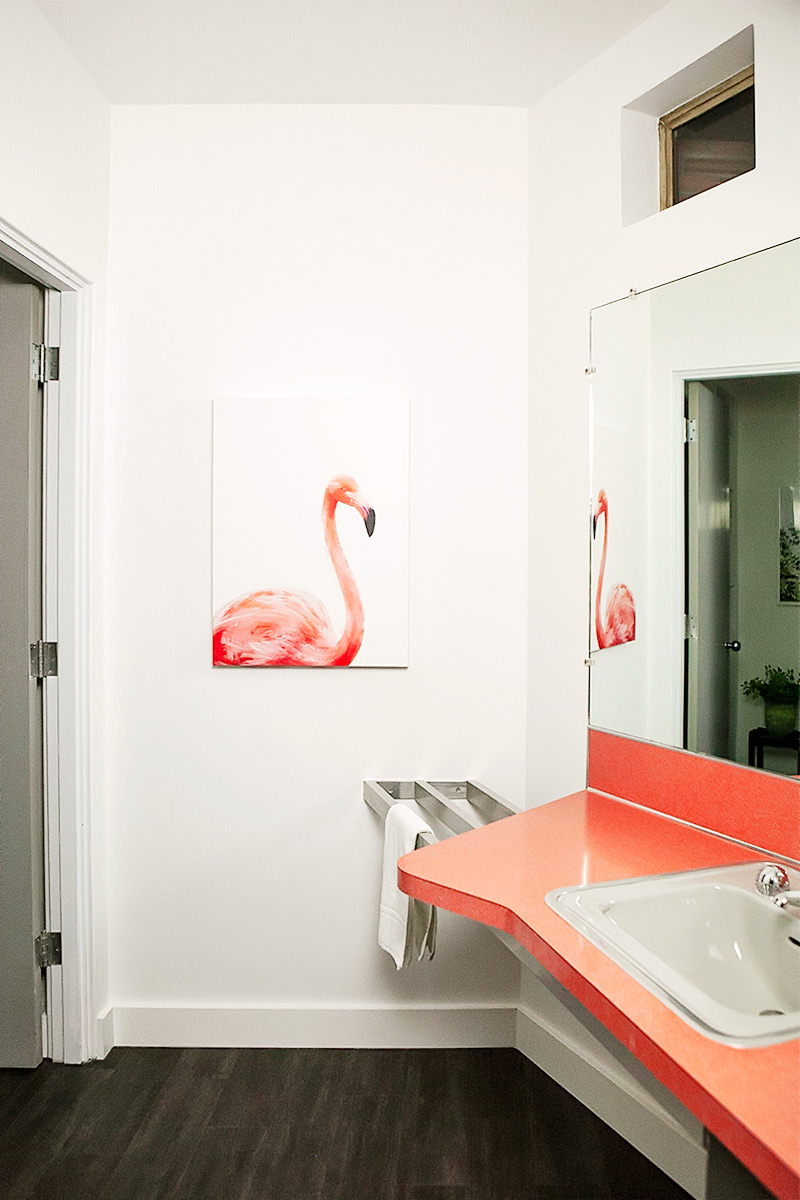
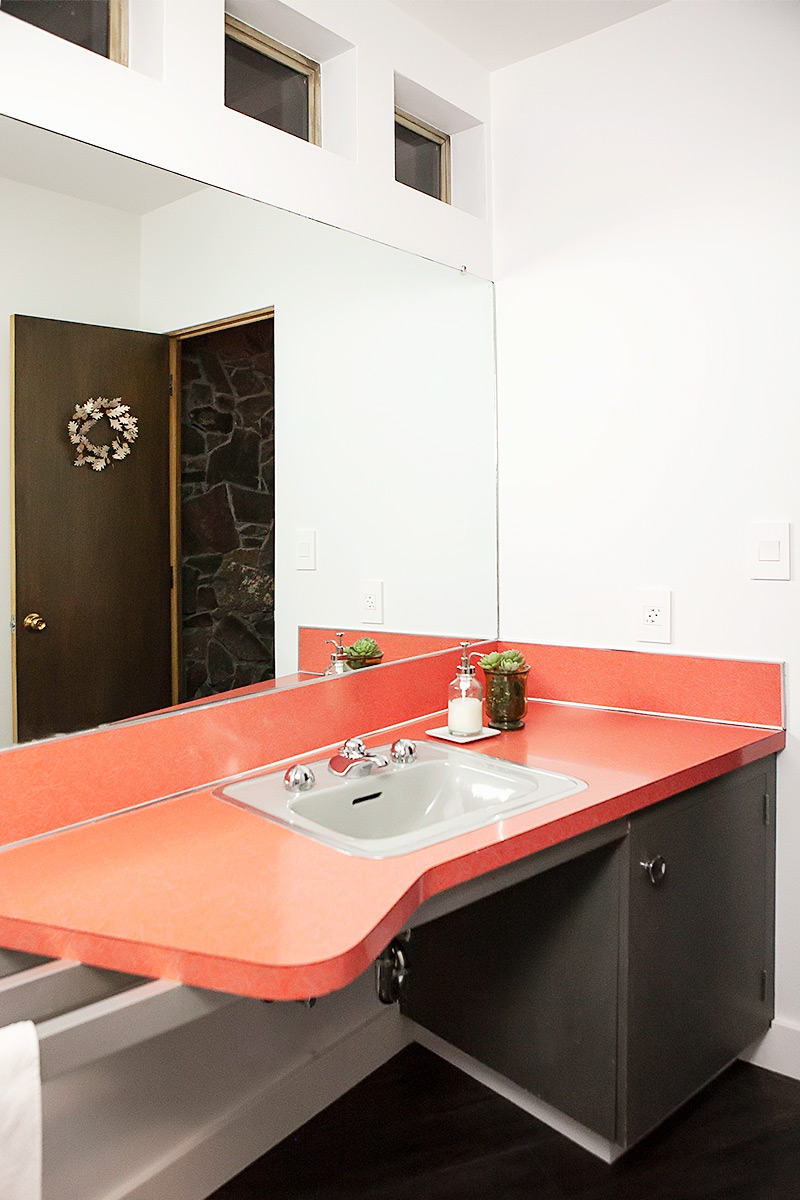
Here is the other side of the vanity. The mirror is not in that good condition anymore and is chipped and the sink is installed pretty low, so at some point we want to circle back and see if we can re-cut the mirror and raise the whole sink. But until then we are enjoying having one more room checked off the drywall repair list.
How to make the acorn wreath on the door.
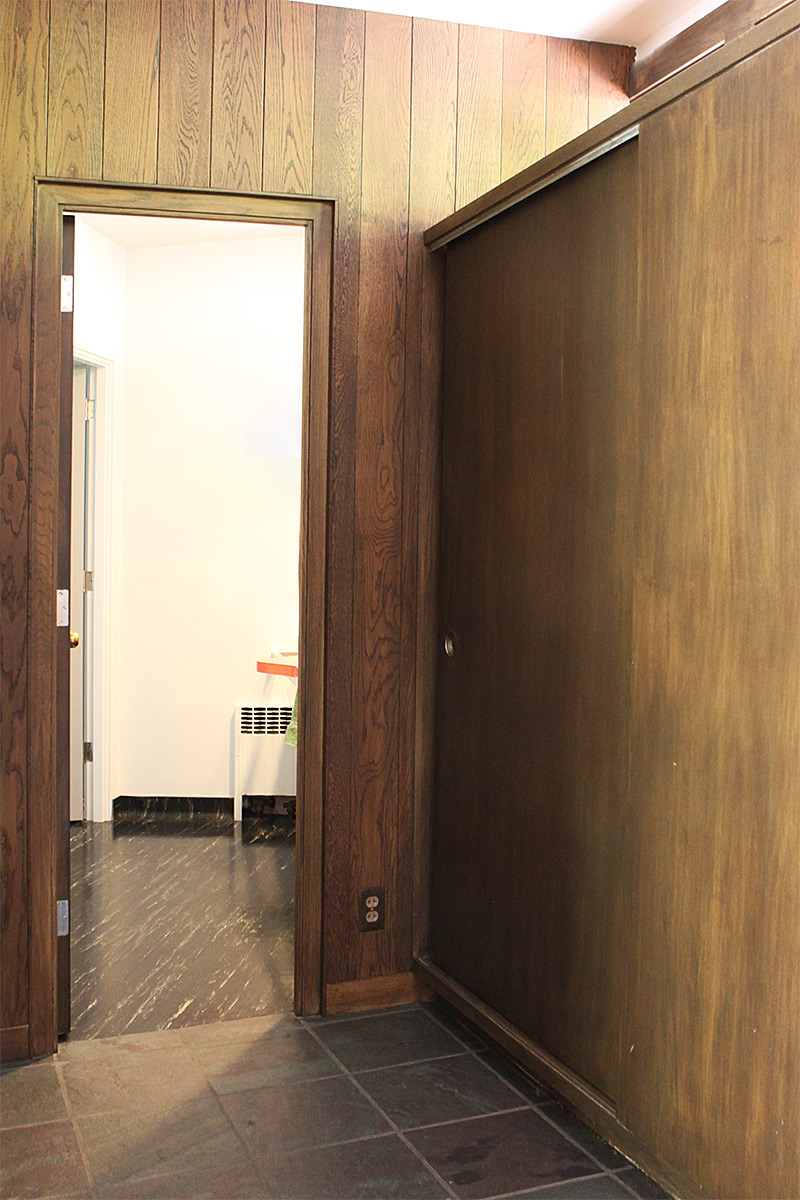
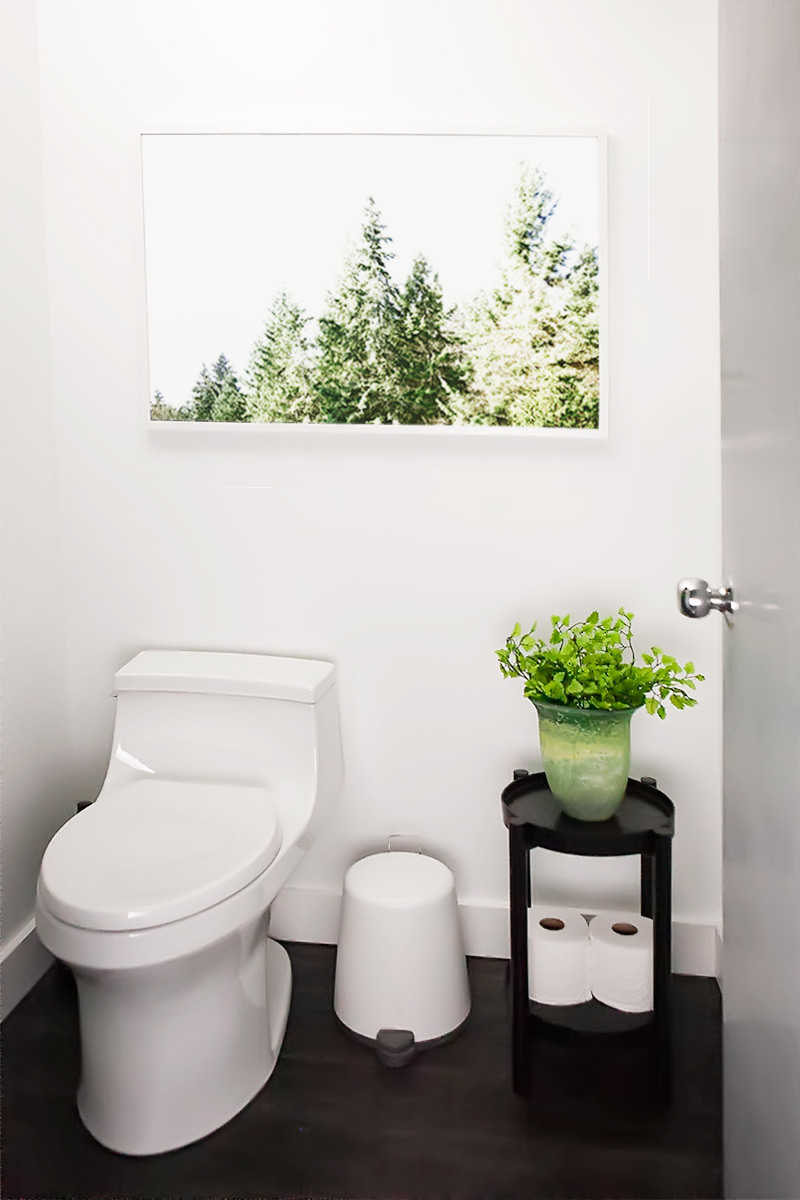
Next is the small toilet room which we also outfitted with a new toilet because the old one was low, small and very very noisy.
I took a picture in a nearby park and used this tutorial to turn it into a water color of sorts. I had it printed at a local print shop as a poster for 35 dollars and framed it in an IKEA frame, the biggest RIBBA they have. Big impact for just a few bucks.
Here is a close up of that effect.

The black table is one we built ourselves this summer using a bent wood technique where you soak a thin strip of wood for 24 hours, then bend it and let it dry. That is how we made the rims around the two table tops. If you follow on Instastories, you saw this process.
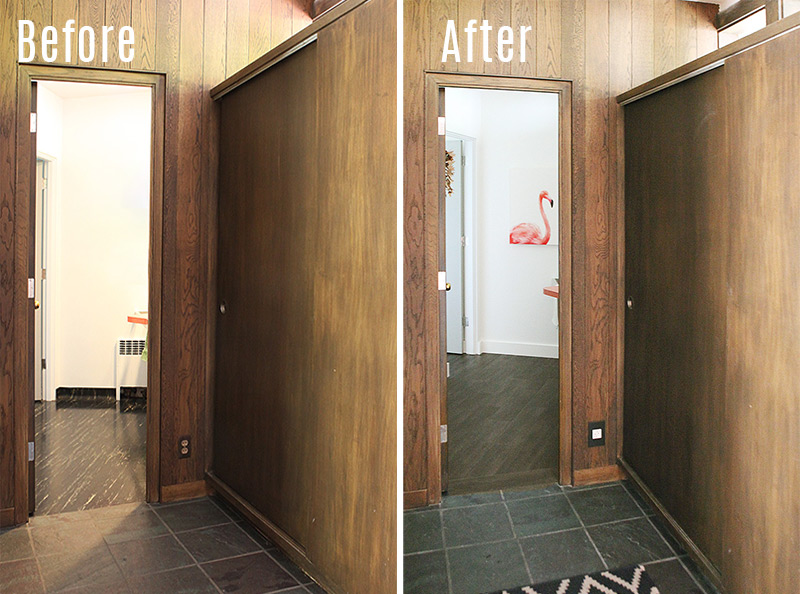
In conclusion, let me just end this post with another mind numbingly similar before and after picture just like in this post. On the left: the spring of 2017 after we moved in and on the right: taken today.You can see that we took out the radiator, changed the floor and baseboard and switched out the outlet in the hallway.

I am a Danish American decorating life in Seattle. I love all things design and DIY.
I can’t think of anything more fun than coming up with project, making it, photographing it and sharing it with you on my websites.
Since 2018 I have been making Ceramics, nearly full time.
AHomeForCeramics.com AHomeForDesign.com AHomeForCrafts.com AHomeForFood.com My Portfolio