B's room - dyeing for some navy curtains - how to dye curtains
Here is my progress report.
B and Dad went camping at Joshua Tree this weekend in freezing temperatures (19F at the lowest at night). They managed to stay warm. They are both known as "heat cannons" around these parts and DH is a scout himself and has camped in snow before. Still ... I was quite worried. Luckily, they both came back with high spirits, all limbs intact and dry lips.
Here is a picture from when the sun came up. So beautiful.

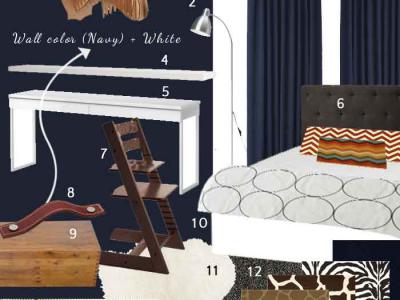
While they were gone, I got busy on B's tween room makeover. You can read the whole plan here
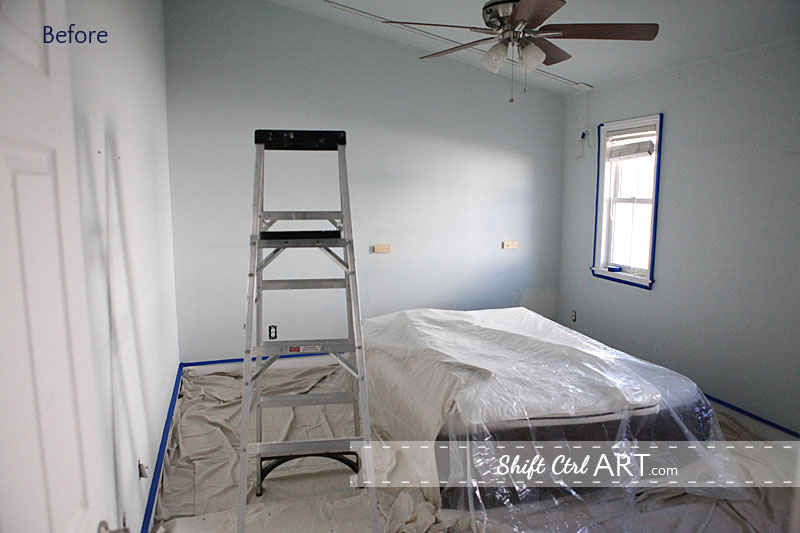
I took everything off the walls and cleared out the room. I covered with my painting tarps and put plastic over the bed.Taped around the base boards and windows.
Then it looked like this.
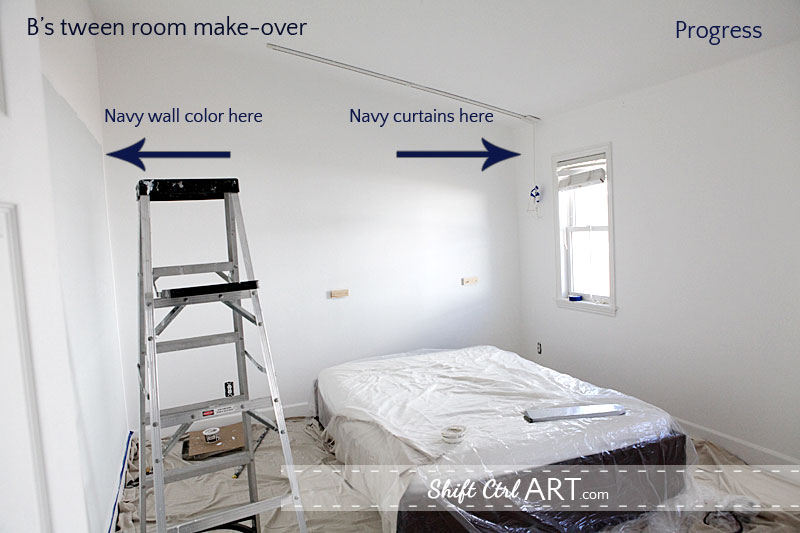
Then I painted the ceiling, three walls and the top of the tall wall on the left. Three coats. Three coats... sigh.
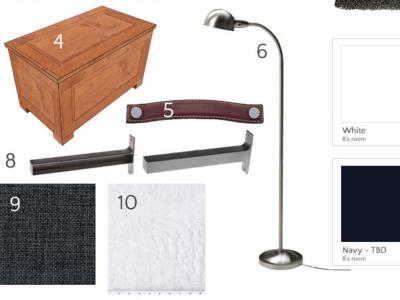
Next I had to determine the navy wall color.
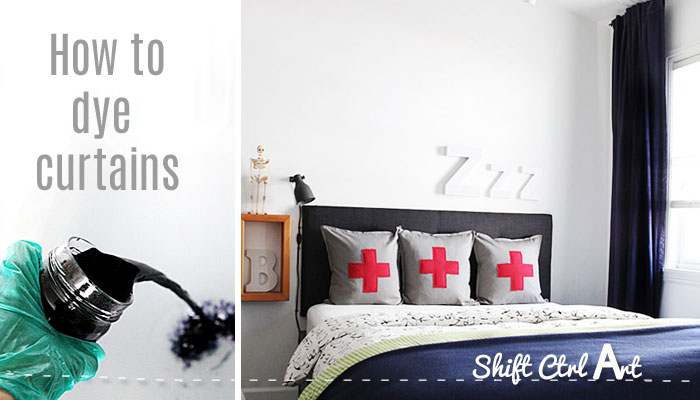
I wanted B's room to have cotton/linen curtains in a navy blue and wanted to try my hand at dyeing some since I found some light blue Ritva curtains at IKEA on sale for $19 the pair. They are usually $35 a pair.
Since I wanted the paint to match or go with the curtains, I had to stain the curtains first, before getting my wall color.
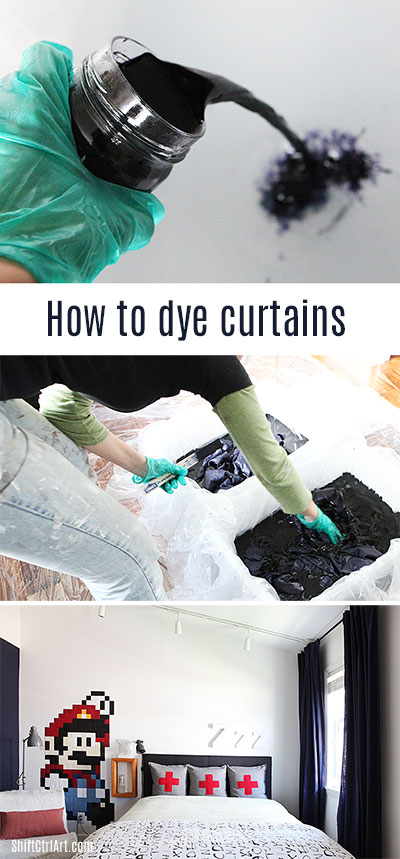
Here is how to dye curtains:
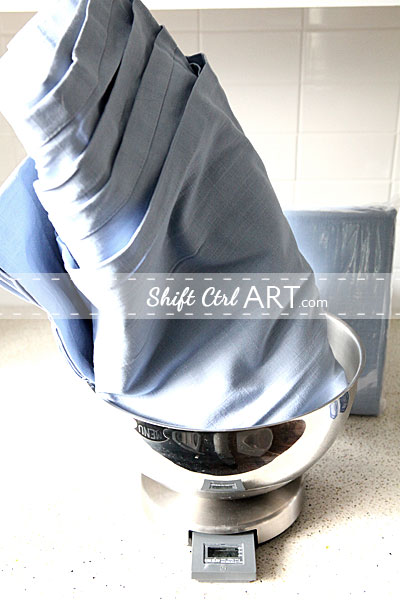
The Rit package says that 3 yards are about one pound of fabric. I checked to see about that and found that my curtains were 2.5 pounds each at about 3 yards each. That is when I decided to dye the curtains in two tubs instead of one.
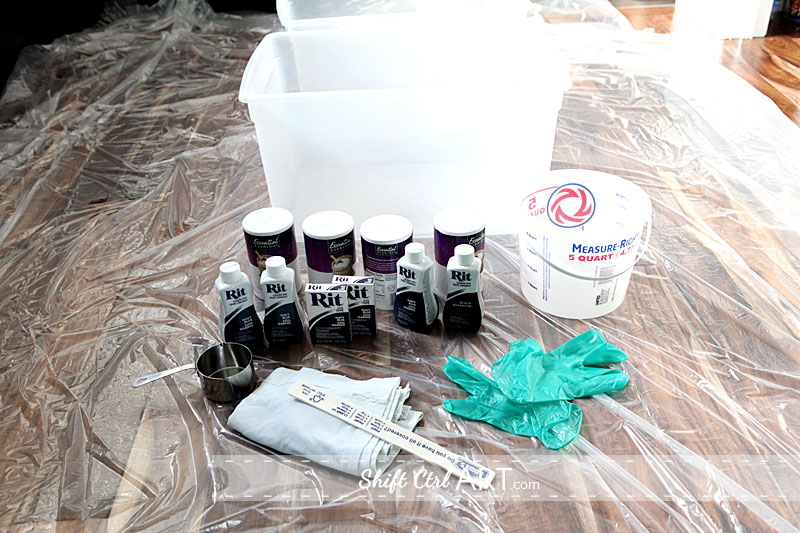
I had bought the stock of navy blue liquid and powder dye at my local JoAnn's and after seeing that the fabric was quite a lot heavier, I went to my local grocery store to buy one more bottle. They only had black, so I got a bottle of that.
So I had 3 liquid blue, 1 liquid black and two powder blue. One thing of powder equals half a bottle of liquid color.
Here is what I used.
The powder package says to use 1 packet of color for every pound of fabric (3 yards) and to add 1 cup of salt, but to double up the color for dark or bright colors. 3 gallons of water per packet. (I assume unless you are doubling up on color).
I thought about this for a bit... then decided that I had 2.5 units of color per tub, so I would use 5 cups of salt per dye bath. I would need 15 gal of water for that, but since my tubs were that size and I wanted darker colors, I modified that to 7 gal of water per tub. I should probably have reduced the salt at that point, but oh well... I ran out of math at that point.
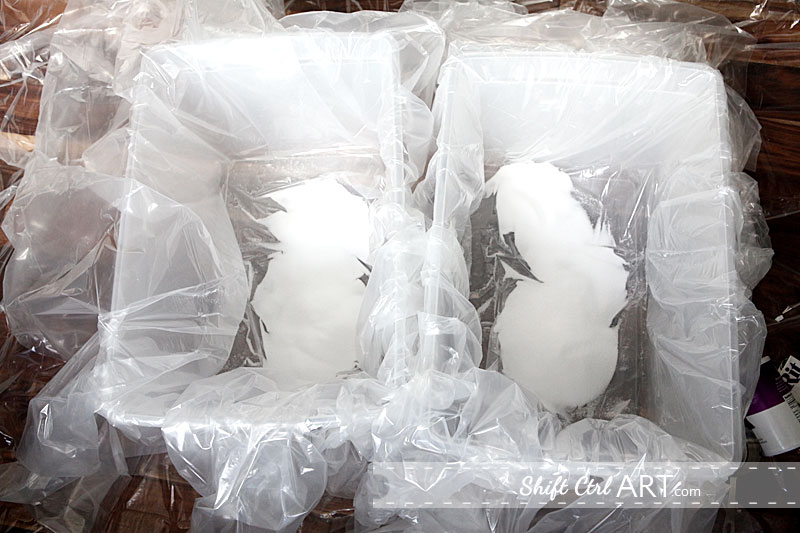
I had plastic on the floor and then another sheet of plastic going into the two bins because I did not want them to discolor. I added 5 cups of fine salt (the kind that did not say ionized on it) to each tub.
Since I had to make two identical baths I had to get semi scientific about measuring the water, so I used that gallon measuring bucket and another bucket that holds two gallons.
I put two large pots on the stove with a gallon each and let it come to a boil. While that was heating up, I ran my tap really hot and filled the two gallon buckets twice - one for each tub. Then I repeated that step, then I added another gallon hot tap water to each bringing the total amount of water in each tub to 7 gallons - 2 of the gallons were boiling hot, the rest were really hot from the tap.
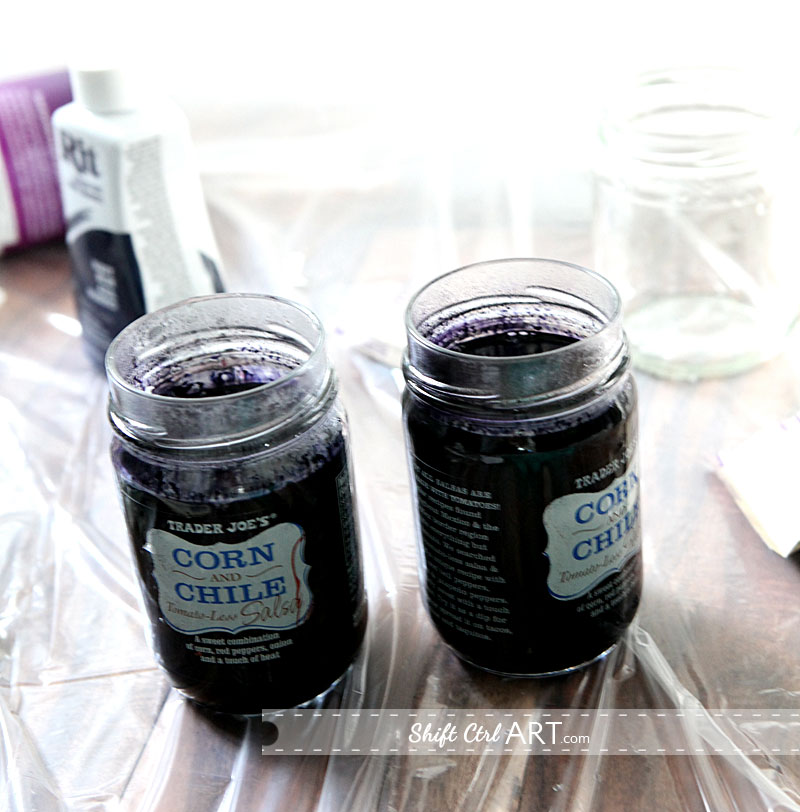
Then I mixed the powder in hot water from the tea kettle. I used two glasses again because I wanted both baths to be identical.
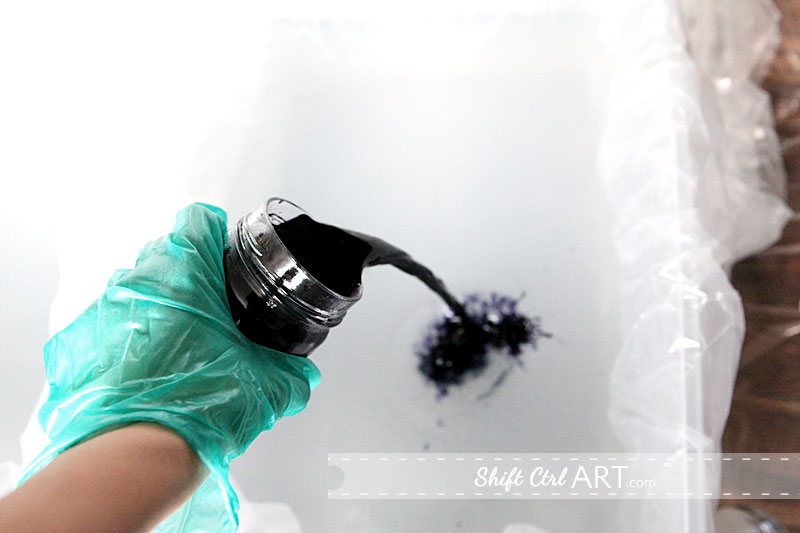
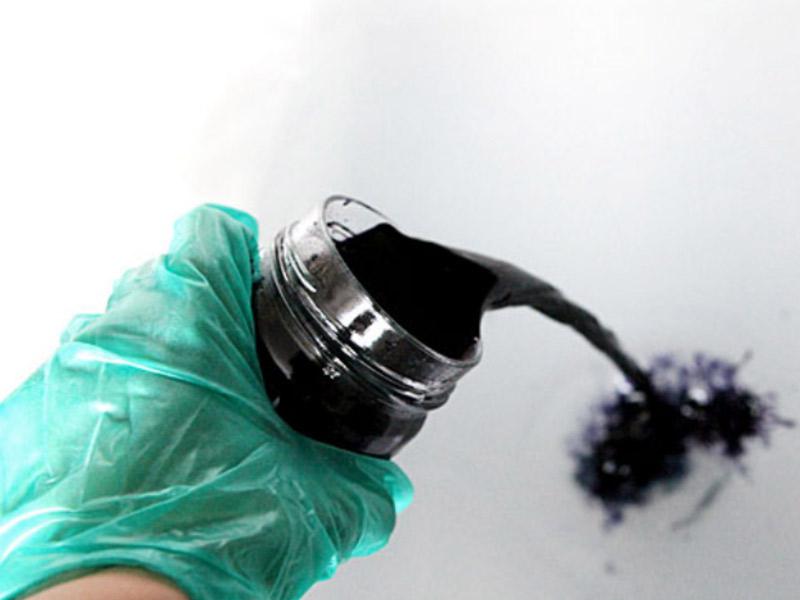
I poured it in - this is the action shot of me pouring the first dye in. What'cha think?.
Then I added 1 liquid blue directly to each. Then, I divided the last blue and the black into the two glasses and poured it into the dye baths.
In the morning before I started all of this I had thrown the curtains into the washing machine and washed with a bit of soap. Here they are wet, ready to go into the dye baths.
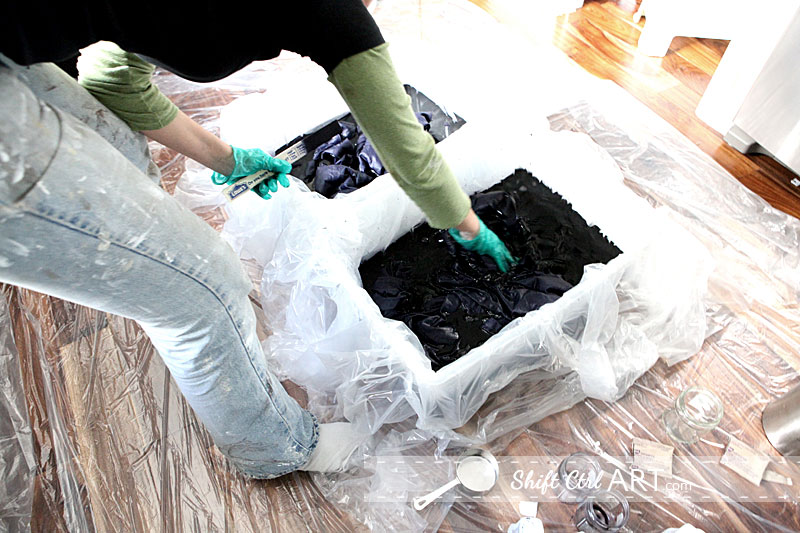
Hey, that's me in my painting outfit!
I used a paint stick to dunk the fabric and then every couple of minutes I turned all the fabric around as best I could.
I proceeded to do that for about 25 minutes. Then I scooped out dye water with the measuring bucket into the sink while letting the tap run. Transferred all the fabric to one tub while still stirring it. Then I emptied the other tub, put all the curtains into that one and then carried it over to my washing machine and put it in there.
I washed the curtains on "heavy soil" with the water on "hot". After that I washed it on "normal" and added soap. I checked through the window (front loader) that the water was running clear at that point, which it was. Then I tumble tried the curtains after that. I then ran my washer empty on normal for one cycle with some bleach gel just to be sure.
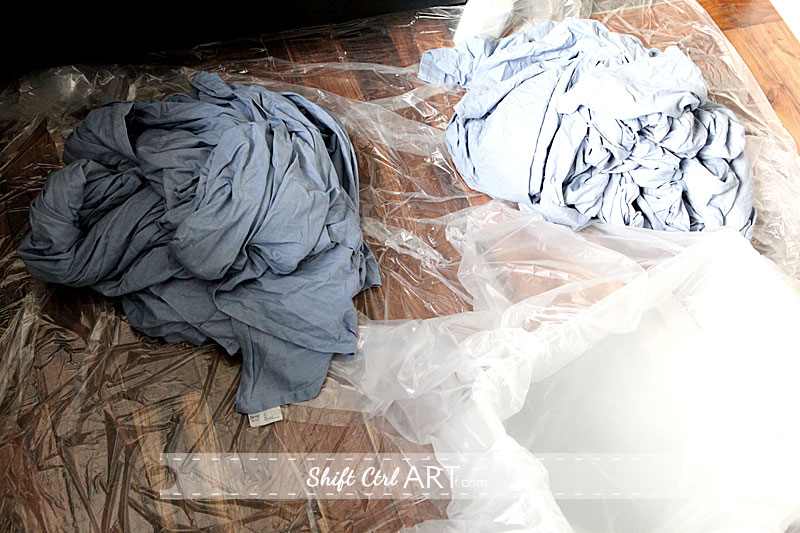
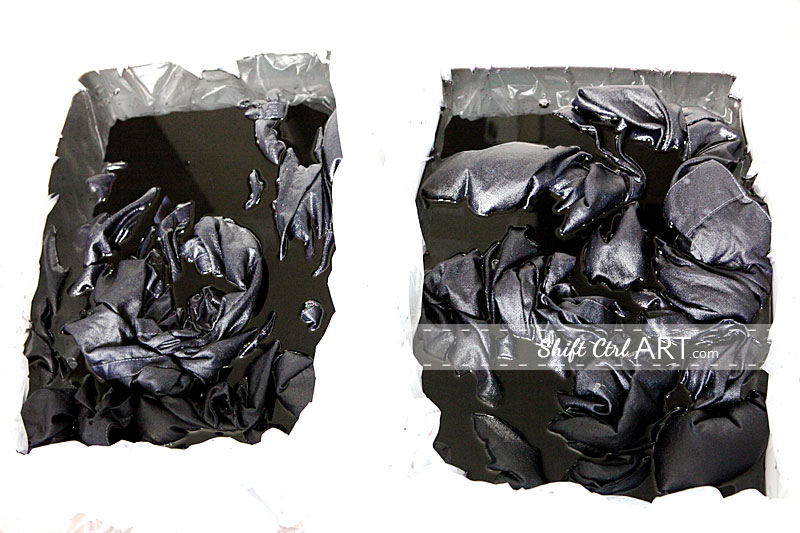
Here are the newly colored curtains in their non-ironed state:
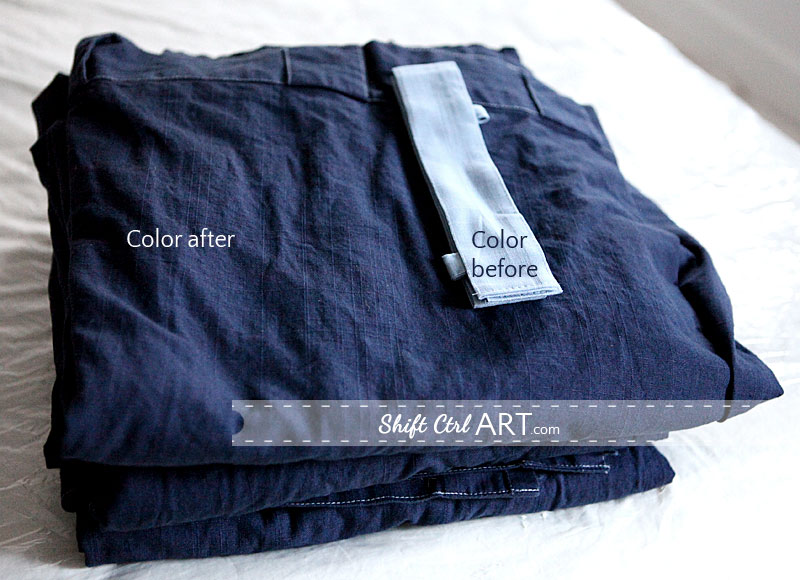
I think the Rit dyes are pretty easy to work with. For this project I had a bit too little water, so I do have some faint color variations here and there. I tried photographing it, but it does not show up in an accurate way on an image. It's pretty faint. As you can see in the picture above the color came out pretty uniformly. I would definitely try dyeing something again. Probably not curtains, but something in the 2-3 pound range or less  And I would not shy away from mixing the dyes either. That would be fun.
My set up worked really well and I don't have any blue anywhere in my kitchen where it all took place or in my front loader where I rinsed the curtains.
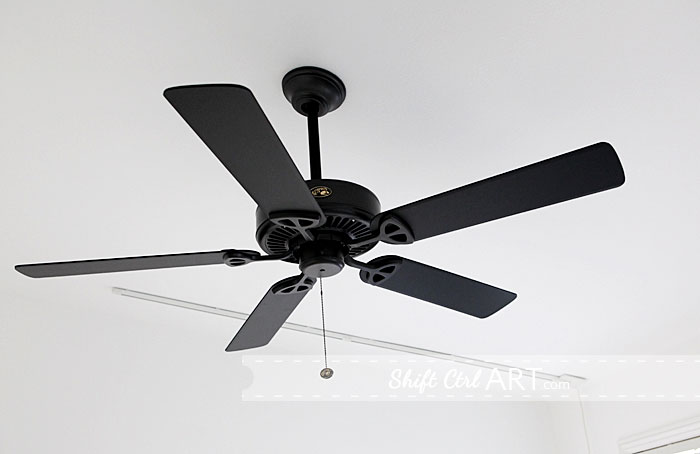
After I had my curtain color locked in, I headed down to Lowe's and found that Valspar's "Blue Coal" was a match to that color. In the meantime I had the old ceiling fan taken down and put a new one up.
Here you see the old one:
I have to say, I am no fan of the fan, but B uses his in the summer. As I mentioned in the beginning - he is a warm soul. And we live in Southern California.
I settled on this one because it did not have any down lights (really, really dislike those) and it was $47. Except for a really great one I found for the master that I will share later, I certainly don't think the fan industry employs any designers. Engineers, yes, designers, no.
And here is the new one:
That's the progress so far in B's room. I am getting ready to paint the third coat of blue. And I need to iron and hang the curtains and then hem them for my next update.
Are you a fan of the fan? How do you feel about white walls? Have you ever dyed anything? Let me know in the comments!
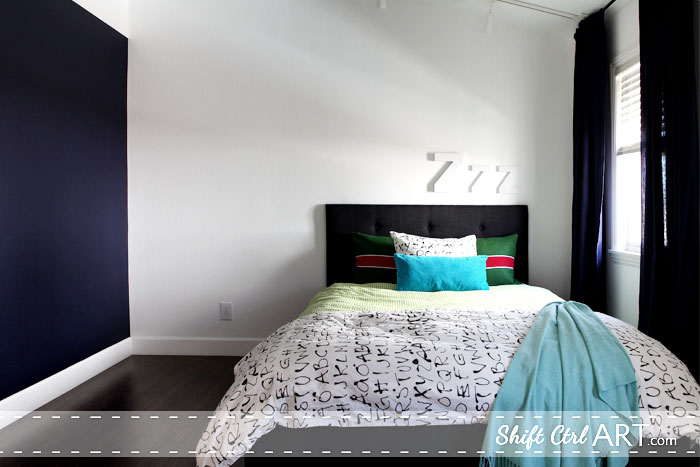
Edited: Here are the curtains all ironed and hung, but before any artwork and styling:
Next:
IKEA hack: B's bed with trundle

I am a Danish American decorating life in Seattle. I love all things design and DIY.
I can’t think of anything more fun than coming up with project, making it, photographing it and sharing it with you on my websites.
Since 2018 I have been making Ceramics, nearly full time.
AHomeForCeramics.com AHomeForDesign.com AHomeForCrafts.com AHomeForFood.com My Portfolio