Master closet - adding shelves and drawers
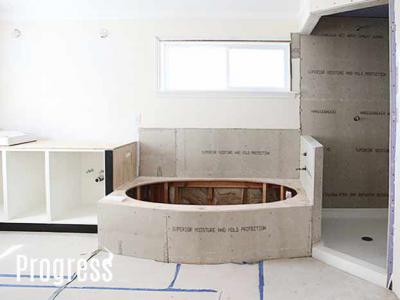
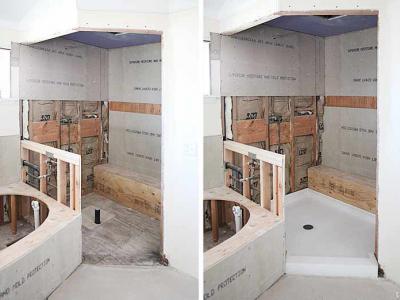
On Wednesday, last week, we passed our second inspection in the master bath remodel. Woot! This means I can get on filling all the Hardie seams with thinset, Hardie tape and more thinset. Fun times ahead. We only have one more inspection to go, which is the final inspection.
This weekend we spent some more time working on shelving for our master closet.
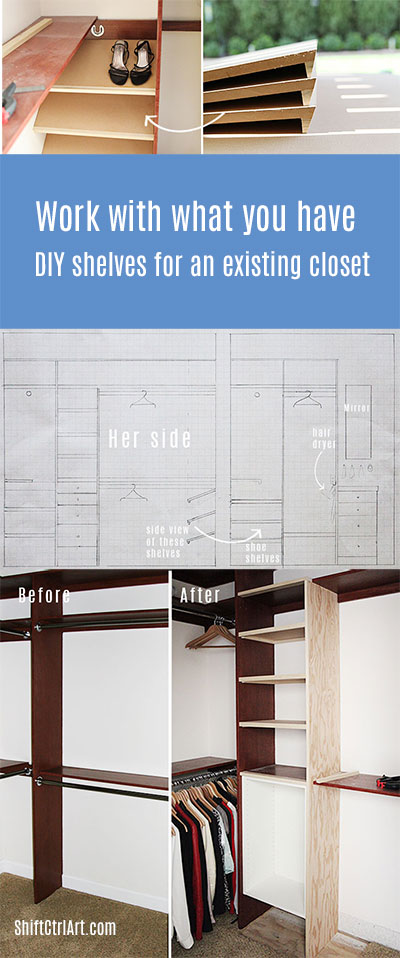
I began this process by making some drawings a couple of weeks ago.
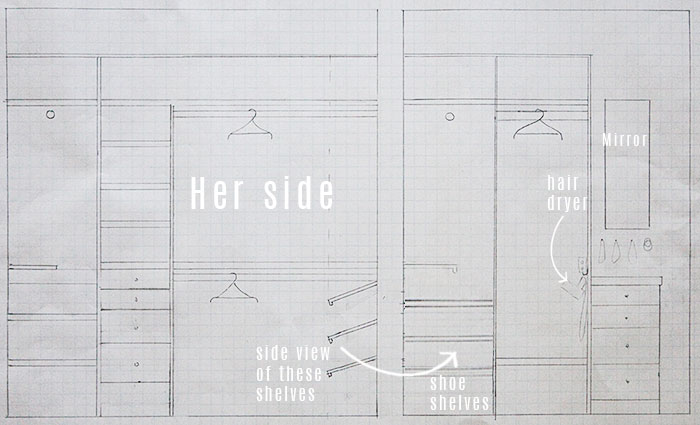
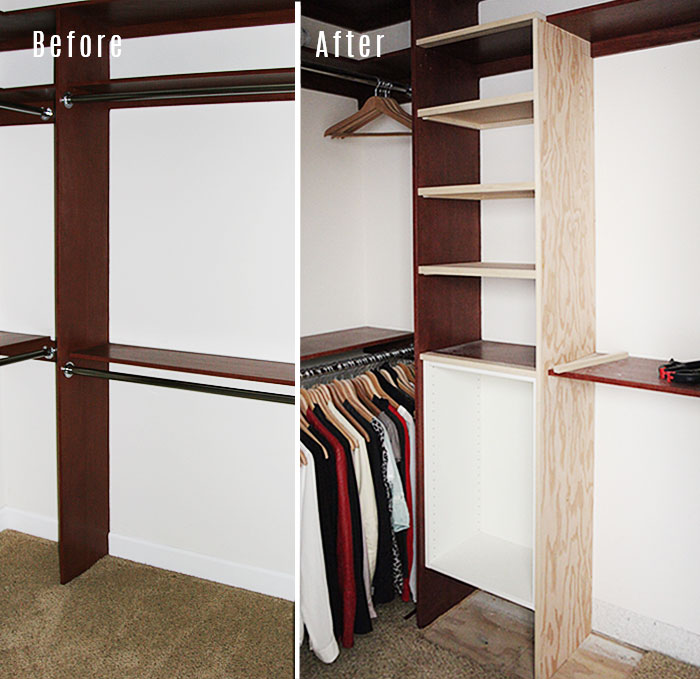
Above is my half of the closet. More open shelving is coming, two units of 4 drawers and 3 shoe shelves, not to mention a hair dryer station with a mirror, forever getting the hair dryer out of the bathroom.
I will still have plenty of hanging space including hanging space for long dresses. So far, so good.
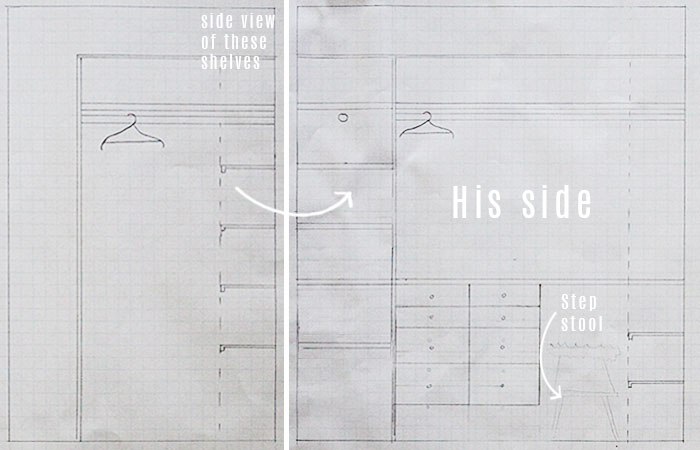
On Frank's side of the closet we are also adding a couple of drawer units and more shelving like this.
The drawer units are 18" wide by 30" tall by 12" deep drawers by IKEA. The drawers are not very deep, which should help keep them organized.
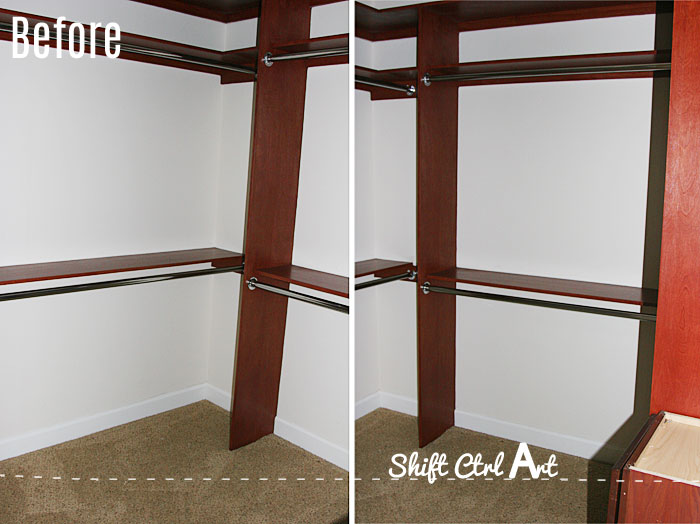
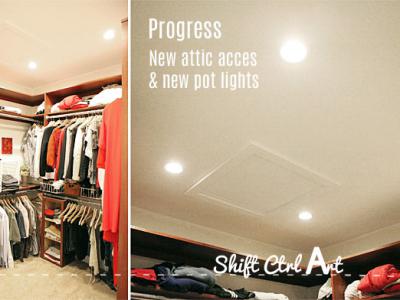
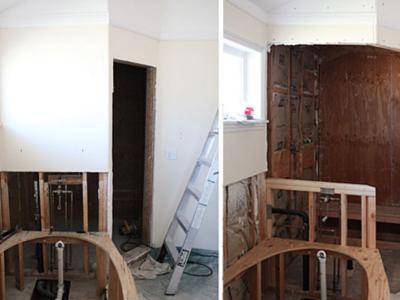
As mentioned in the previous post when we had the attic access moved in here and installed 4 recessed can lights, our closet had no shelves or drawers, but otherwise it was very nice you can see in the above photo.
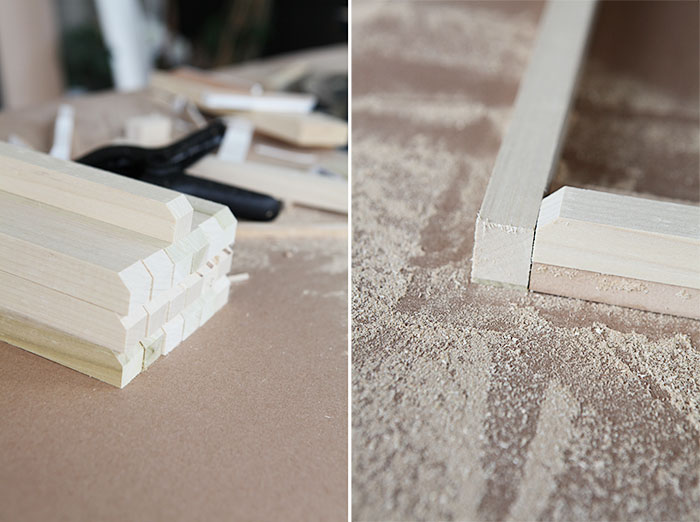
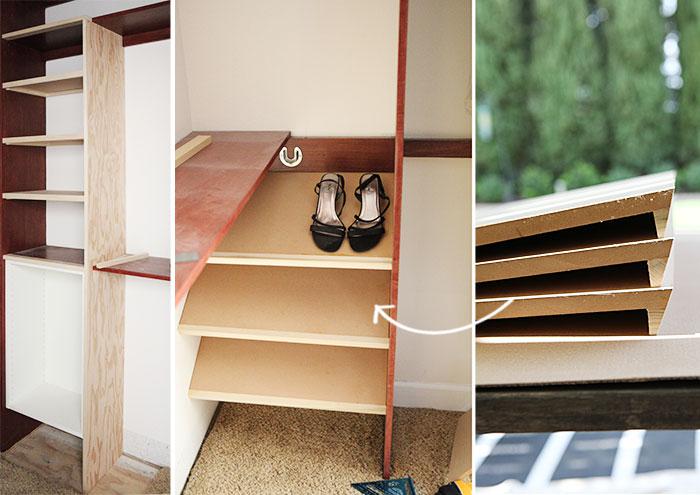
We cut all the shelves out of 1/2" MDF. We cut a bunch of wood supports for each shelf. We only have room for a 1 inch front trim piece on the existing horizontal partitions due to the position of the rods (if we still want to be able to get the hangers off the rods.). So we decided to go with this width on all the shelves as well. To make the support pieces meet up with the front pieces, we cut a little 45 degree cut on the front of them.
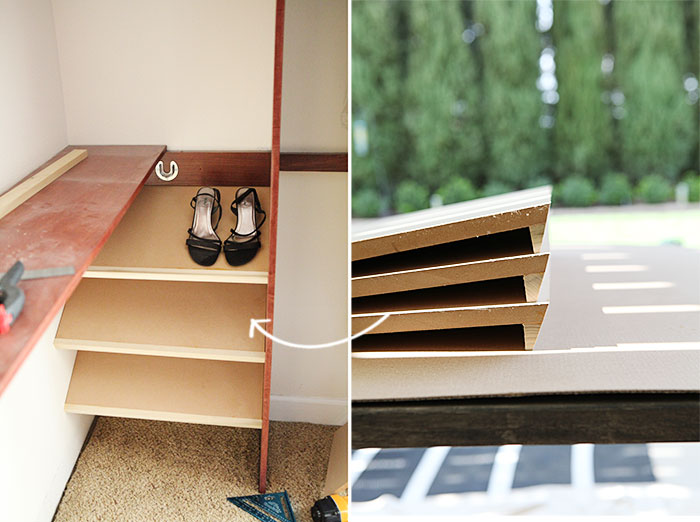
The shoe shelves are being installed at an angle. We added a piece of 1x2 with glue to the back of each of the 3 shelves for shoes. Then we set our skill saw at a 30 degree angle.
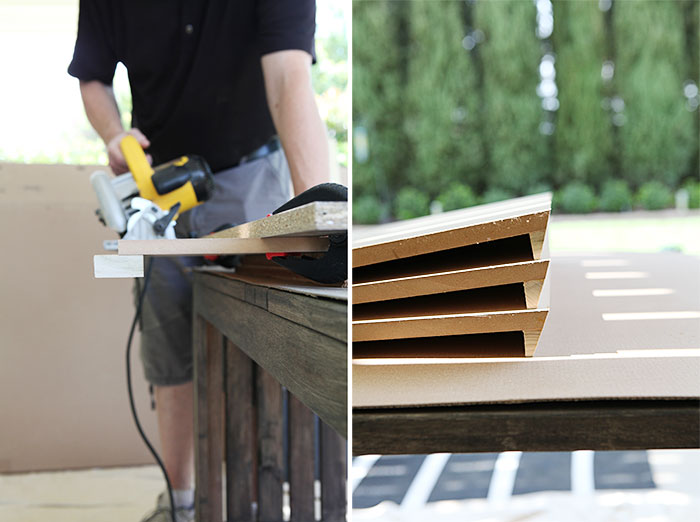
After the glue was dry we cut the backs of the shelves with the angled skill saw blade creating a mounting angle on the back ledge.
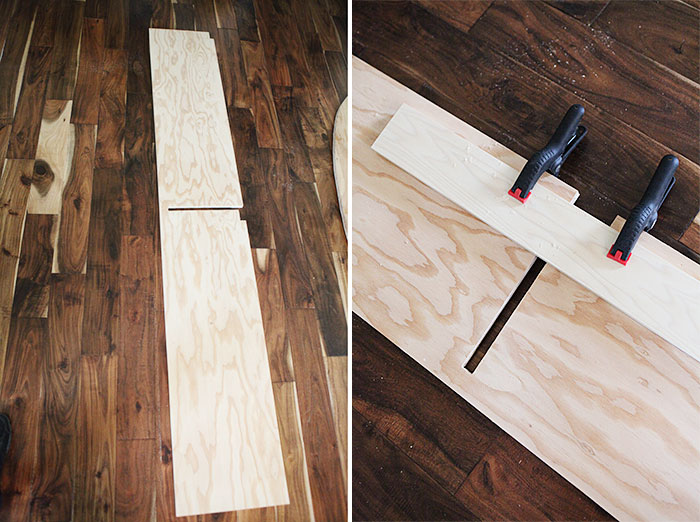
For my section of the closet we were creating a whole new vertical section with shelves above and a drawer unit below. From a sized piece of 3/4" plywood, we cut a ridge to grab the existing shelf and notched for the existing wall mounting boards. During transport up and down the stairs while dry-fitting this piece, we added a bracket with clamps for stability.
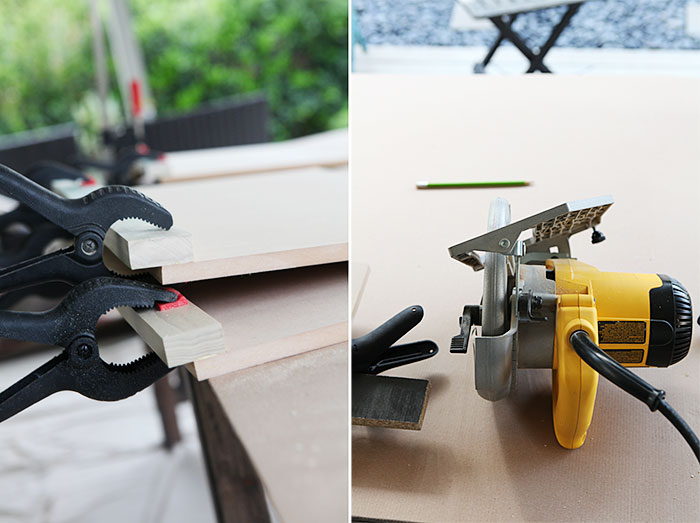
We needed to trim a piece to finish the front of the plywood.
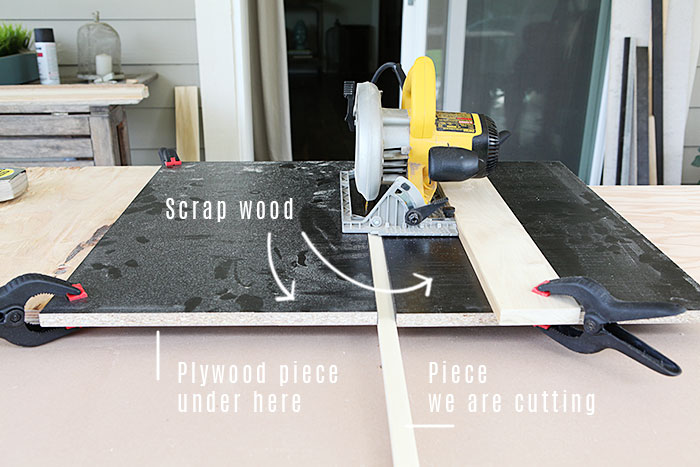
With this set-up we could push the piece through from one side, then pull it from the other side. All digits at a very safe distance.

Next, we put together the first IKEA frame and then mounted the hanging rail on the wall.
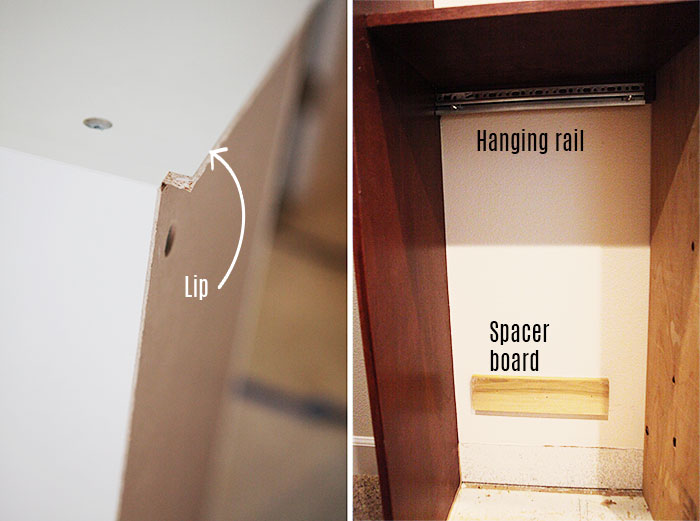
Because this IKEA frame has a lip to grab the rail and the rail was mounted on top of an existing board, we secured a matching piece of scrap wood on the lower part of the wall which lined up with the bottom of the cabinet. The width of the cabinet frame helped us set the vertical plywood to get the right distance for the shelves above.
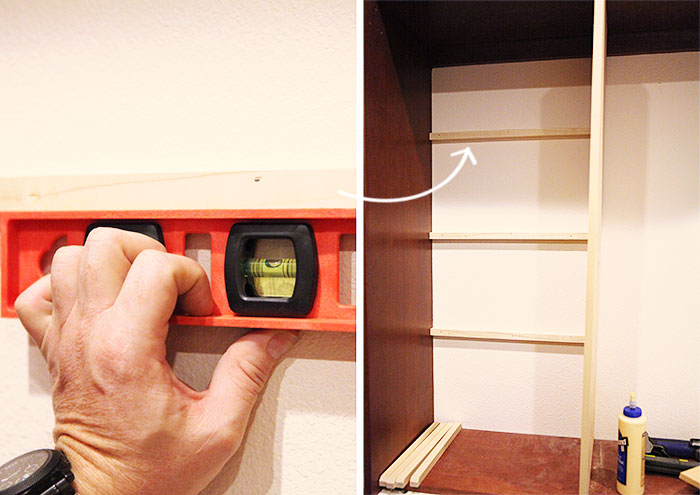
To put up the shelves, we first put up the back support using a short level, glue and nails.
Next, we lined up the back of each side support and used a level again, then nailed the supports into place.
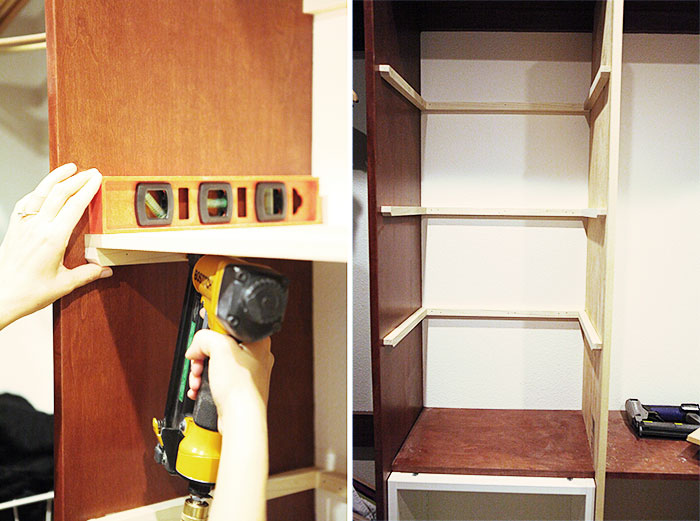
We added the shelves and nailed them to the supports with our pin nailer and finished each shelf with a front trim piece.
For the three shoe shelves, we used the same method except that we attached the side supports at an angle.
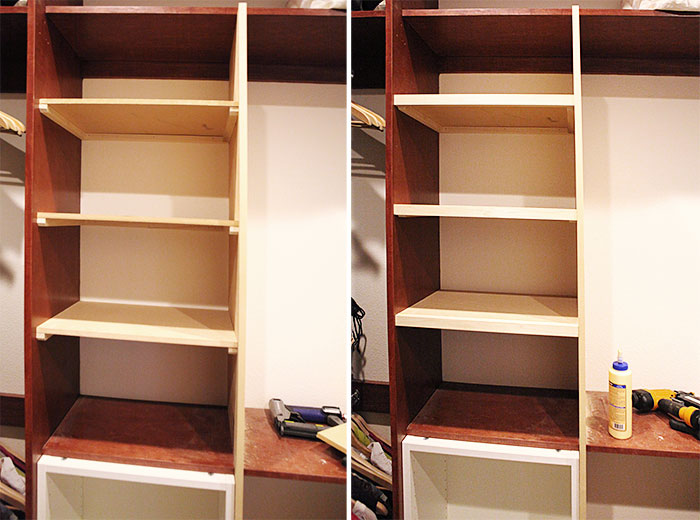
With a few more trim pieces, the new vertical section on my side of the closet was done.
We will remove the IKEA frames and rods before I spray paint the closet.
We still have a couple more shelves to put up, but the most time consuming ones are behind us. I think.
It feels like the closet just grew several square feet!
Next: Master closet progress - paint and hardware installation
Share
This weekend we spent some more time working on shelving for our master closet.
I began this process by making some drawings a couple of weeks ago.
Above is my half of the closet. More open shelving is coming, two units of 4 drawers and 3 shoe shelves, not to mention a hair dryer station with a mirror, forever getting the hair dryer out of the bathroom.
I will still have plenty of hanging space including hanging space for long dresses. So far, so good.
On Frank's side of the closet we are also adding a couple of drawer units and more shelving like this.
The drawer units are 18" wide by 30" tall by 12" deep drawers by IKEA. The drawers are not very deep, which should help keep them organized.
As mentioned in the previous post when we had the attic access moved in here and installed 4 recessed can lights, our closet had no shelves or drawers, but otherwise it was very nice you can see in the above photo.
We cut all the shelves out of 1/2" MDF. We cut a bunch of wood supports for each shelf. We only have room for a 1 inch front trim piece on the existing horizontal partitions due to the position of the rods (if we still want to be able to get the hangers off the rods.). So we decided to go with this width on all the shelves as well. To make the support pieces meet up with the front pieces, we cut a little 45 degree cut on the front of them.
The shoe shelves are being installed at an angle. We added a piece of 1x2 with glue to the back of each of the 3 shelves for shoes. Then we set our skill saw at a 30 degree angle.
After the glue was dry we cut the backs of the shelves with the angled skill saw blade creating a mounting angle on the back ledge.
For my section of the closet we were creating a whole new vertical section with shelves above and a drawer unit below. From a sized piece of 3/4" plywood, we cut a ridge to grab the existing shelf and notched for the existing wall mounting boards. During transport up and down the stairs while dry-fitting this piece, we added a bracket with clamps for stability.
We needed to trim a piece to finish the front of the plywood.
With this set-up we could push the piece through from one side, then pull it from the other side. All digits at a very safe distance.
Next, we put together the first IKEA frame and then mounted the hanging rail on the wall.
Because this IKEA frame has a lip to grab the rail and the rail was mounted on top of an existing board, we secured a matching piece of scrap wood on the lower part of the wall which lined up with the bottom of the cabinet. The width of the cabinet frame helped us set the vertical plywood to get the right distance for the shelves above.
To put up the shelves, we first put up the back support using a short level, glue and nails.
Next, we lined up the back of each side support and used a level again, then nailed the supports into place.
We added the shelves and nailed them to the supports with our pin nailer and finished each shelf with a front trim piece.
For the three shoe shelves, we used the same method except that we attached the side supports at an angle.
With a few more trim pieces, the new vertical section on my side of the closet was done.
We will remove the IKEA frames and rods before I spray paint the closet.
We still have a couple more shelves to put up, but the most time consuming ones are behind us. I think.
It feels like the closet just grew several square feet!
Next: Master closet progress - paint and hardware installation

About Katja Kromann
I am a Danish American decorating life in Seattle. I love all things design and DIY.
I can’t think of anything more fun than coming up with project, making it, photographing it and sharing it with you on my websites.
Since 2018 I have been making Ceramics, nearly full time.
AHomeForCeramics.com AHomeForDesign.com AHomeForCrafts.com AHomeForFood.com My Portfolio