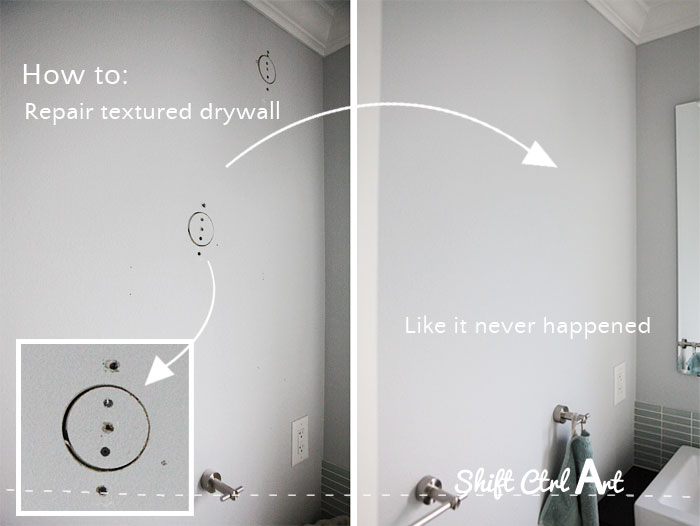
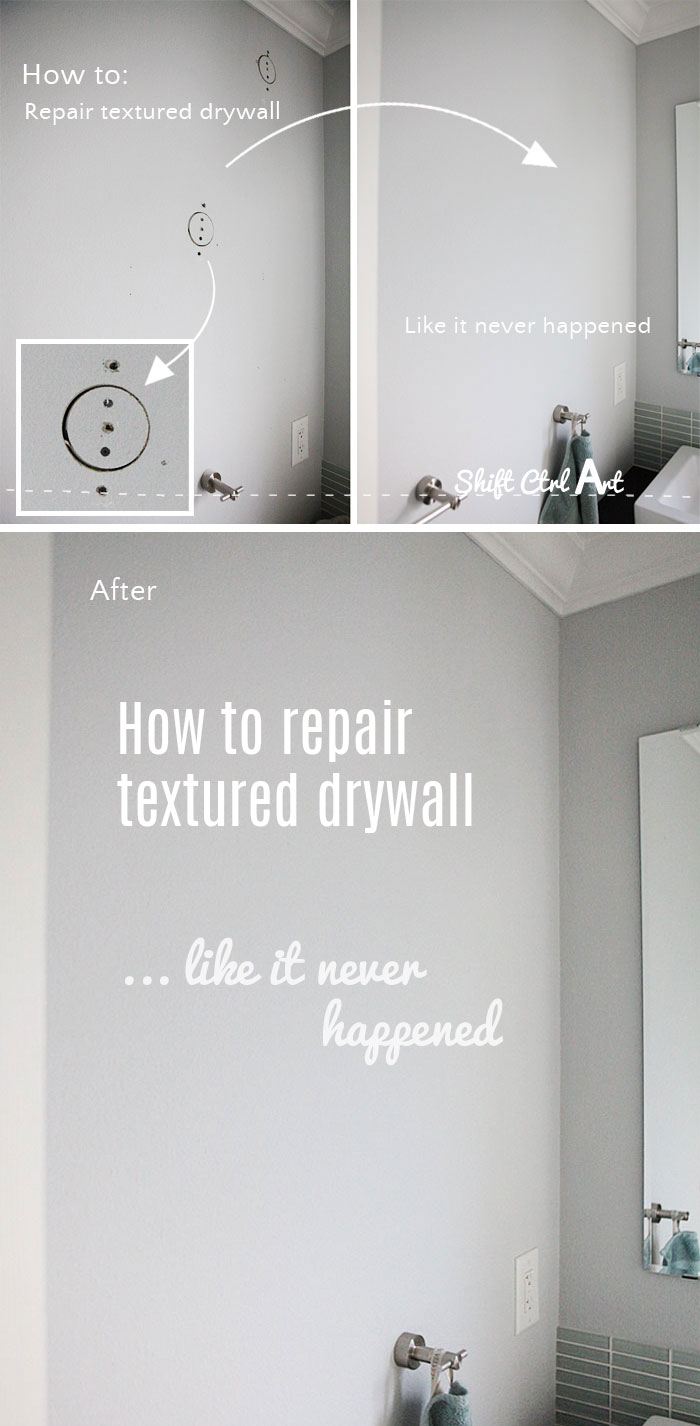
How to: repair textured drywall like it never happened

Last weekend we got a TV in the kitchen. We had already wired for it when we remodeled our kitchen, but don't ask me how it happened, we had used a wrong AV cable that would connect the TV with the Cable box. Womp womp.
I am going to show you all about the kitchen side of this adventure in a separate post. In this post, I want to show you how we successfully patched and repaired the holes in the wall after we pulled the new cable through.

We used a hole saw that attaches to your drill to cut round holes right next to the studs where we needed to pull through the wires. We saved the cut-out for the repair.
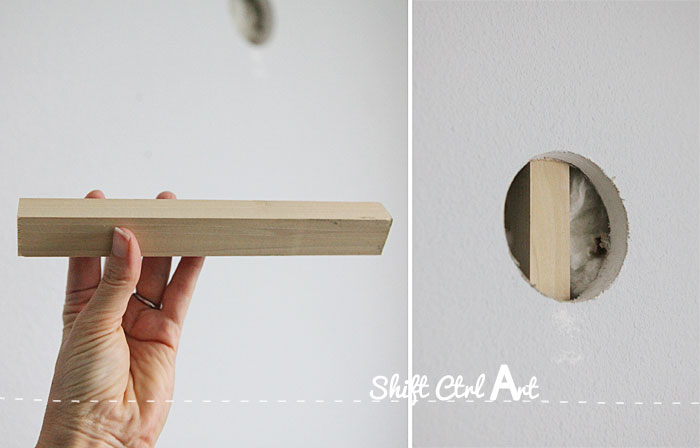
After the wires were pulled, and after testing that everything worked, we used some spare pieces of wood that we inserted into the cut outs. Small tip: Hold on to this stick while you attach it above and below the hole, or it could fall to the bottom of the wall never to be seen again. Don't ask me how I know this

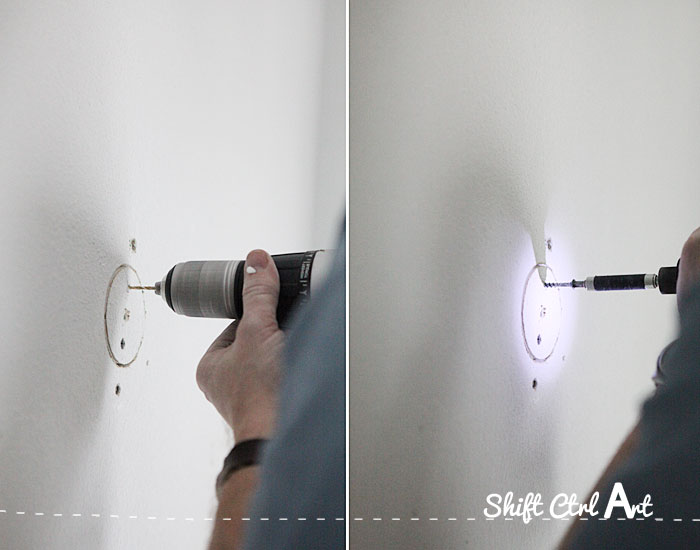
We pre-drilled holes into the stick to avoid splitting the wood and then secured it with drywall screws. It's tempting to screw through the center hole, but it is a much better choice to screw through new drywall and in two places inside the circle so that it can't spin around.
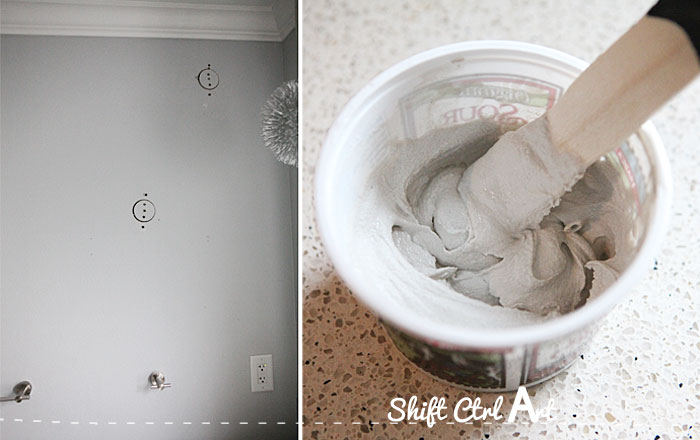
Make sure that none of the screws stick out and can get caught on the spatula. No amount of spackeling can hide a screw that hasn't been counter sunk in deep enough. I used "45 minute" drywall compound. This has a somewhat quick drying time and you can work with it for about 30 minutes before it sets. You can also buy "20 minute" if you are in a hurry
 .
.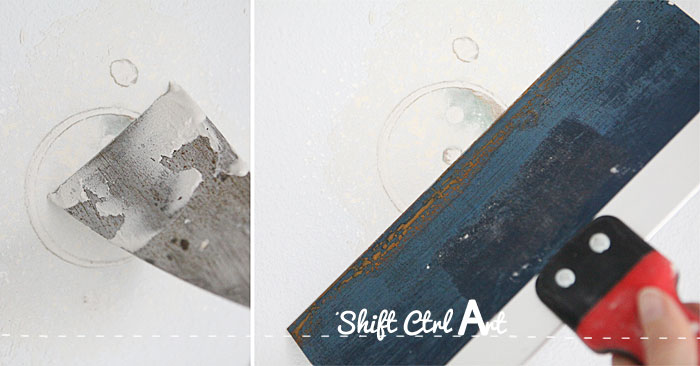
I used two spatulas. A smaller one that fit inside my container to get the mud onto the wall and a larger one that is wide enough to fit comfortably over the entire area to avoid any dips or mountains. For the first round of mud especially, scrape off as much as possible. You don't want any build up. But really, you don't want to create any build up at any of your passes.
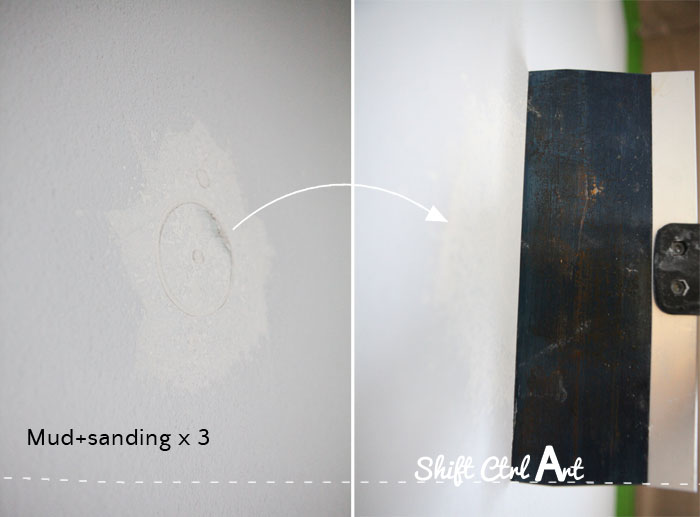
The thing you have to accept with drywall compound is that it takes three passes with drying and sanding in between to truly get passed the "sunken" look. Once you accept that - and there is a 12 step program for that, I think - it's much easier to do this type of repair and get a great result. I checked my work with the large spatula after the third pass like this (on the right) to make sure I had neither a mountain nor a valley. When you run your fingers over the area at this point, other than it being smooth and not textured, you are not supposed to feel any difference in height.
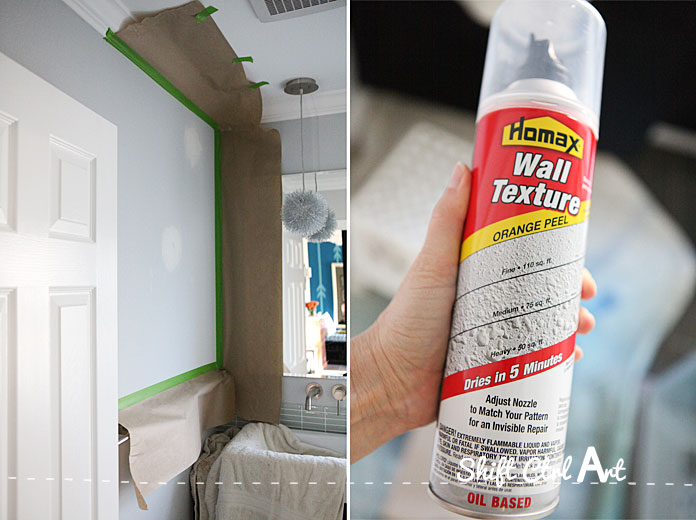
Next, I taped off around my repair and got out my texture spray can. I have a very light texture on my walls, so I set it to "fine" by turning the tap at the top to "fine". I know ... rocket science.

Then I tested the spray on a scrap piece of paper before spraying a very thin layer on my repaired spots. I feathered out quite a bit going lighter and lighter as I fanned out. This is really key to getting a good result. Don't just spray over the repair.

Here you can see how my repair is almost covered but not gunked up by the texture on the left. On the right, I gave it a very, very, very light sanding and then primed it. I feathered out the primer as well to hide any edges.
Then I came back and did two coats of the bluish gray paint which is Valspar's Silver Setting in a flat finish.
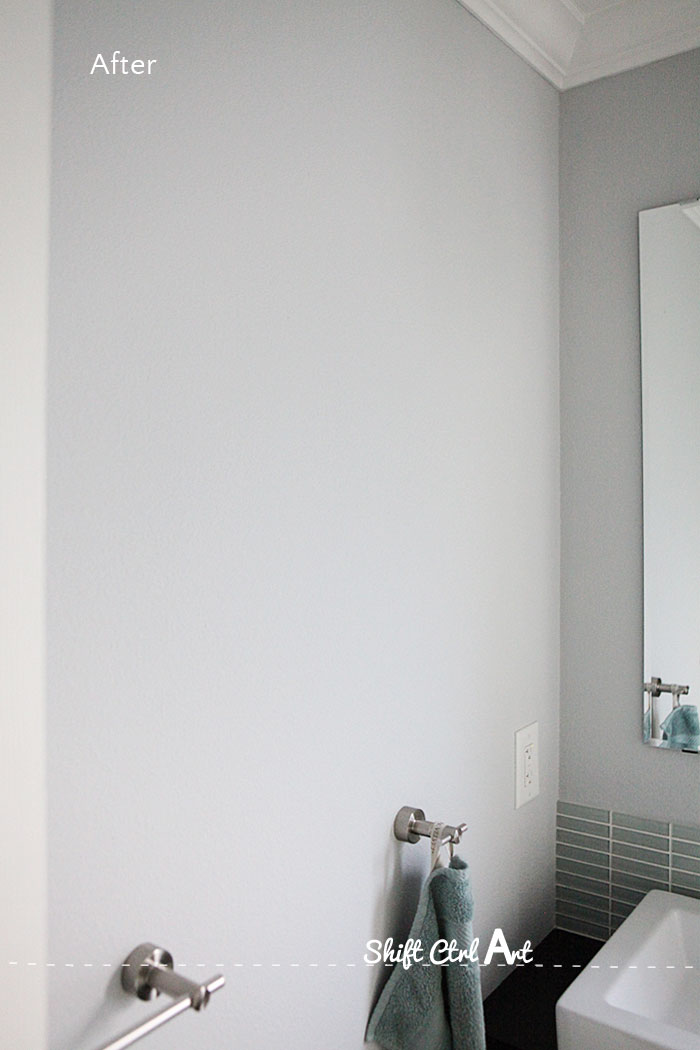
And here is the finished wall ready for artwork. I am working on something new for this wall.
Read all about our bath remodel: here, here, and here.
In the mood for more bathroom remodel? We started demoing the master bathroom a couple of weeks ago.
I loved this new found passion for texturing so much I re-textured a wall in the garage in preparation for my upcoming post about our Laundry nook out there. It's coming together. I am so excited.
Next: How we installed a TV in our kitchen.

About Katja Kromann
I am a Danish American decorating life in Seattle. I love all things design and DIY.
I can’t think of anything more fun than coming up with project, making it, photographing it and sharing it with you on my websites.
Since 2018 I have been making Ceramics, nearly full time.
AHomeForCeramics.com AHomeForDesign.com AHomeForCrafts.com AHomeForFood.com My Portfolio
Categories
How to: repair textured drywall like it never happened is posted in the category


