B's bed with trundle revisited - questions answered
I have had some further questions about how we built this bed for our son B.
These are the posts I have already written on the subject:
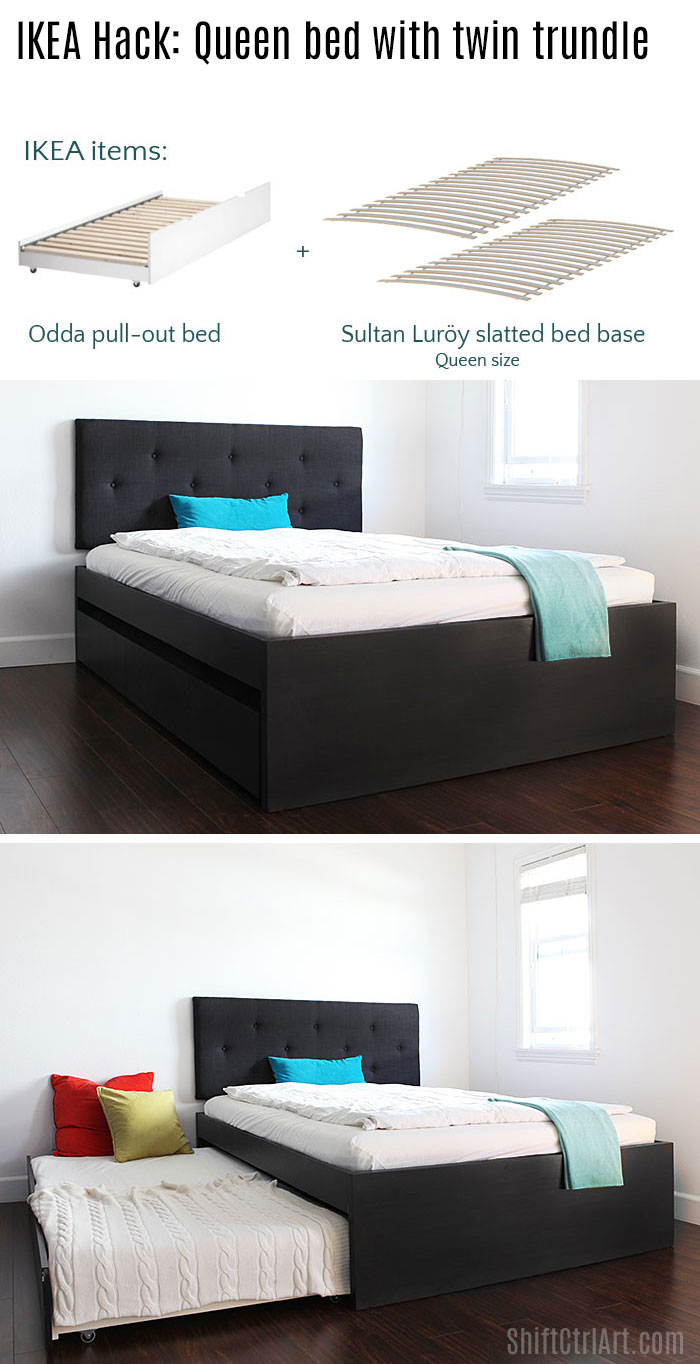
IKEA hack: B's bed with trundle
How to make a tufted headboard
Oil based primer and latex paint - a match made in heaven?
Here are 10 questions that I received from various readers:
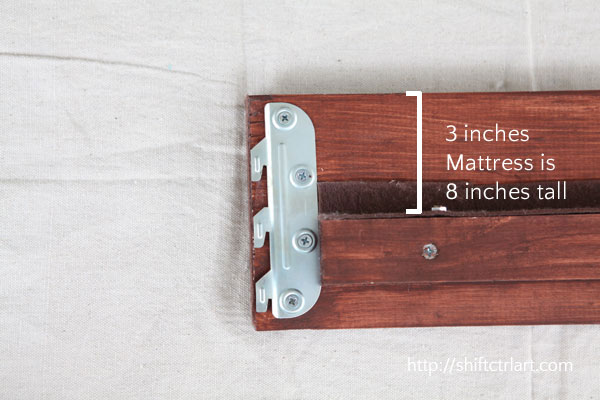
Question 1. How far from the edge of the side boards are the 1x2 strips attached? 1-2 inches?
My answer
We put ours 3 inches from the top. The queen mattress is 8 inches thick. That way you won't hit the board when you sit on the edge of the mattress. If you mattress is less thick, you may have to play around with this measurement for the edge of the bed to be comfortable when you sit on it.
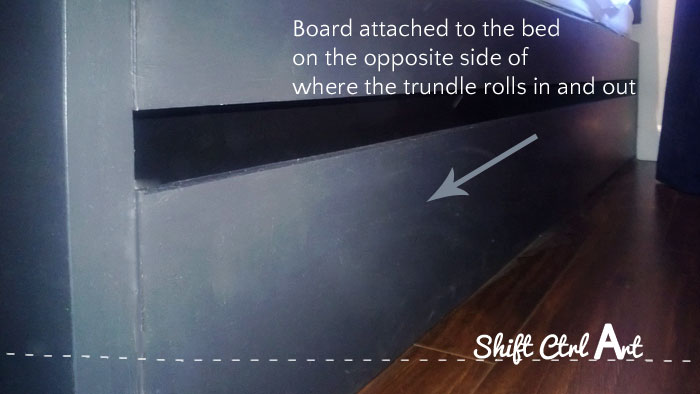
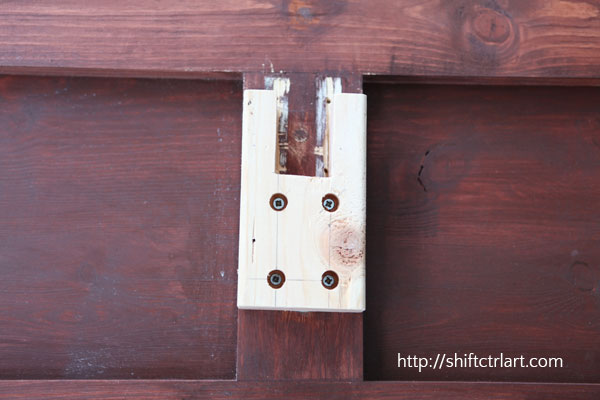
Question 2. You stated in your post "....We did however add that fifth board on the right hand side (not pictured) to secure the bed to a square shape - instead of a diamond shape if you pushed on it" where did you install the fifth piece? could you send me a picture?
My answer
That board is screwed into the other side of the bed and looks like the front of the trundle, but it does not pull out.
You can see the board here when I painted it - at the top of the picture:
Here is a picture of the board attached to the bed.
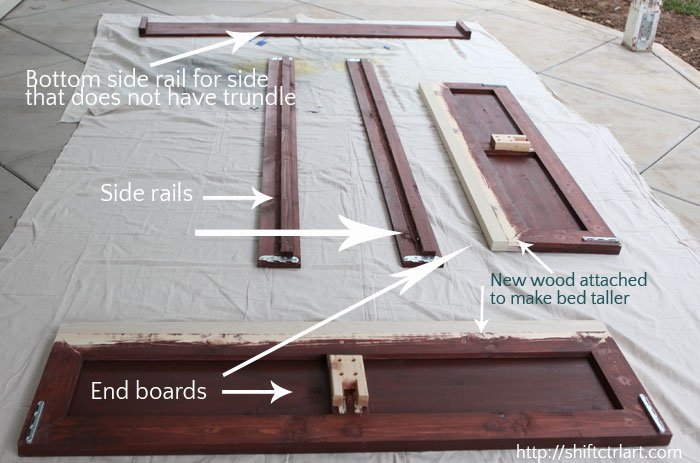
Question 3. The end boards had trims attached to them (all around 4 sides) I'm guessing to make them stronger. What are the dimensions of those strips and were they glued? if so what kind of glue did you use?
My answer
We uses 1 x 4s to build around the ends to make them more solid and strong. We used regular wood glue and screws.
Here is a better look at how the wood was attached - see the two end boards.:
As you can see we later had more wood added to the bottom of the end boards to make the bed taller. We did this because the original center T-post was made out of 1x3. We later changed that to 2x3s which meant that the trundle no longer cleared the T-post. Making the bed a couple of inches taller fixed this. More info about that here.
Question 4.What size of screws did you use throughout the project? and what tools are needed ?
My answer
We used wood screws. I want to say #8 or #10 screws that were 1 inch long. Maybe 1 1/4.
We always do a test first with two pieces of wood to make sure the screw doesn't go through. The longest screw that doesn't poke through on the other side is what you should use. It will also depend on how much you counter sink the screw heads.
Sorry I can't be more specific than that as it is almost 5 years ago that we built this bed...
Question 5.I know that you had to cut the side board of the ODDA bed did you need a saw table? or did Home Depot cut it for you?

It looks like the Odda trundle has a new name: FLAXA. We cut it down by attaching a long piece of wood with our clamps similar to this one. then we ran our circular saw along the piece of wood using it as a guide. When I say "we", I mean my super duper handy husband "dh"
Question 6. Also, I love the finish of the bed and would like to get the same paint color. Could you please tell me what color and brand did you use?
My answer
I featured the entire painting process in my post Oil based primer and latex paint - a match made in heaven?.
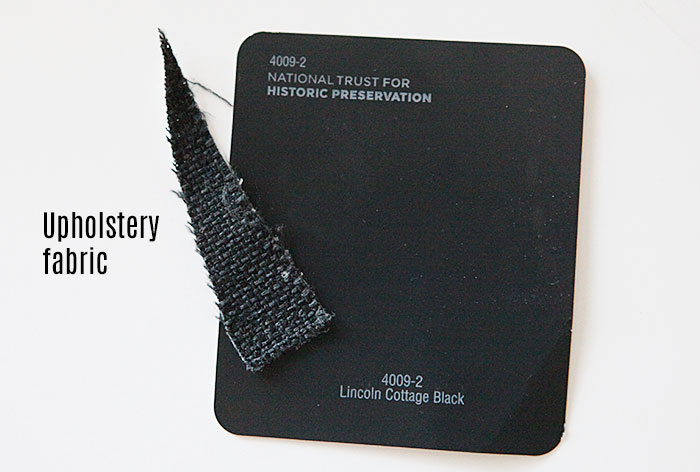
For the primer, I used Zinsser oilbased cover stain. The paint I used was Valspar's Lincoln Cottage Black in satin finish. I matched it to the fabric I used for the headboard later. The headboard was a separate project and is not attached to the bed.
Question 7. How much would this project roughly cost?
My answer
Sultan Florvåg. $79
Sultan Fåvang. $329
FLAXA - $99
Surface mounted bed rail brackets by Rockler. $17 - I got them during a free shipping promotion. You may have to add shipping.
Lumber, glue, screws, sand paper, paint - around $200-$300 - this was a project we did almost 5 years ago now, so I am going by what I remember. Also lumber prices vary from state to state, I think.
Question 8. Thank you so much for posting this! I have been searching and searching for this kind of sleeping solution for our vacation cottage and had come to the conclusion that a queen bed must not be stable enough without support legs in the middle down to the floor (which then blocks the space where the trundle would go). Do you think this bed would be secure with 2 adults sleeping in it?
My answer
The short answer is that, yes, this bed would be secure with 2 adults.
The longer answer: The upgrade we did with the center post is extremely solid. For the width of the bed, as I mention in the post, I would make the measurements 62 inches wide instead of 61.5 inches to better accommodate the slats. Also, if I had to build the bed again, I think I might laminate two 1x6s together for the sides instead of having only one. And then adjust the measurements of the head and foot board accordingly.
Our upgraded center post made out of 2x3
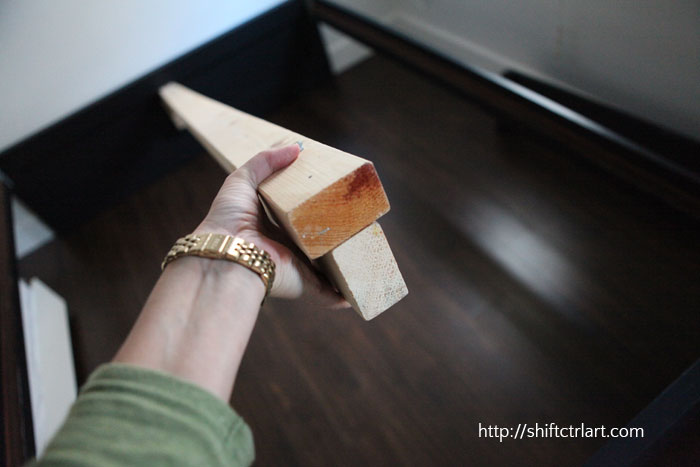
And our upgraded T-post holder made out of 2x4
Question 9. I am thinking about replicating your hack for more flexible bedding arrangement for a beach house room regularly used by my wife and I, our daughter (now 2) and new baby (3 wks). I have a question on the construction of the end boards?
Are these made with 1 base piece of wood (62x18) and then with a framing of 1x6 (?) all the way around and down the middle?
How is the end board constructed, wood pieces attached- wood glue, screws?
My answer
Yes we used 1 base piece like you are describing and 1x4 as a frame and down the middle. We put everything together with glue and screws
As I mention above, I might double up on the side rails - yes we did use 1x6 for those. It's not really needed, but it would sturdy it up just that one bit more. If you do double up, you would have to lengthen the end boards accordingly by 2 x 3/4 inch. (63 1/2 in). Be sure to tripple check those measurements with the actual slats you are getting.
Question 10. Hi, thanks so much for sharing this, its brilliant and I think this is definitely the solution I've been looking for. For the main bed (the Queensize) would you suppose using a default IKEA frame (i.e: MALM-the high bed frame, Brusali, and Brimnes) would be suitable for the Odda trundle you used (assuming the side of the Odda is cut/lowered like what you did)? Unfortunately there's no IKEA shop in our city so will need to travel or order online, but I noticed from the Assembly instructions of those 3 Queensize frames there didn't seem to be any 'middle leg' that might get in the way of the trundle. Appreciate if you could perhaps share some advice. Many thanks!
My answer
I don't know the answer to those beds specifically, but when I looked at IKEA I did not find a good solution for buying one queen bed and then pushing a trundle under it. And I did look because that would have been so easy, right  So when I didn't find one that worked, that is when we went ahead and designed this one instead.
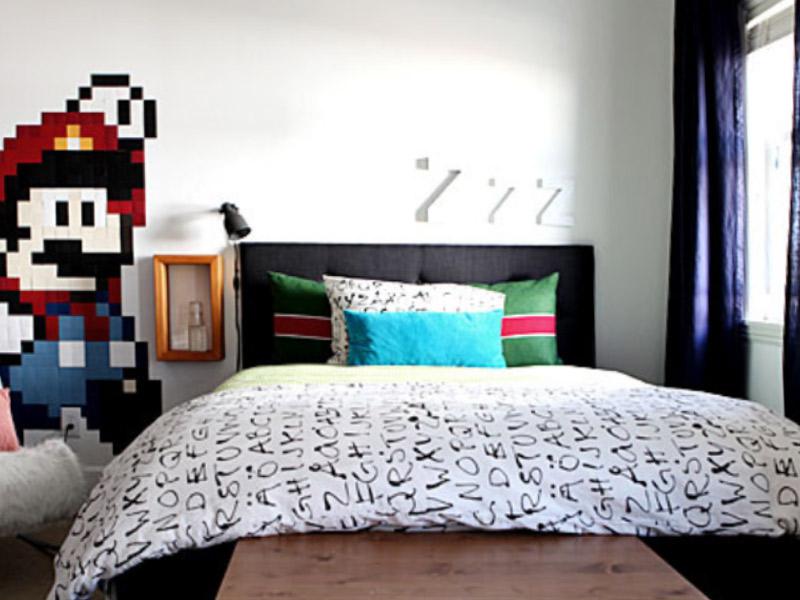
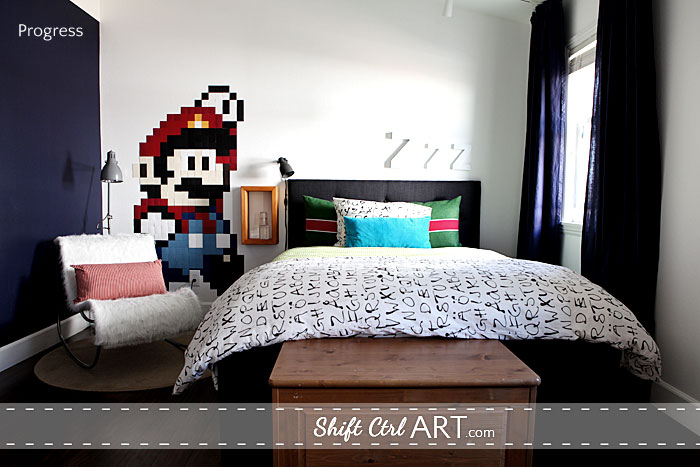
And here the bed is again with the trundle under the bed and pulled out.
Let me know if you have more questions and I will tack them on to this post.

I am a Danish American decorating life in Seattle. I love all things design and DIY.
I can’t think of anything more fun than coming up with project, making it, photographing it and sharing it with you on my websites.
Since 2018 I have been making Ceramics, nearly full time.
AHomeForCeramics.com AHomeForDesign.com AHomeForCrafts.com AHomeForFood.com My Portfolio