DIY picture hard ware: Quatrefoil mirror on the side
Last week I found this quatrefoil shaped mirror at HomeGoods. It was only $29.99. I have been looking for a new mirror for over the fireplace for a while. The one I had, I had since forever. And with our fireplace remodel being rather minimalist, I thought it needed a bit more interest instead of just an oval.
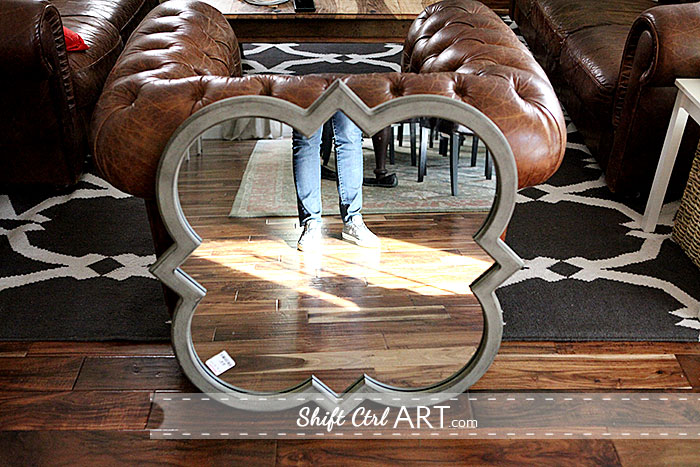
Here is the new mirror.
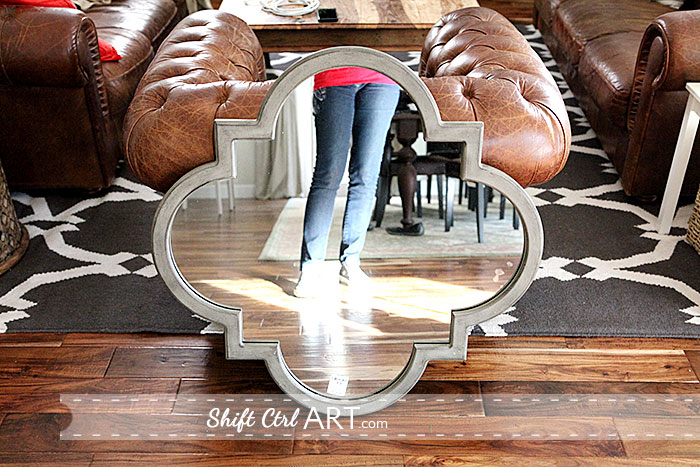
Only one thing ...
I wanted to hang it like this. On the side. I think that looks much more interesting.
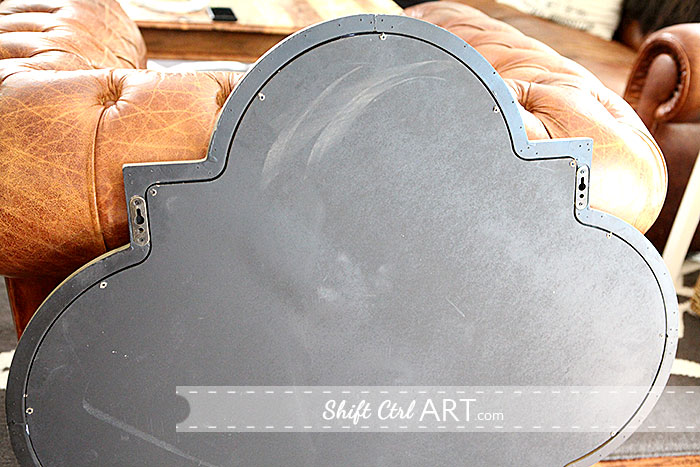
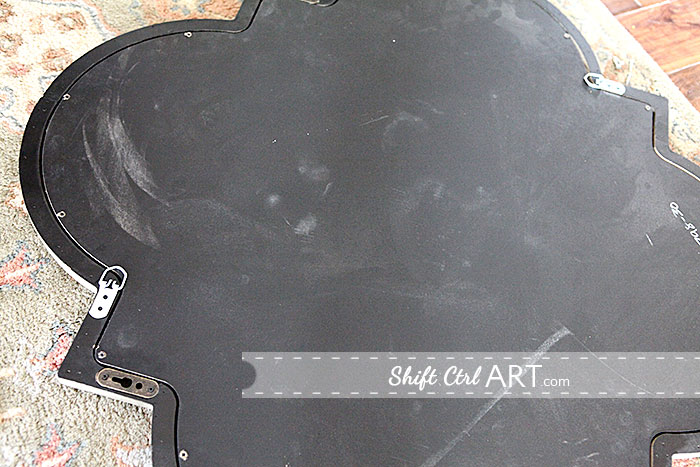
Turning over the mirror you can see that the manufacturer did not have that same idea. The hanging hardware was for the more conventional hanging method.
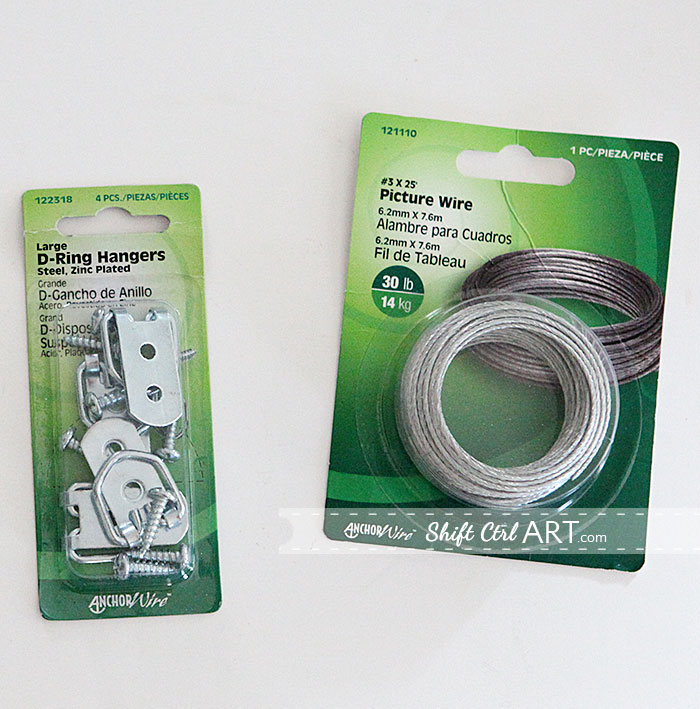
So I skipped down to Lowe's and got my self some D-ring hangers and some picture wire. I like skipping.
I decided to place the D-rings like this to have the best directional pull on the screws.
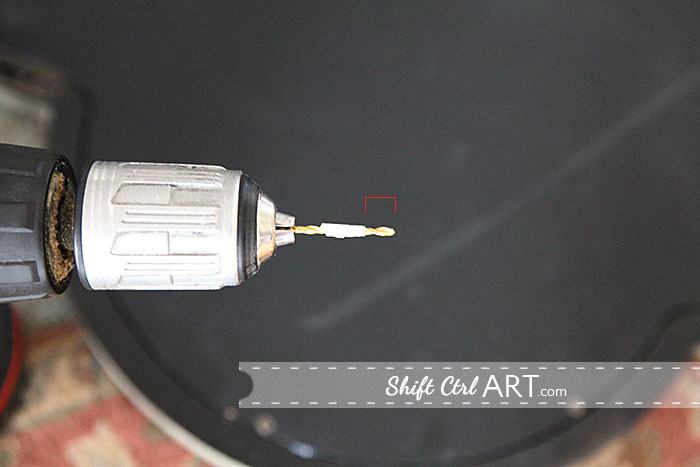
Then I went to pre-drill the holes so thewood mdf would not splinter. I put a piece of masking tape on the drill so I knew how far I could go without poking through on the other side.
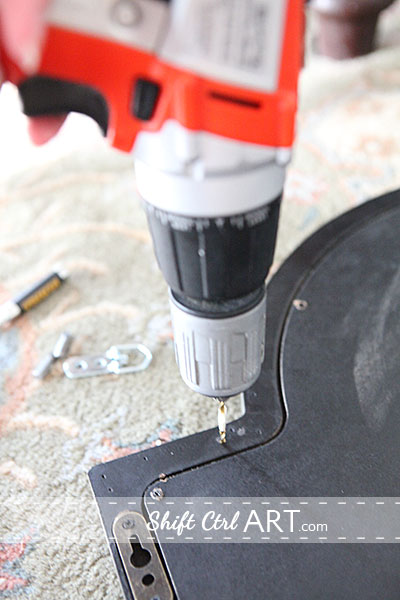
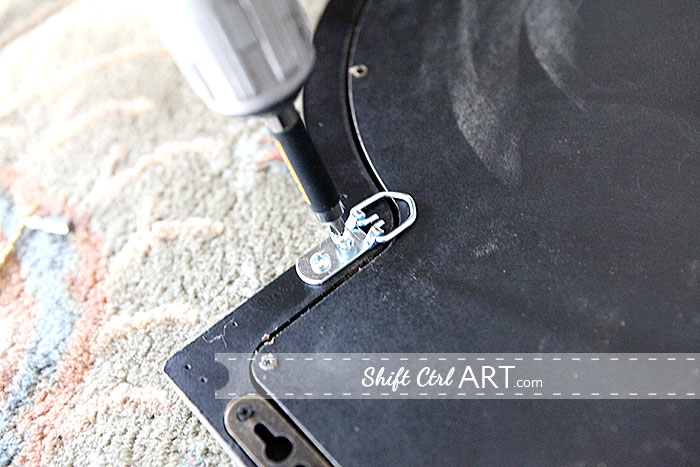
Then I drilled the four marked spots.
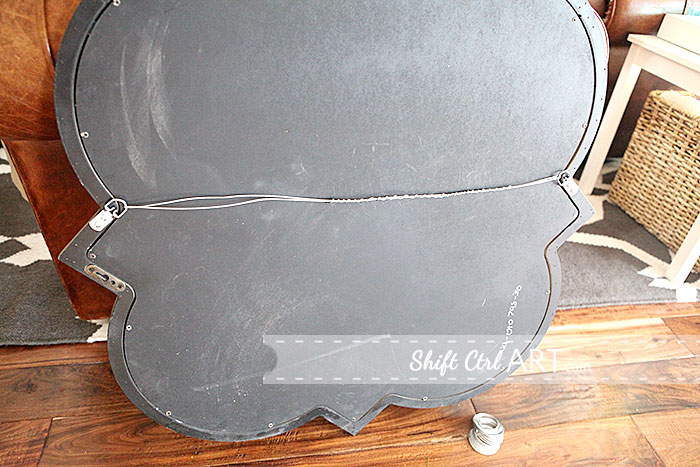
And screwed in the d-rings into the frame.
Next I took a length of picture wire and put through the d-rings and twisted it a couple of times. I off-centered the twist so it would not sit directly over the screw that I would later hand the mirror from.
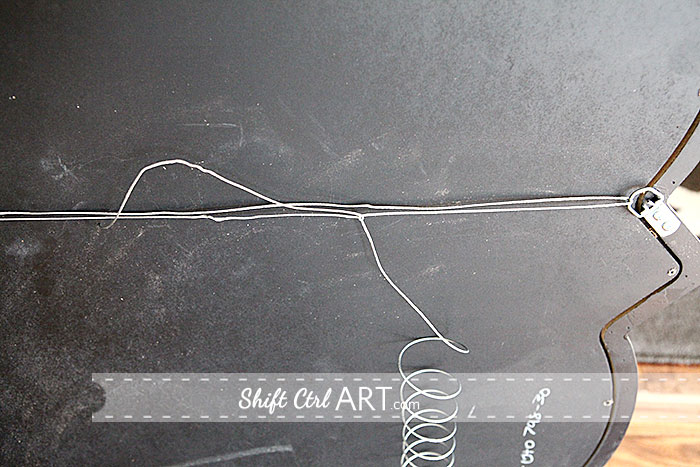
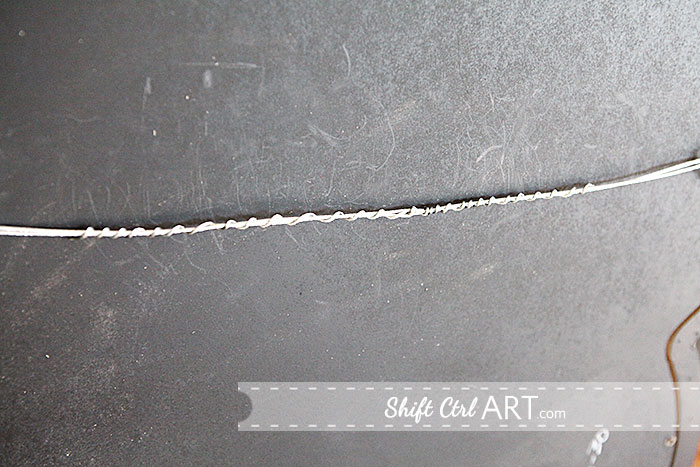
Then I cut the picture wire with pliers and twisted the ends around both wires neatly and closely together.
Here is a close-up of that.
Then I lowered the drywall screw in the wall and hung my new mirror.
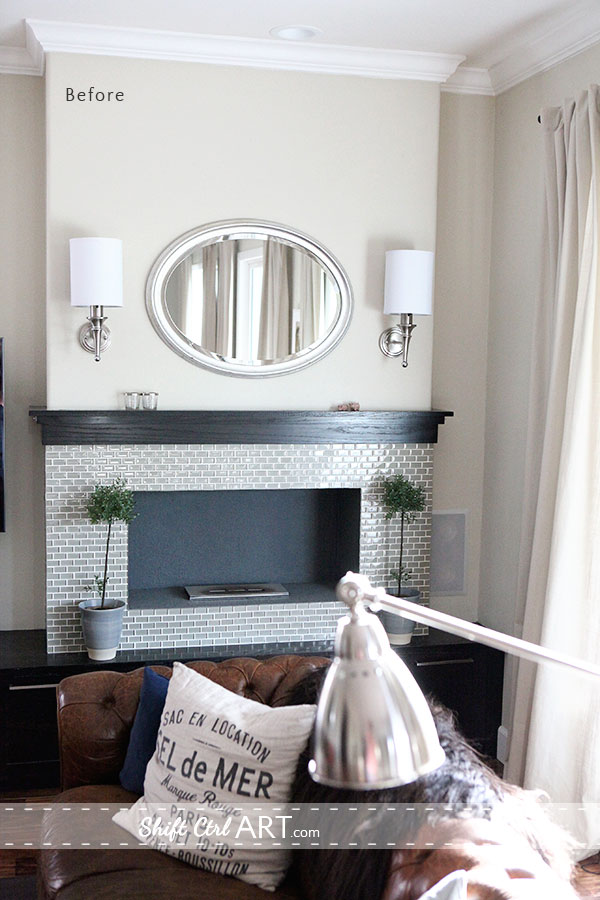
Here is what it looked like with the old oval mirror.
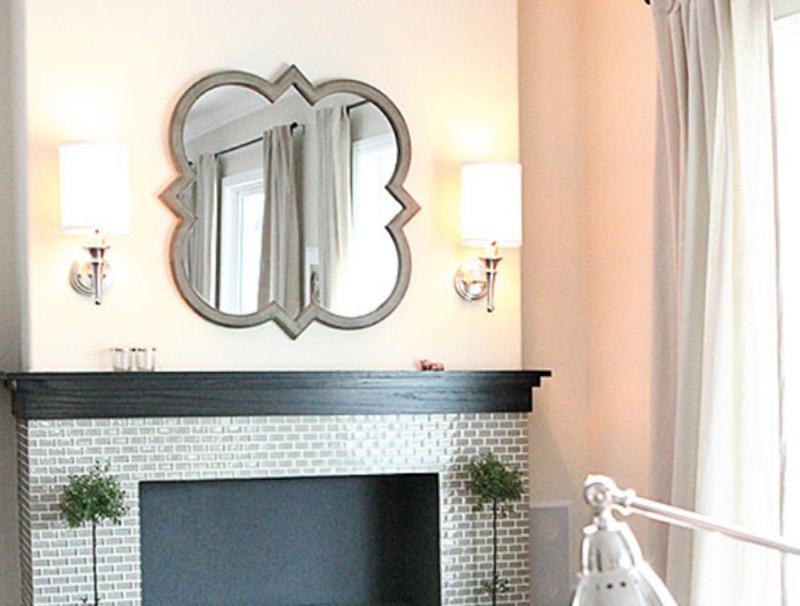
And here is my new quatrefoil mirror on its side.
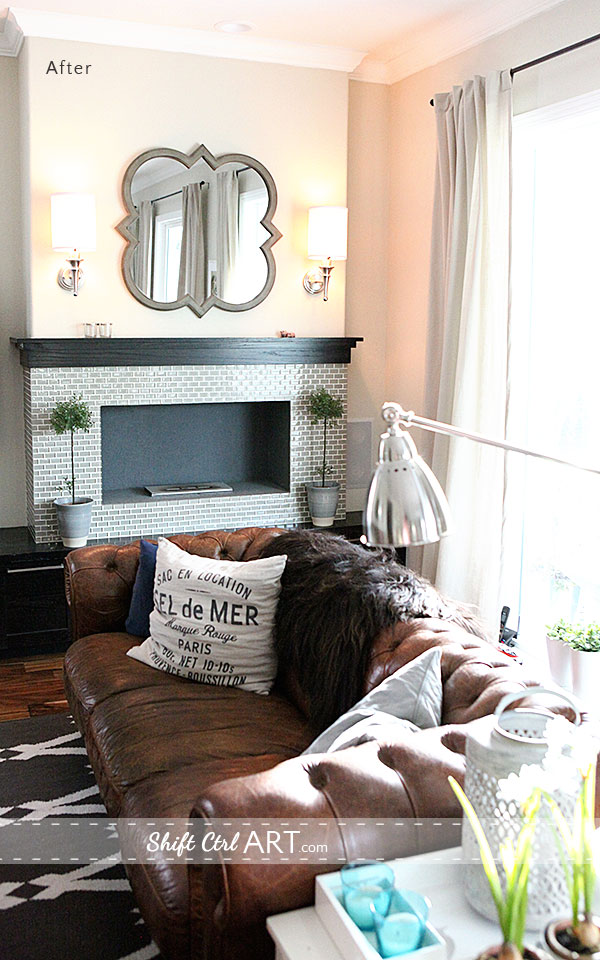
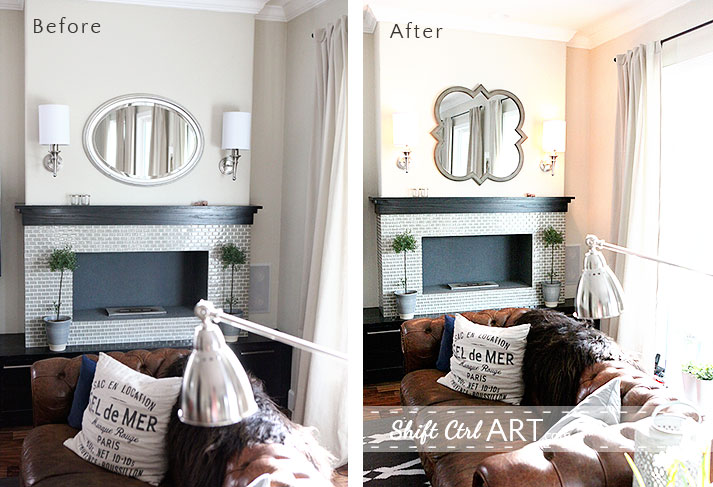
And side-by-side. Much better now, I think.
The oval mirror went up in one of my bathrooms that did not have a mirror.
I think it looks much more interesting with the new shape. It has kind of a { } feeling...
Share
Here is the new mirror.
Only one thing ...
I wanted to hang it like this. On the side. I think that looks much more interesting.
Turning over the mirror you can see that the manufacturer did not have that same idea. The hanging hardware was for the more conventional hanging method.
So I skipped down to Lowe's and got my self some D-ring hangers and some picture wire. I like skipping.
I decided to place the D-rings like this to have the best directional pull on the screws.
Then I went to pre-drill the holes so the
Then I drilled the four marked spots.
And screwed in the d-rings into the frame.
Next I took a length of picture wire and put through the d-rings and twisted it a couple of times. I off-centered the twist so it would not sit directly over the screw that I would later hand the mirror from.
Then I cut the picture wire with pliers and twisted the ends around both wires neatly and closely together.
Here is a close-up of that.
Then I lowered the drywall screw in the wall and hung my new mirror.
Here is what it looked like with the old oval mirror.
And here is my new quatrefoil mirror on its side.
And side-by-side. Much better now, I think.
The oval mirror went up in one of my bathrooms that did not have a mirror.
I think it looks much more interesting with the new shape. It has kind of a { } feeling...

About Katja Kromann
I am a Danish American decorating life in Seattle. I love all things design and DIY.
I can’t think of anything more fun than coming up with project, making it, photographing it and sharing it with you on my websites.
Since 2018 I have been making Ceramics, nearly full time.
AHomeForCeramics.com AHomeForDesign.com AHomeForCrafts.com AHomeForFood.com My Portfolio


Categories
DIY picture hard ware: Quatrefoil mirror on the side is posted in the category Before & After | Decor | Living room


