IKEA transformation: How to DIY an upholstered bedframe
Today I am revisiting our green guest room reveal where two of the 11 DIYs we made for the room was designing the green leaf fabric and upholstering an inexpensive bed from IKEA. You can read all about how I designed the fabric here. Now let me show you how I upholstered the bed frame start to finish with sources on everything I used for this project.

There are two parts to this. The first one is preparing the bed for upholstery and the second part below is the upholstery itself. Let's dive in.
The bed we used for this project is this bed from IKEA. We chose this because it had an overall very square shape which not only works well with the Mid-century theme we are going with, but it also makes it pretty easy to upholster.
Upholstery prep
We used:
Some scrap 1x3 or 1x4.
Walnut legs - I wish the metal bracket that these came with where a bit more sturdy. If I find some I will update this post. I worry if you weigh more than 250 lbs that the brackets may not hold up. There is a picture close up at the end so you can decide for yourself.
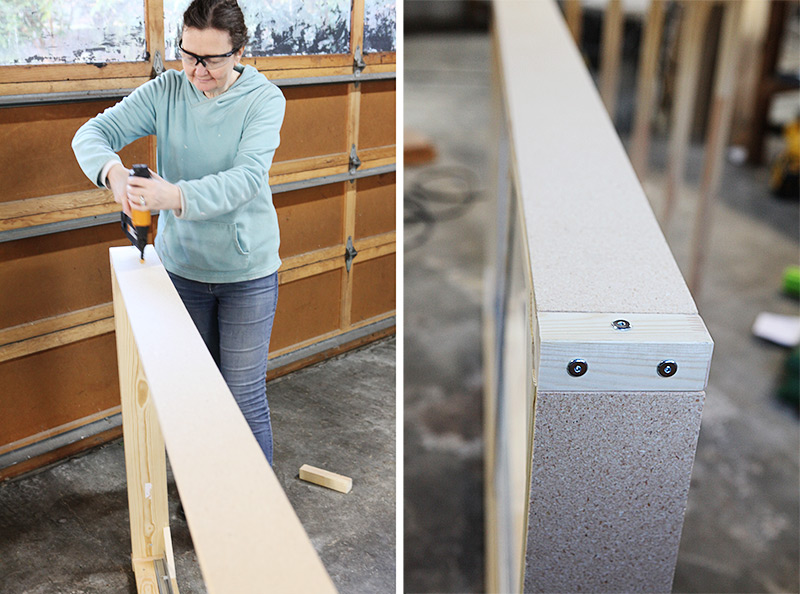
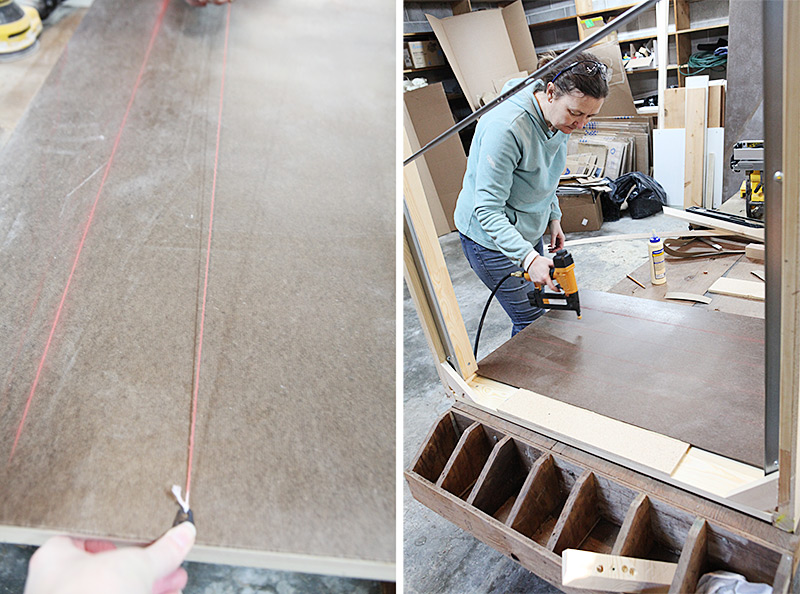
First we cut off the legs of the bed flush with the bed frame. We added some triangle pieces to each corner to hold the new legs and to stabilize the bed. These were cut from some scrap 1x3 material.
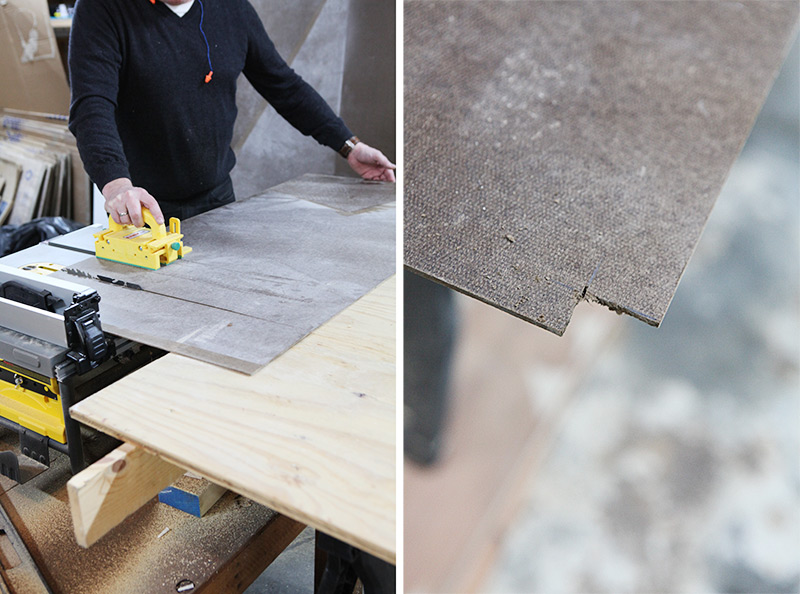
Then we cut down strips for the side rails and the foot of the bed out of 3/8s particle board with our table saw.
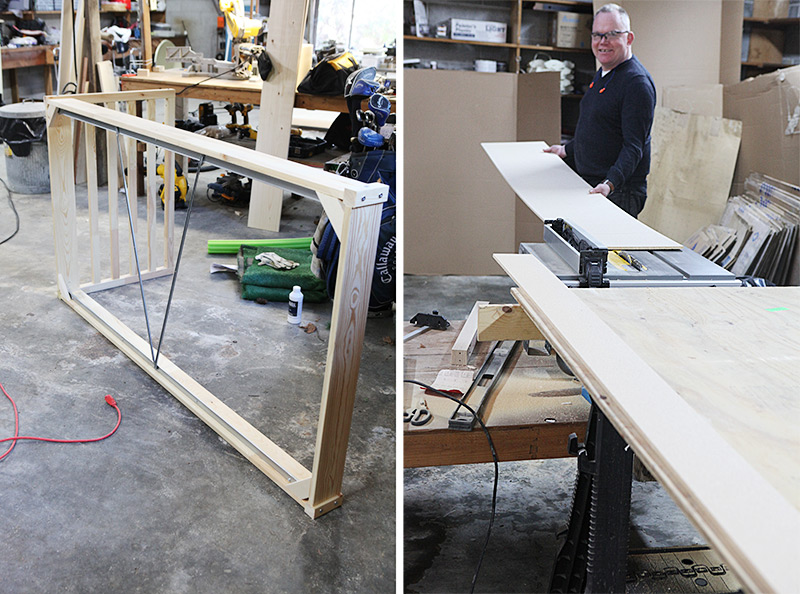
We attached the particle board strips with glue and nails.

This makes the corners and rails come out to the same thickness.
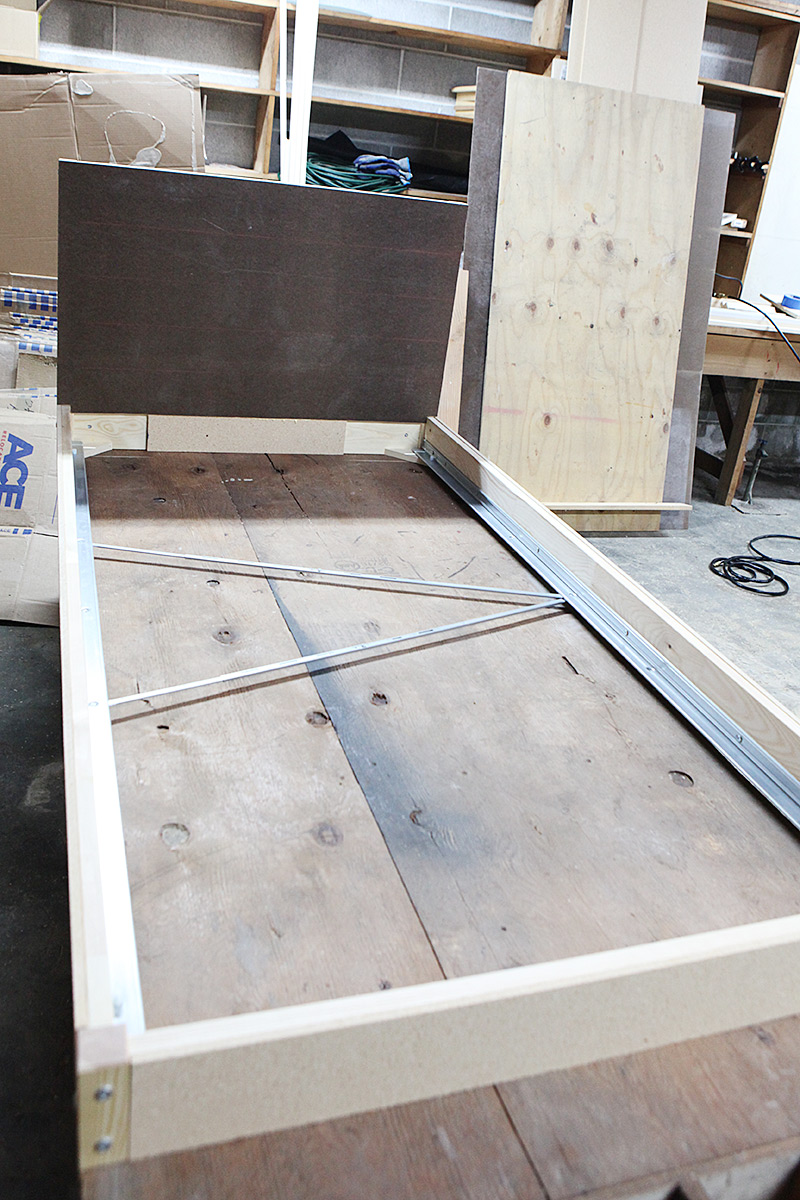
We also added a piece of particle board to the bottom of the head board to catch the bottom of the hard board that we added after that.
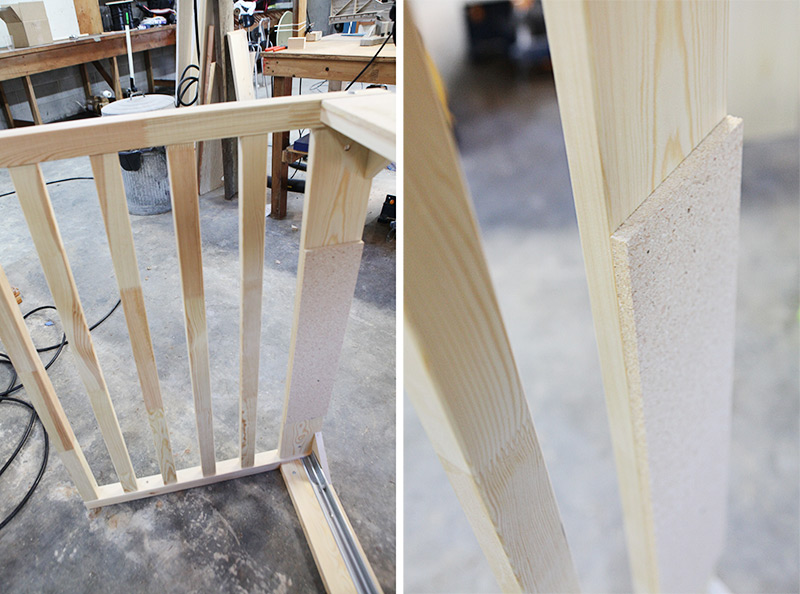
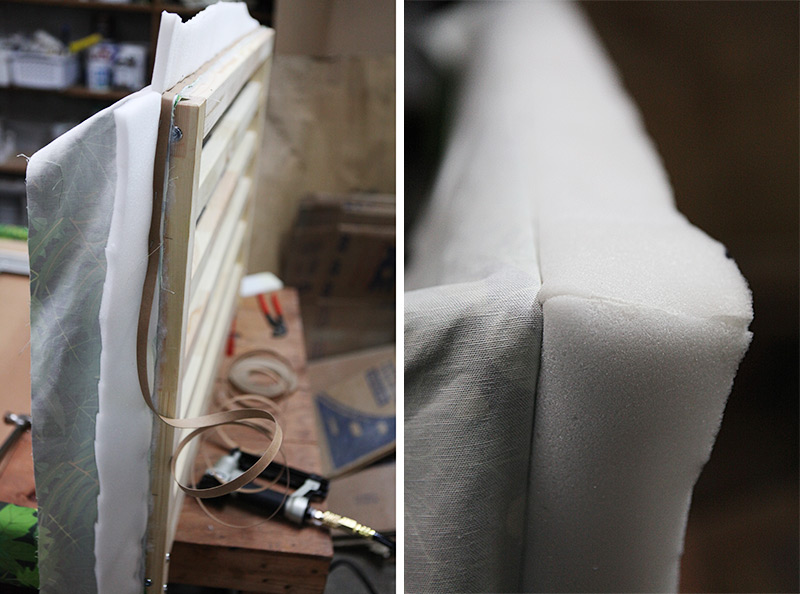
Here we cut the 1/8 sheet of hard board to fit the front of the headboard. We notched out for the side rails. We added this board so that the headboard slats wouldn't eventually show through the foam and fabric.
The interior slats were not level with the frame of the head board, so we added some drywall shims to fur them out.
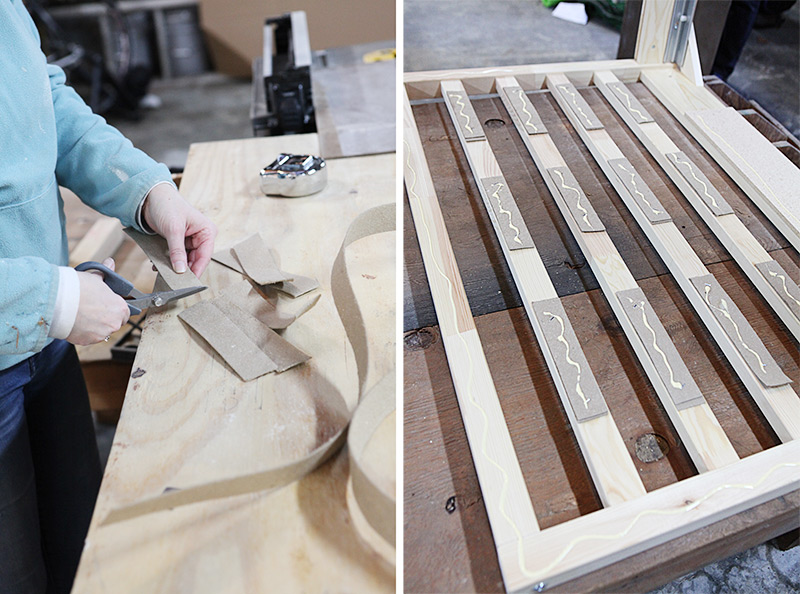
Then we added the hard board on top and glued and nailed it in place. We made some chalk lines along the slats to make sure we hit the nails into the wood.
It took us about an hour to complete these steps and now the bed was ready for upholstery.
Upholstery
I used:
1 inch foam for the head board - I won't be using this source again, so can't recommend and I am looking for a new one.
Upholstery gun - I upgraded to this one specifically for this project and I am so glad I did. Made it go a lot faster and I got more professional results.
Upholstery fabric. I ordered 4 yards for this project. I designed my own fabric.
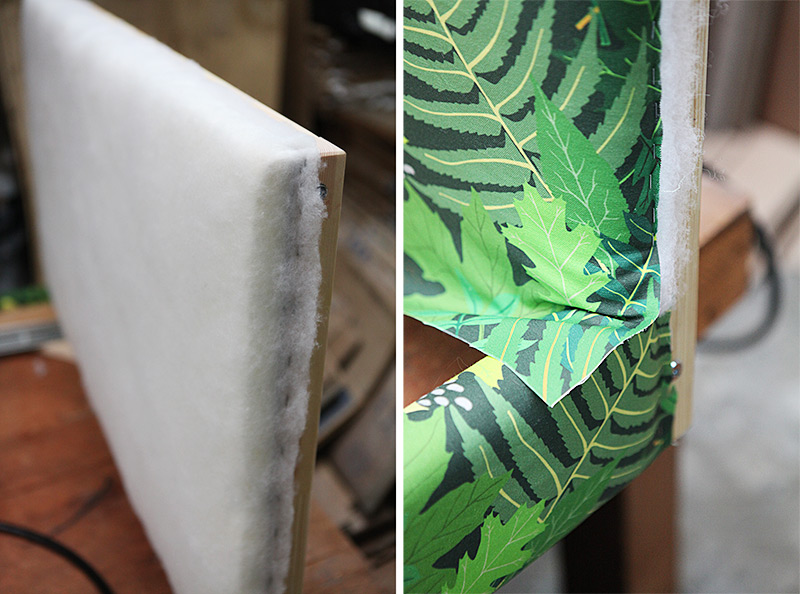
I was very frugal with the 1/2 inch foam so that I would only have to use one bag for the rails and the side of the head board. I only just had enough. I cut it so it only went over the top and sides and a little bit over and under. I stretched it quite a bit. If you don't want to do that buy two rolls instead of one.
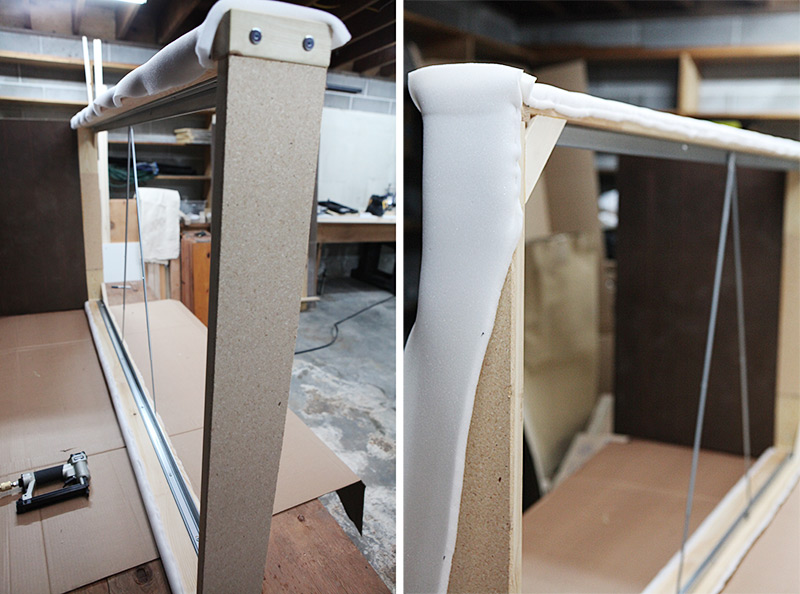
I attached the foam with adhesive spray and also glued the corners together before stapling down. I glued on the 1 inch foam piece to the head board at this point (not pictured). You should probably not use foam that is thicker than 1 inch for this project or the mattress will sit too tightly in the frame afterwards making it difficult to change the sheets. We have a foam mattress in this bed.
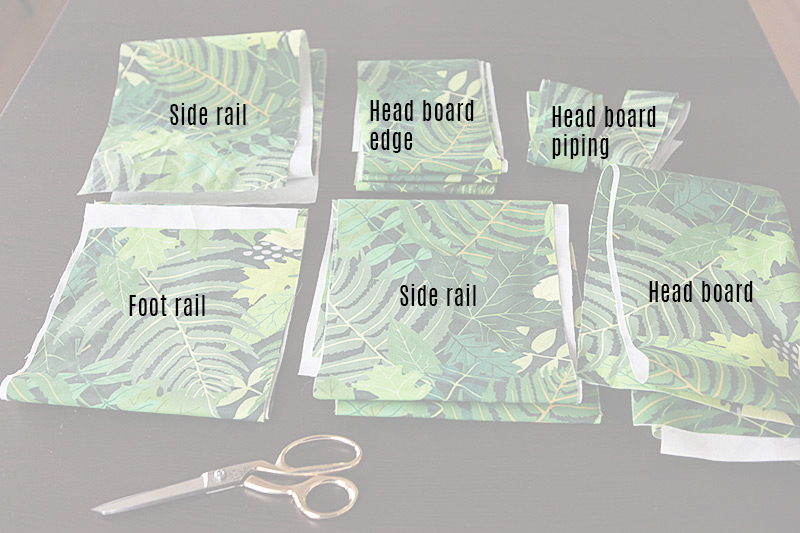
I cut the fabric out like this:
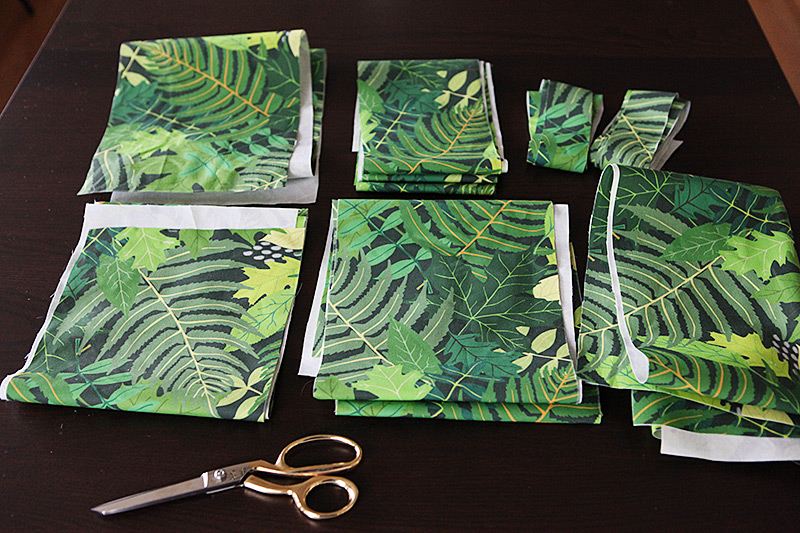
Strips for the rails on three sides of the bed. A large piece for the head board, long strips for the piping and a strip to go around the head board between the two rows of piping. I also had a piece of inexpensive green cotton to finish the back of the head board. (not shown)
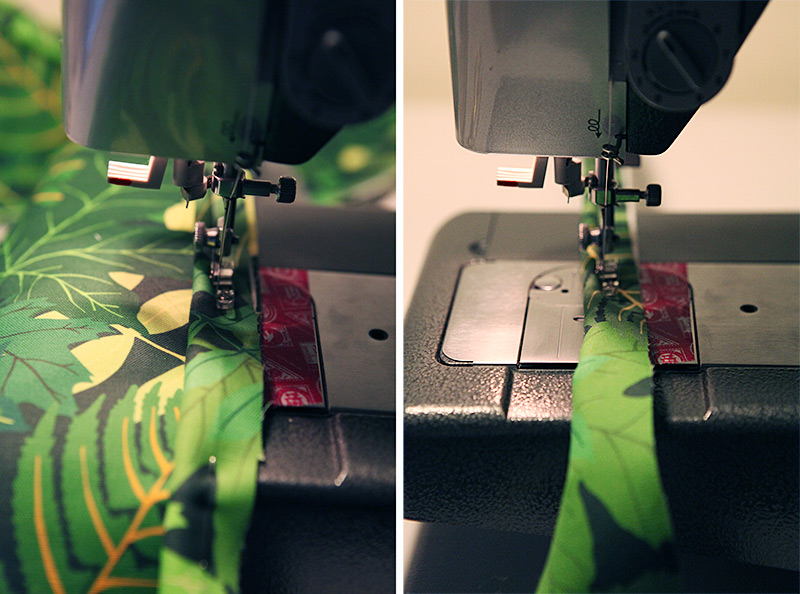
Using the thicker upholstery grade thread, I sewed the piping to the strip that was going around the head board. And I sewed another piece of piping as well. These two pieces will go from the bottom of the headboard on one side of the bed to the bottom of the other side of the headboard along the edge of the headboard and will hide the ends of the fabric that go around the rails of the bed.
I used my zipper foot to sew the fabric closely to the piping chord.
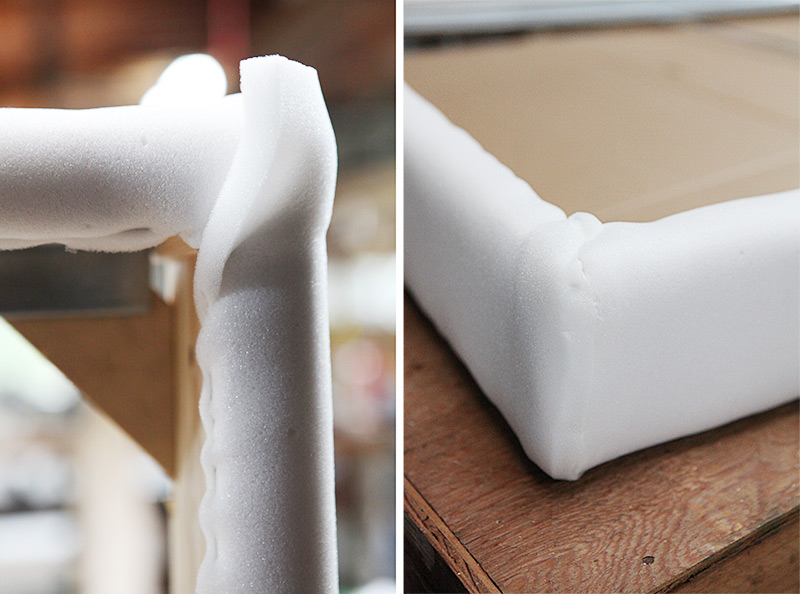
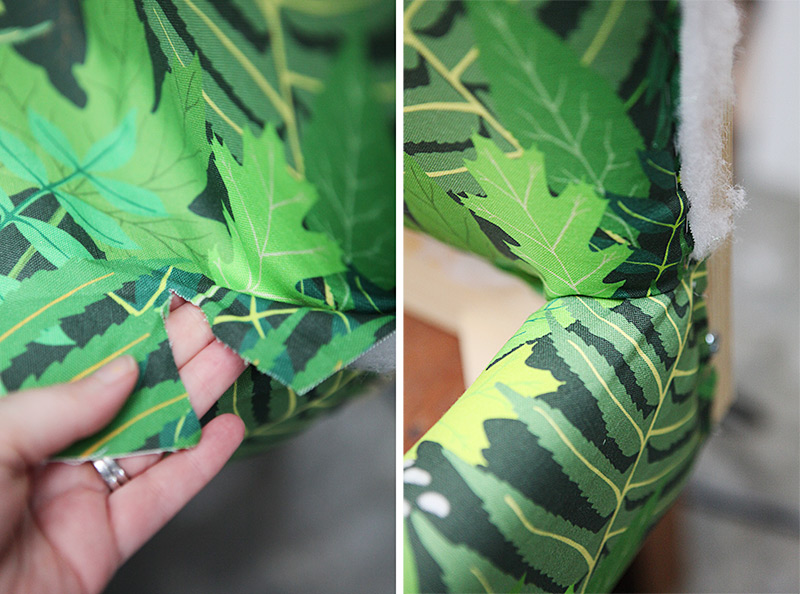
I then sewed together the three strips of fabric that went around the rails of the bed. In the corners I sewed around in a curve as you see in the left photo below to get the fabric to follow the curve of the bed after the foam is attached - see the right photo below.
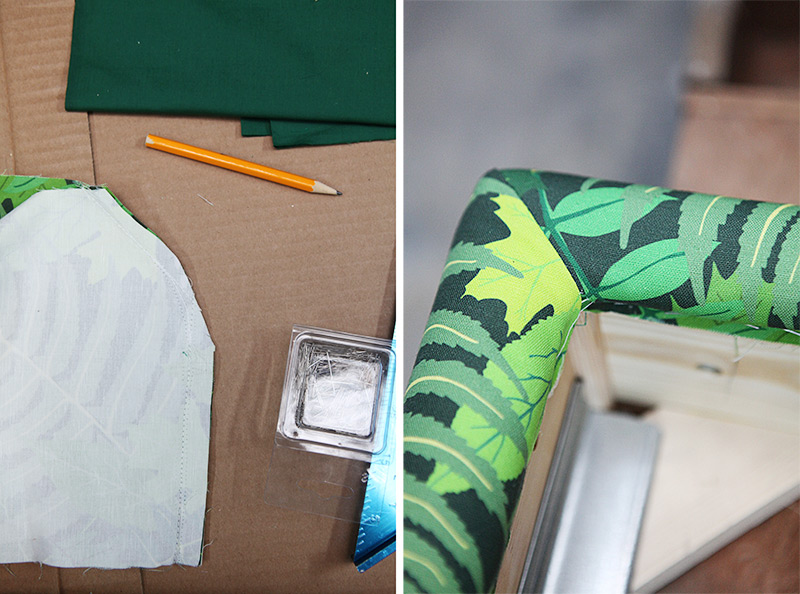
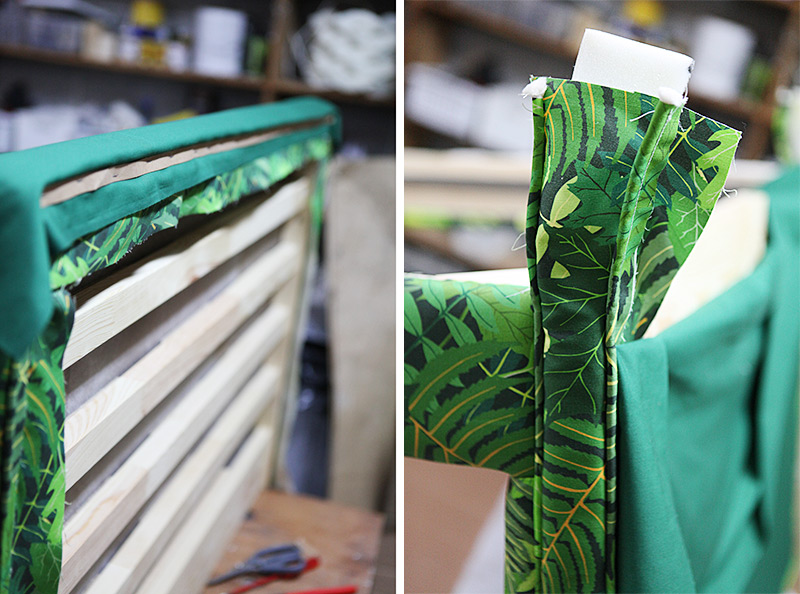
I attached these three rail pieces - now one long piece - all the way around the bed frame. At the head bard, I made a relief cut as seen in the below right picture.
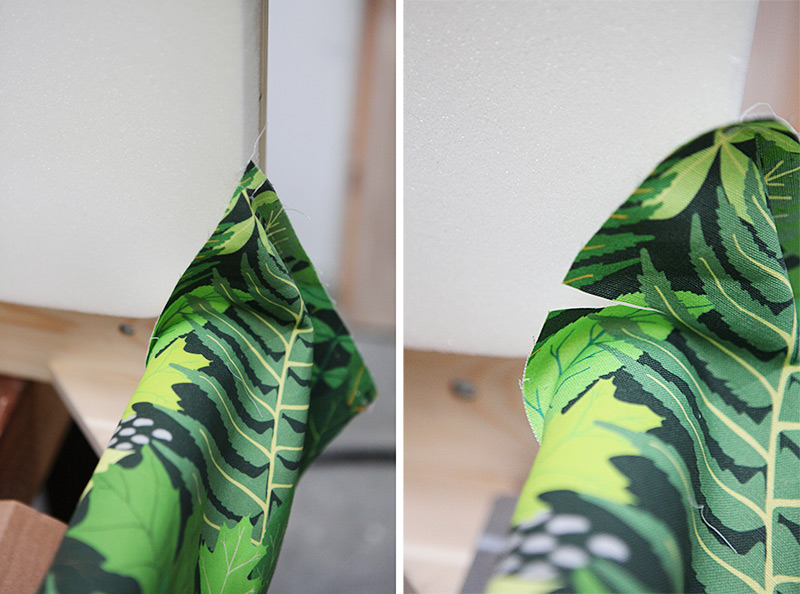
Then I could fold the fabric down and tuck it under the head board foam and finish the rail sides like you see below.
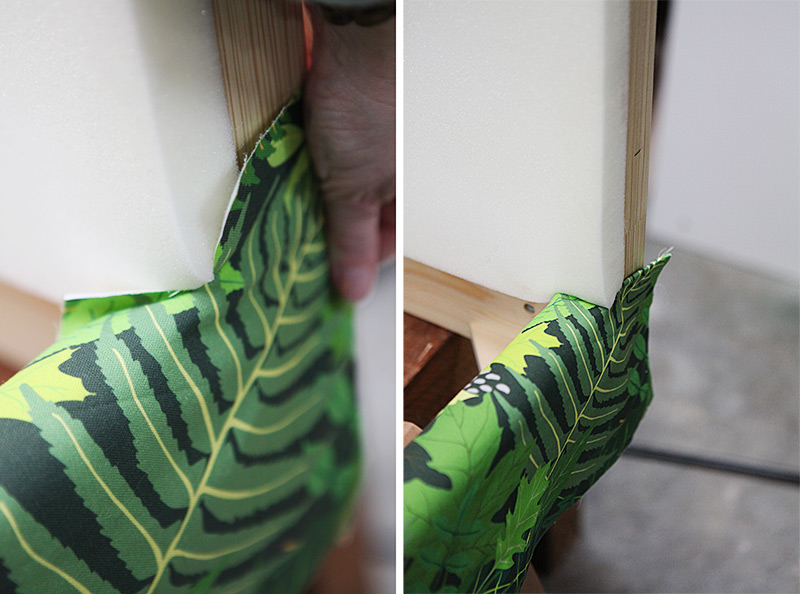
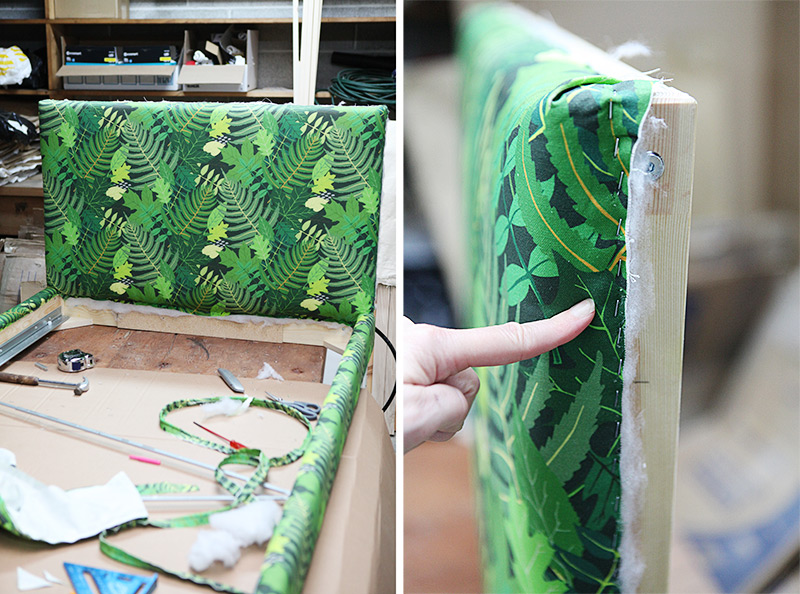
Now the rail fabric was attached all the way around on the top of the bed. I then turned over the bed and stapled the fabric to the underside all the way around as well. At the corners I made a relief cut again by the seam so I could staple the fabric flat by where the legs were going to be attached. See below right picture.
On the left below you can see that I got it pretty flat. I also cut out a bit of bulk in that corner. On the right picture you see that I stapled the fabric flat (did not turn over the seam) up by the head board. This will later be covered by the piping and headboard edge piece fabric.
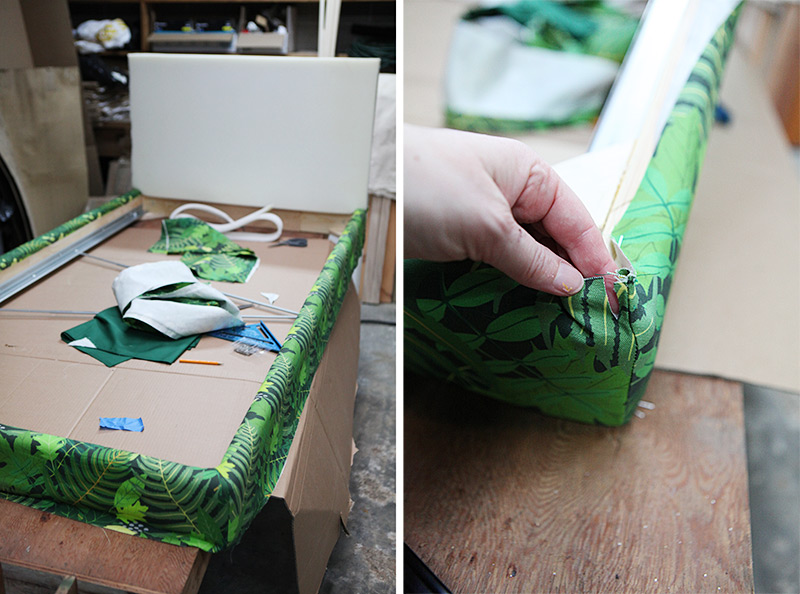
With the rails finished, I moved onto the head board and attached some batting over the 1 inch foam. Then I added the fabric and stapled it down to the side of the headboard.
Again I made relief cuts so that I could get the fabric to go around the rails and tucked it in and stapled it down.
I folded the fabric in the two upper corners. On the picture below right you can see that I stapled the fabric to the side of the headboard. Be sure to staple it far enough back that the piping etc will cover the staples completely. I didn't at first so had to re-do that step.
This is the video I modeled my piping and headboard upholstery after. Beginning at the 6:30 minute mark.
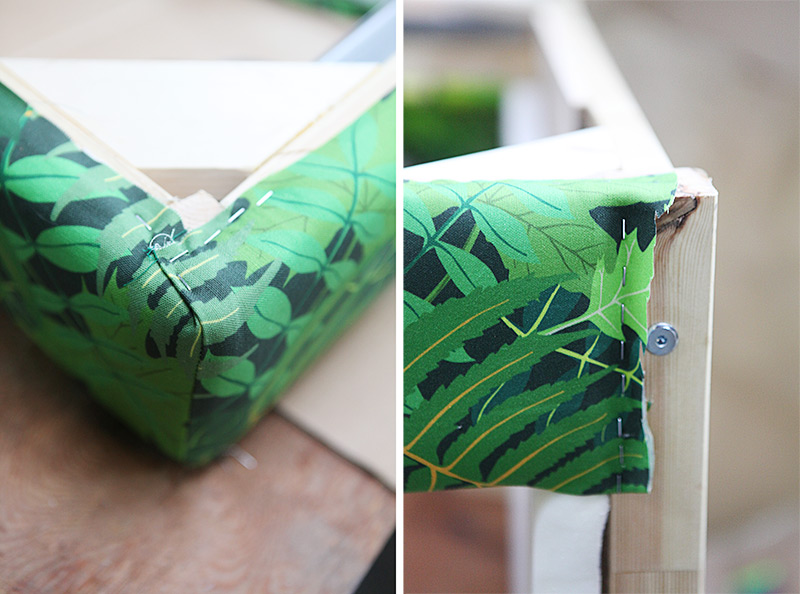
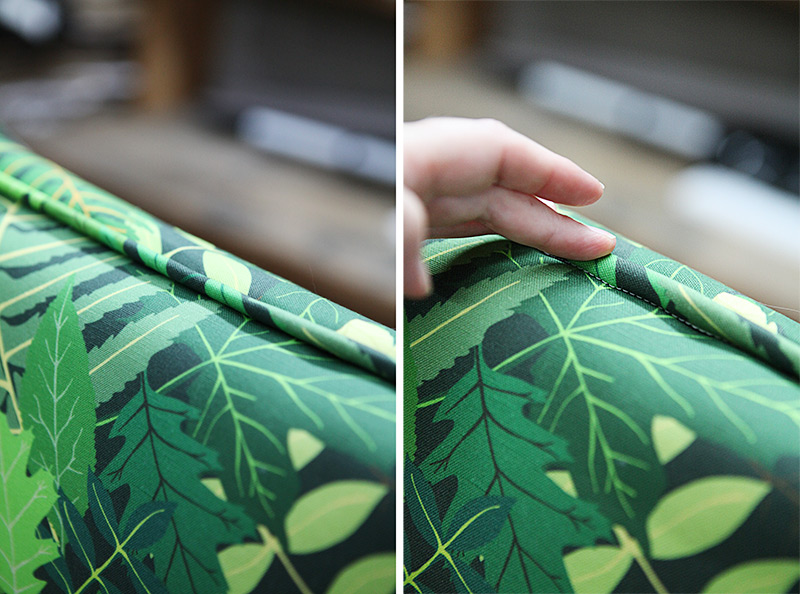
Next I took the headboard edge strip with the piping attached and flipped it over and stapled it along the edge of the head board as straight as possible (below picture on the left). When flipped back after that it looks like below picture on the right.
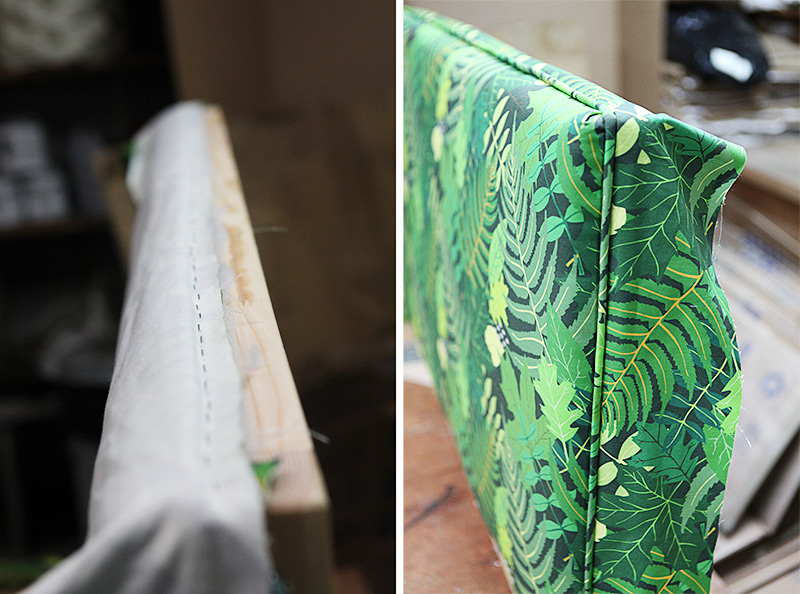
Lift up the piping to be sure that you have covered all the staples. You should only see the seam of the piping as shown on the right picture below.
Next, staple a strip of 1/2 inch foam tight to the piping on the back and then staple a strip of upholstery card board over this. This makes the fold more straight. I did not have a continues strip of foam left, so I glued one together. Works fine.
Then I stapled the other piping to the back of the headboard and finally I stapled the green cotton fabric to the back again finishing it off with the card bard strip. On the picture on the right the bed is upside down and you can see how the the piping is sandwiching the headboard edge and goes all the way over the fabric from the side rails and finishes everything off nicely.
Trim and staple to the bottom of the bed and then screw on the brackets for the legs. These are the metal brackets that I wish were made of a little bit more solid. The walnut legs screw into these brackets.

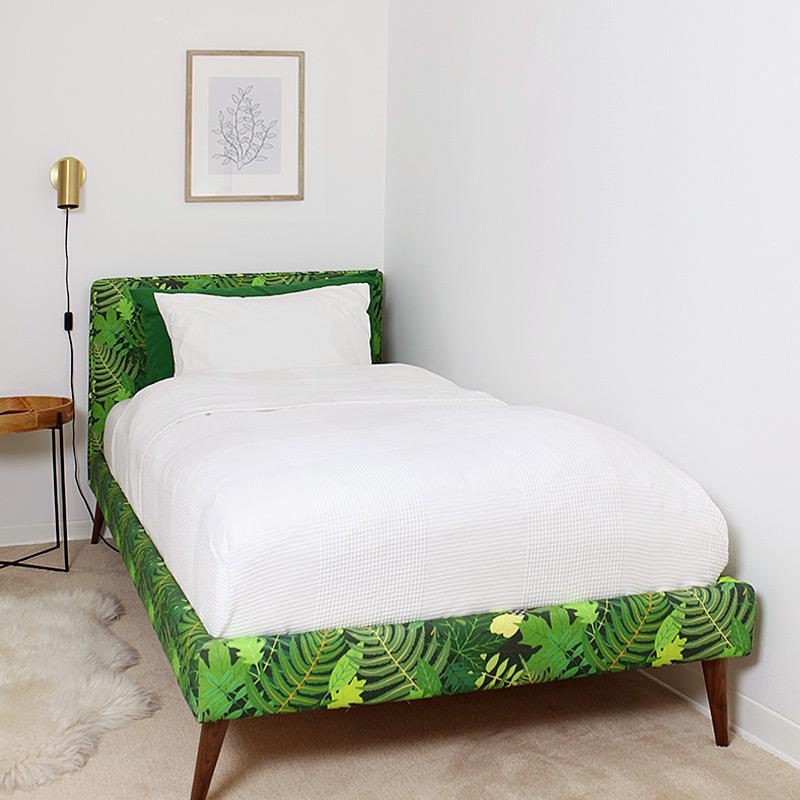
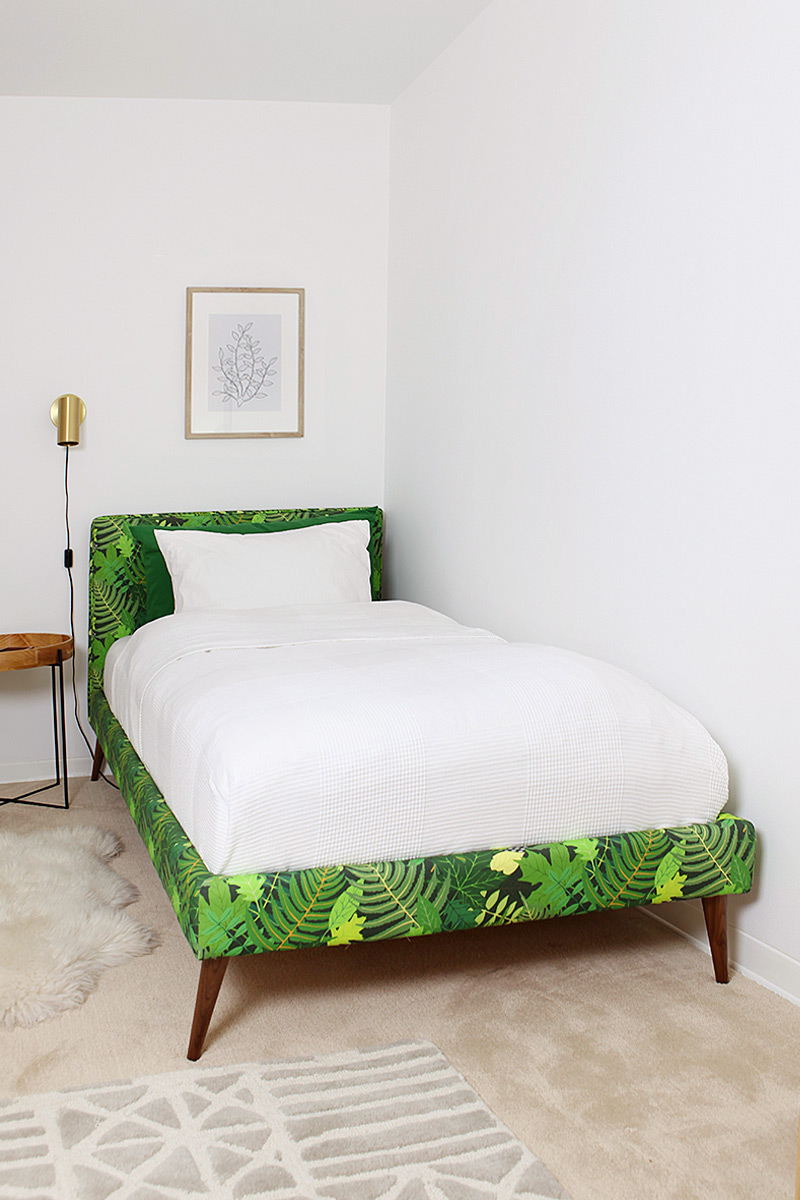
Here you see the finished result. You can find the full reveal of this room with sources here. I instastoried the whole process and you can find that video under highlights on my instagram: @ahomefordesignfoodcrafts.
Please pin this:

I am a Danish American decorating life in Seattle. I love all things design and DIY.
I can’t think of anything more fun than coming up with project, making it, photographing it and sharing it with you on my websites.
Since 2018 I have been making Ceramics, nearly full time.
AHomeForCeramics.com AHomeForDesign.com AHomeForCrafts.com AHomeForFood.com My Portfolio