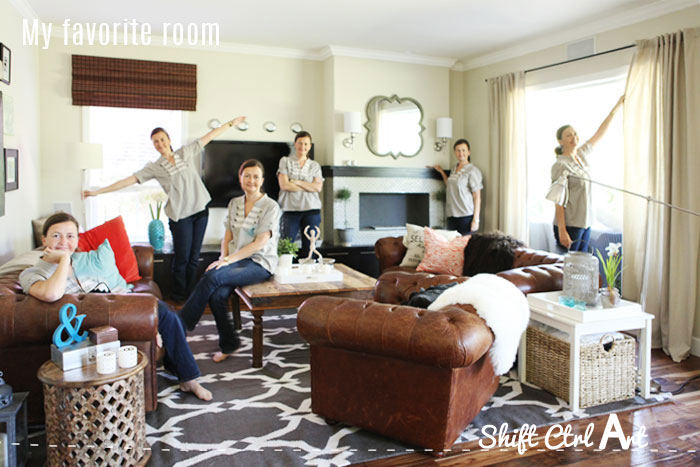
My favorite room in my home

Today I am coming to you from the Daily Decorator, Tracy's blog. Tracy is taking a breather to focus on getting healthy after coping with dis ease for a while. She is asking other bloggers to help out with posts in the meantime and I am only happy to pitch in!
Check out my post at Daily Decorators.
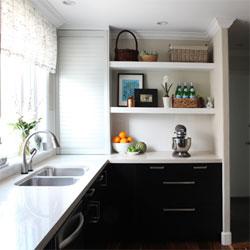
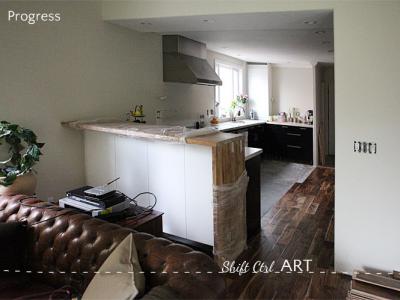
Coming over from Daily Decorators? Welcome! I have a Home Tour tab with all the most up to date pictures of the progress we have made in our home. I also have a page with thumbnails of all the DIY projects I have made.
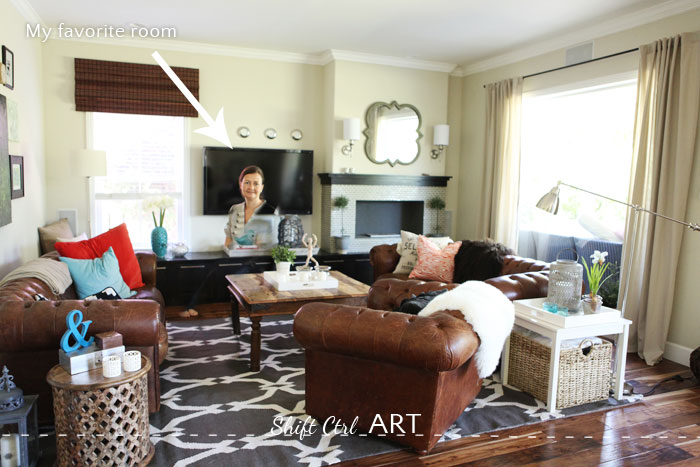
While my post over at Daily Decorators is about my favorite room in our house, I thought you might like to know over here how I made that photo I used. Hint: I had help from B (my son) to click on the camera button and even more help from Photoshop.
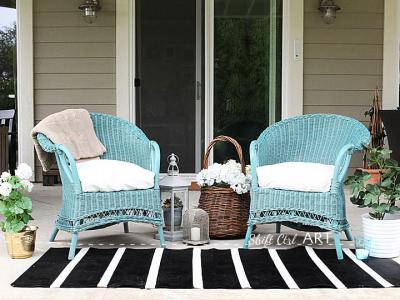
I mounted my camera on a tri-pod and set the aperture to 2.8 and the ISO to 2000. This gave me a shutter speed of 1/60 sec. Because my tri-pod is set up 6 feet or so away from the edge of the gray and white rug, I don't have too much of a blurry background in spite of the shallow aperture. The shutter speed of 1/60 sec is about as low of a setting you can do before getting soft focus on people who are standing still.
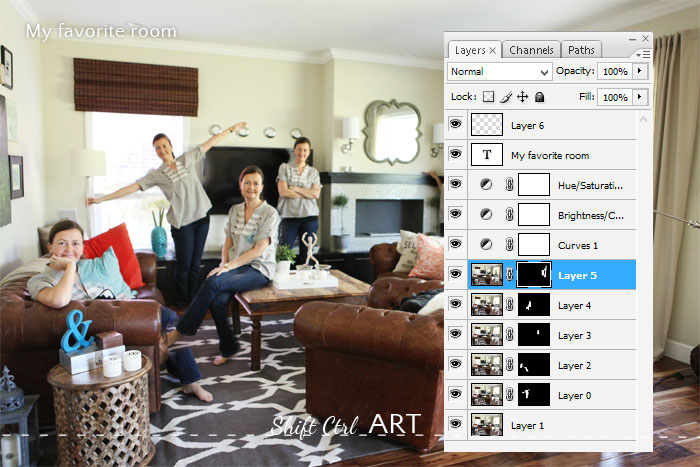
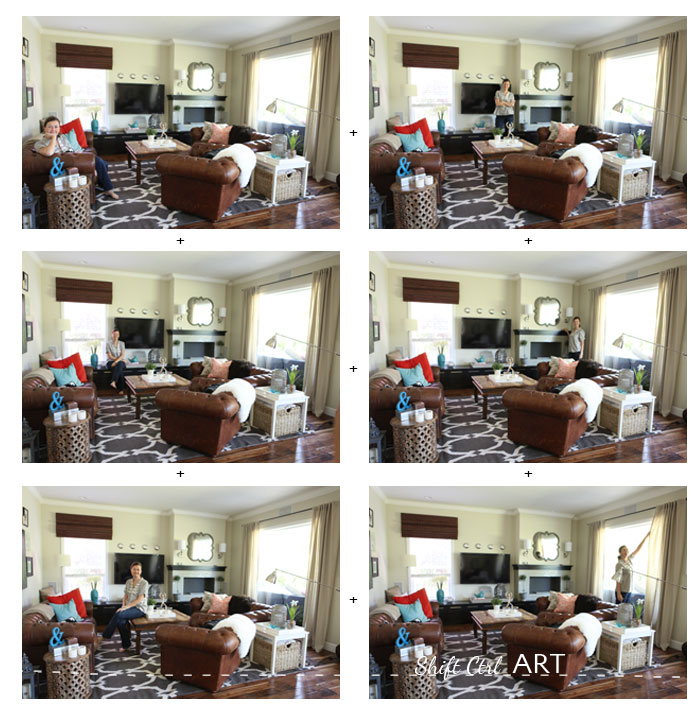
In Photoshop I placed all my photos into the same document. Hold down shift when you drag the images in and they will sit exactly on top of each other.
Then I used masks on each image. I actually erased myself on each image like this - using the mask. To learn more about masks see here.
That creates a black-out over my body in the picture. Then after selecting the mask in the layer palette, I pressed Ctrl + I, which inverses the mask making me re-appear, but all the back ground disappear. That's how I did it!
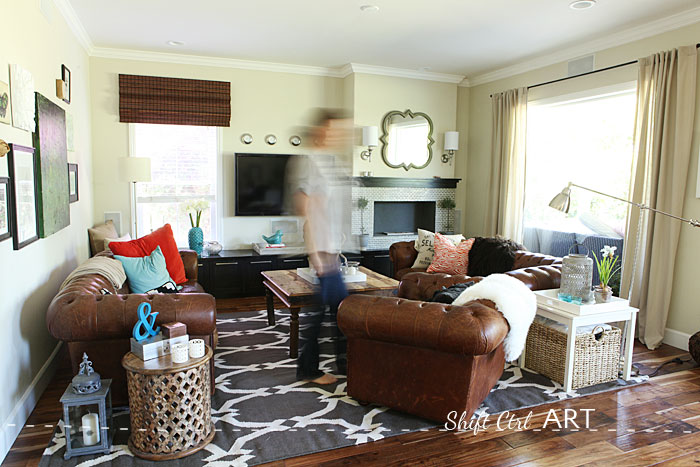
This was the other photo of me in the space. This is achieved by slowing down the shutter speed and then walking across the room while the shutter closes.
A ton of interior decorating magazines have used this over the years. It gives an otherwise action-less photo a bit of life without taking the focus from the interior.
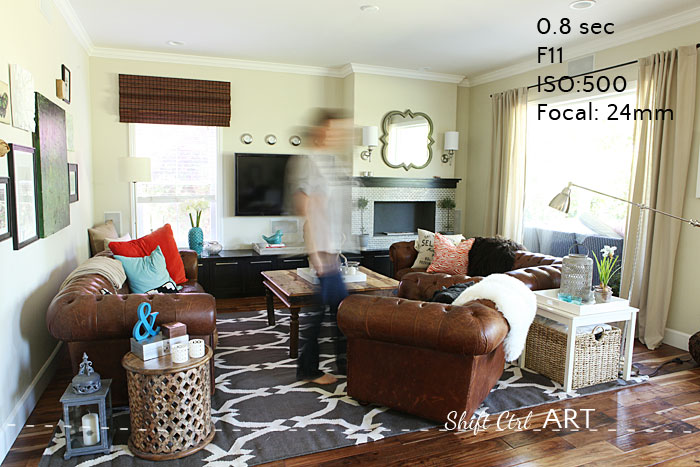
These were my settings for that picture.
Shutter speed: 0.8 sec
Aperture: F11
ISO: 500
Focal length is 24mm (zoomed all the way out)
You have to fiddle a bit with how fast you walk. Too slow and you don't get that fuzziness, too fast and you almost disappear from the image.
Are you a home/design/DIY blogger? If you would like to help Tracy out with a guest post, please contact Jamie on this email: sales at dailydecorator dot com.
Have you tried any new photo techniques lately? What is your favorite room in your home and why?
Next: Fireworks - How to use bulb mode
Share
Check out my post at Daily Decorators.
Coming over from Daily Decorators? Welcome! I have a Home Tour tab with all the most up to date pictures of the progress we have made in our home. I also have a page with thumbnails of all the DIY projects I have made.
While my post over at Daily Decorators is about my favorite room in our house, I thought you might like to know over here how I made that photo I used. Hint: I had help from B (my son) to click on the camera button and even more help from Photoshop.
I mounted my camera on a tri-pod and set the aperture to 2.8 and the ISO to 2000. This gave me a shutter speed of 1/60 sec. Because my tri-pod is set up 6 feet or so away from the edge of the gray and white rug, I don't have too much of a blurry background in spite of the shallow aperture. The shutter speed of 1/60 sec is about as low of a setting you can do before getting soft focus on people who are standing still.
In Photoshop I placed all my photos into the same document. Hold down shift when you drag the images in and they will sit exactly on top of each other.
Then I used masks on each image. I actually erased myself on each image like this - using the mask. To learn more about masks see here.
That creates a black-out over my body in the picture. Then after selecting the mask in the layer palette, I pressed Ctrl + I, which inverses the mask making me re-appear, but all the back ground disappear. That's how I did it!
This was the other photo of me in the space. This is achieved by slowing down the shutter speed and then walking across the room while the shutter closes.
A ton of interior decorating magazines have used this over the years. It gives an otherwise action-less photo a bit of life without taking the focus from the interior.
These were my settings for that picture.
Shutter speed: 0.8 sec
Aperture: F11
ISO: 500
Focal length is 24mm (zoomed all the way out)
You have to fiddle a bit with how fast you walk. Too slow and you don't get that fuzziness, too fast and you almost disappear from the image.
Are you a home/design/DIY blogger? If you would like to help Tracy out with a guest post, please contact Jamie on this email: sales at dailydecorator dot com.
Have you tried any new photo techniques lately? What is your favorite room in your home and why?
Next: Fireworks - How to use bulb mode

About Katja Kromann
I am a Danish American decorating life in Seattle. I love all things design and DIY.
I can’t think of anything more fun than coming up with project, making it, photographing it and sharing it with you on my websites.
Since 2018 I have been making Ceramics, nearly full time.
AHomeForCeramics.com AHomeForDesign.com AHomeForCrafts.com AHomeForFood.com My Portfolio