Bs tween bedroom - the reveal
The time has come, the time is now ~ Dr. Seuss
To show you the final reveal of B's tween bedroom make over.
It all started way back in November 2012, when I put together an Advent calendar for B. One of the gifts was a little embroidery kit that I made for him.
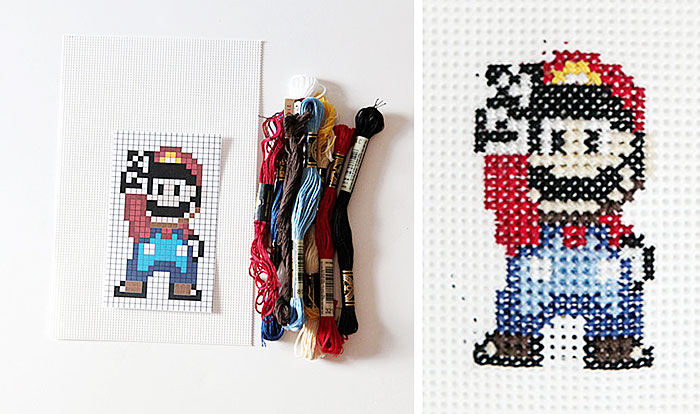
Which he finished embroidering by himself. I love how that came out. I later cut a matte and framed it for his gallery wall.
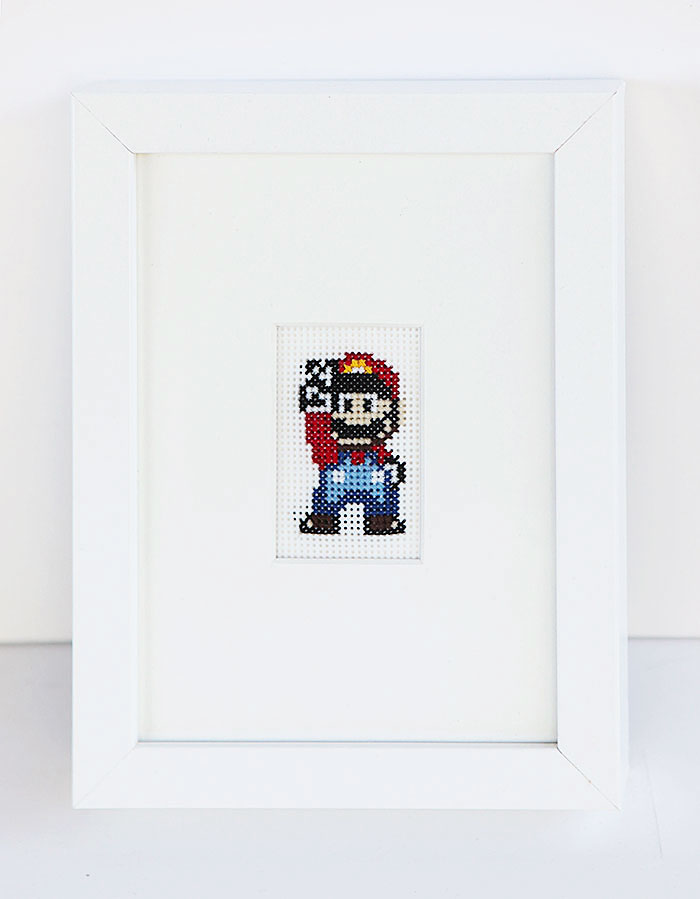
This Mario set the tone for the whole room and after a few tweaks, I made this mood board for the room.
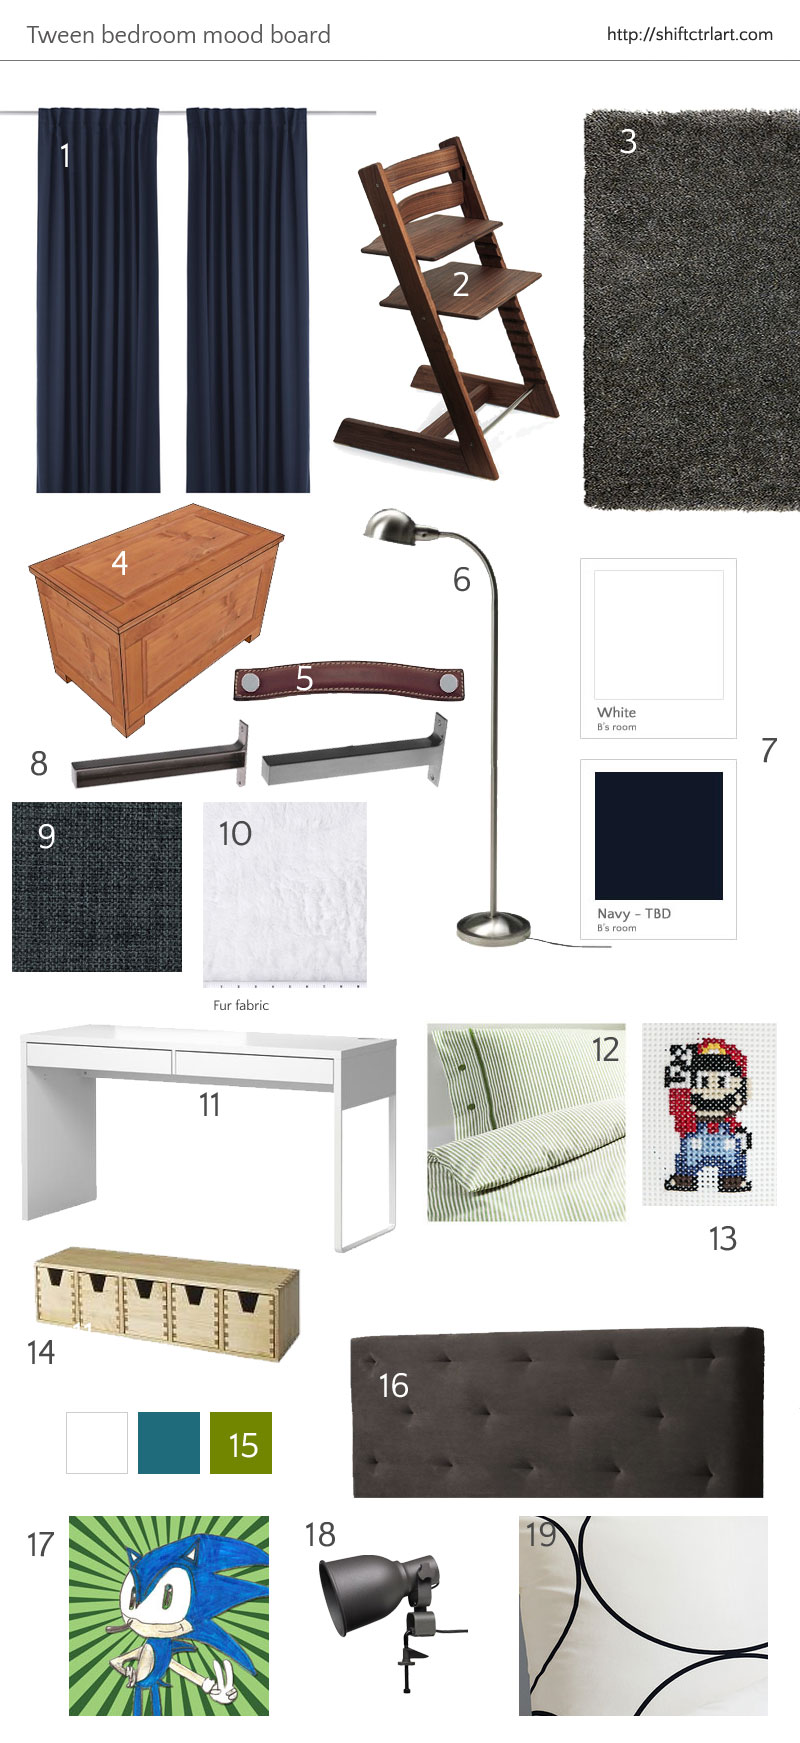
Sources
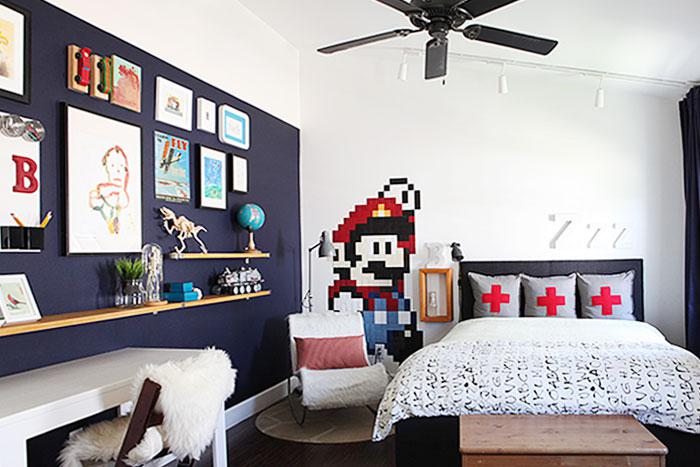
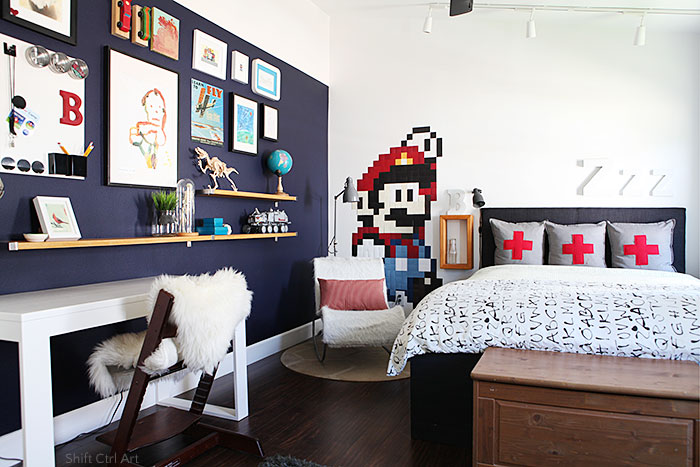
Here is the finished room.
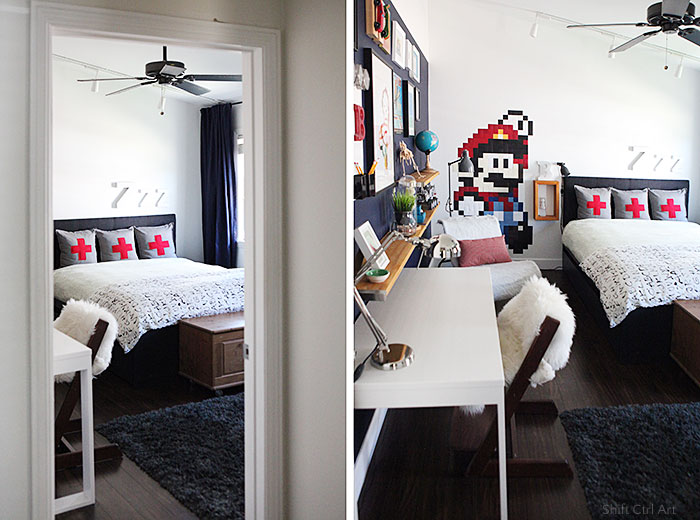
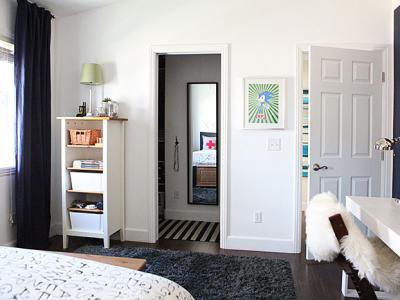
Looking in through the door way from the hall.
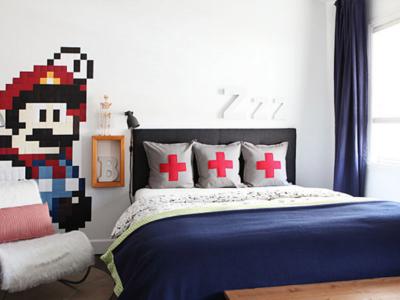
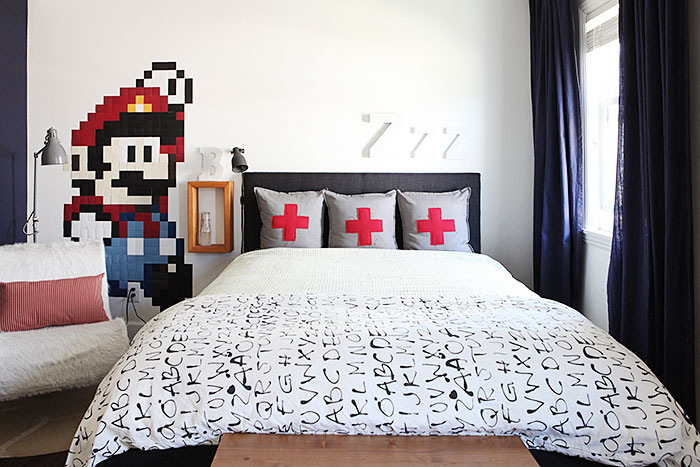
Frank and I built the bed in 2009 for B. It's a queen bed with trundle. It was originally stained, but for this make-over we had it raised up a bit to make room for a center post that was more substantial. We made the bed with some parts from IKEA, wood from the hardware store, and brackets from Rockler. The whole process is documented here and is one of the reader top 10 posts in my archive.
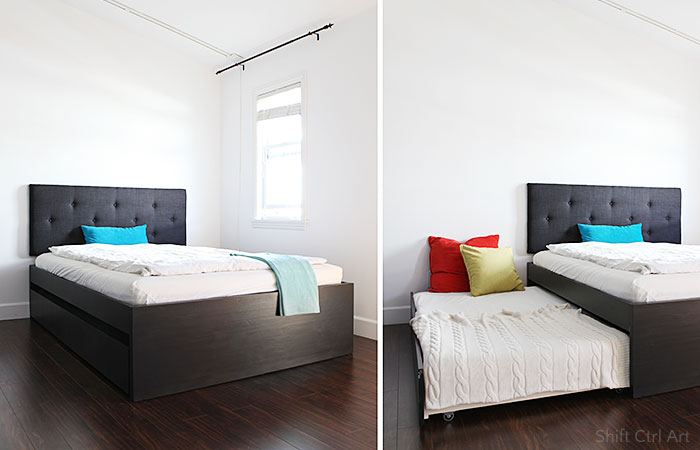
Trundle in, trundle out.
It has been great for sleep-overs as well as guests. We have room for 5-6 sleeping guests between B's room and the guest room. B sleeps on a mattress on the floor in our bedroom when we have that many staying with us, which has happened a couple times. I love to have house guests and play bed and breakfast with them.
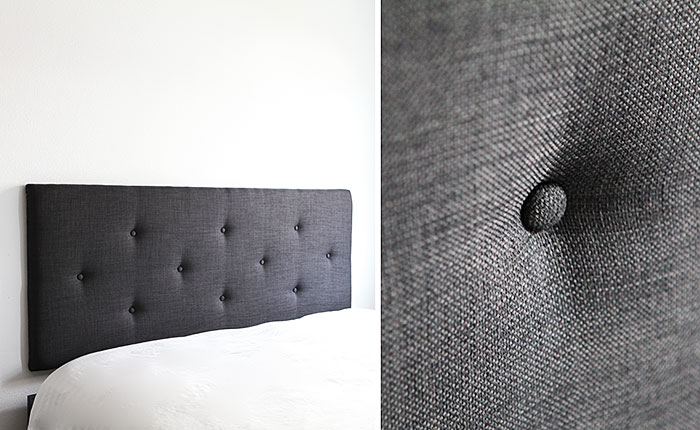
We made a tufted headboard for the bed. I used a charcoal upholstery grade furniture fabric (bought in Denmark) I originally made the buttons myself with one of those kits from JoAnn's. But this particular fabric is so thick, the buttons started popping off, so I took some fabric to an upholsterer and had her make a new set on a button machine. When one of the old ones pops off, I switch it out with one of those. They hold up fabulously and don't pop off.
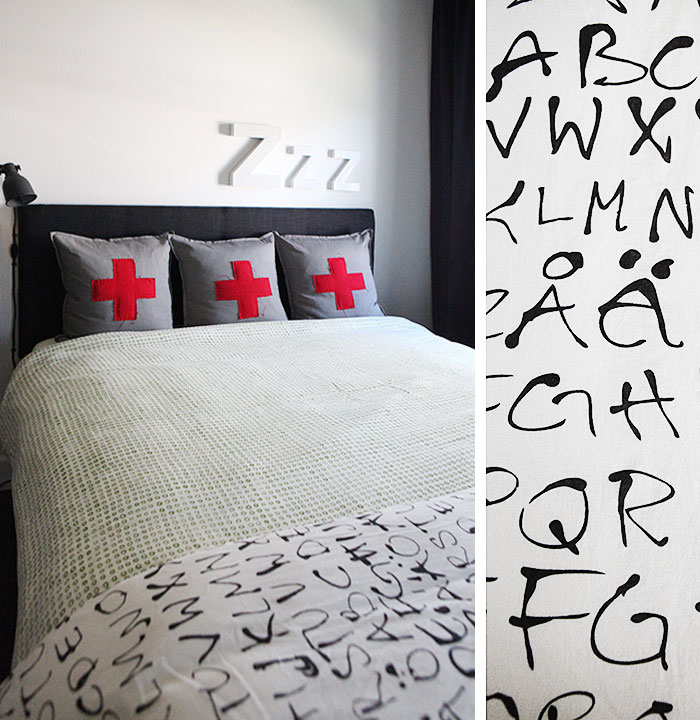
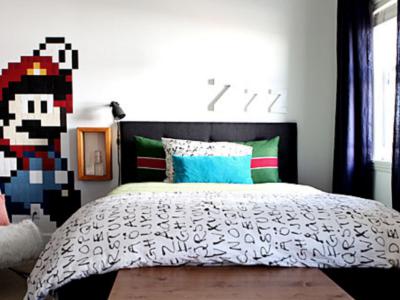
I got the Eivor Ord cover for the foot of the bed instead of the Twåblad cirkel (not available anymore) which was on the mood board. Mainly because it was in stock and cheaper. It had the same black/white effect I wanted. I think every room needs a black/white moment.
I hand sewed some Swiss crosses to some GURLI pillows from IKEA.
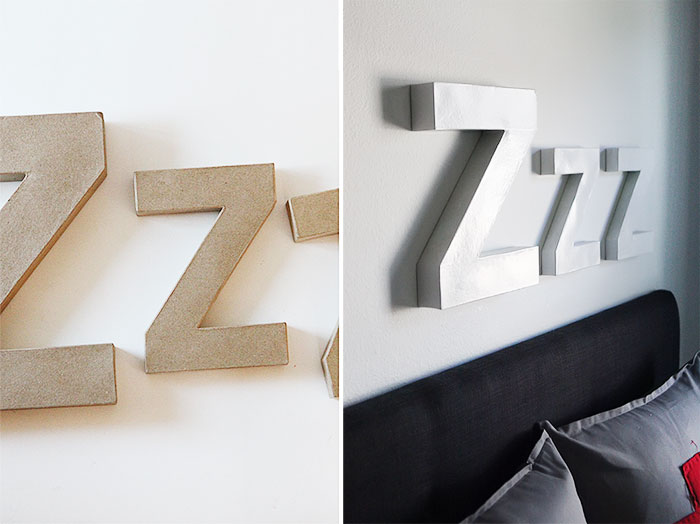
Over the bed, I put some spray painted Zzzs. They balance out the wall without drawing too much attention to themselves because they are the same color as the wall.
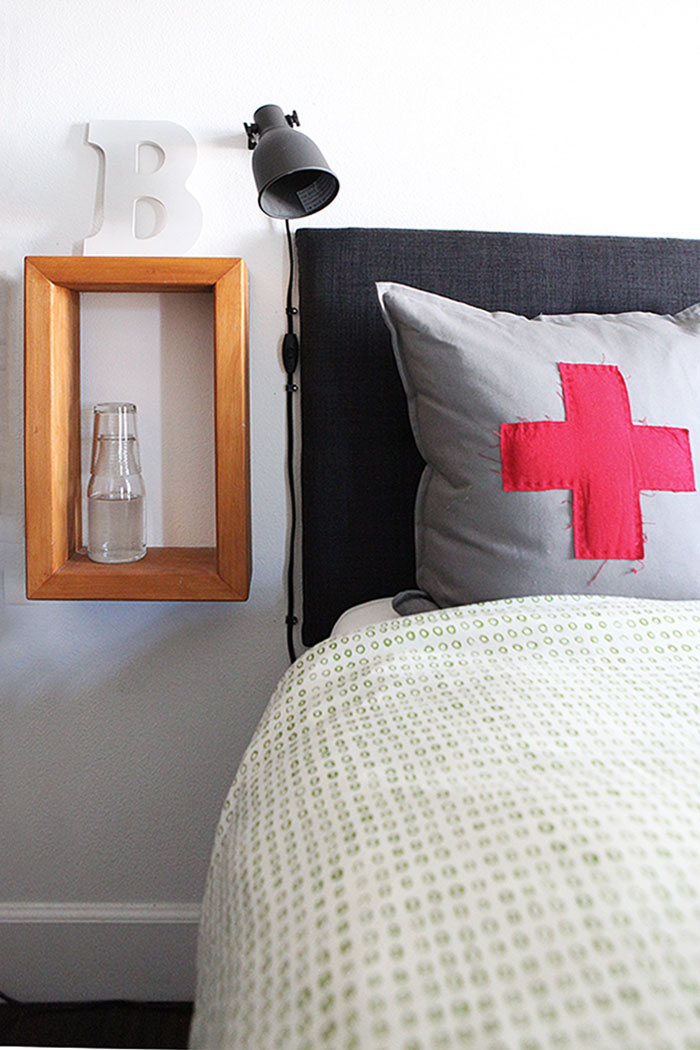
I built a little wall mounted cubby for the wall out of some wood that was left over from our Deck hand rail project. Here staged with a glass carafe. In real life B has a plastic water bottle here. Full disclosure and all that. The glass carafe is prettier in a picture though.
Frank hung a Hektar lamp next to the bed and I secured the cord with little wire holders that I painted black with a sharpie.
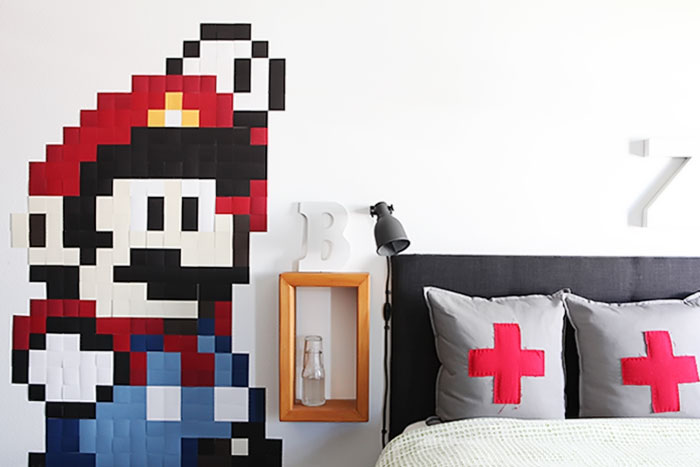
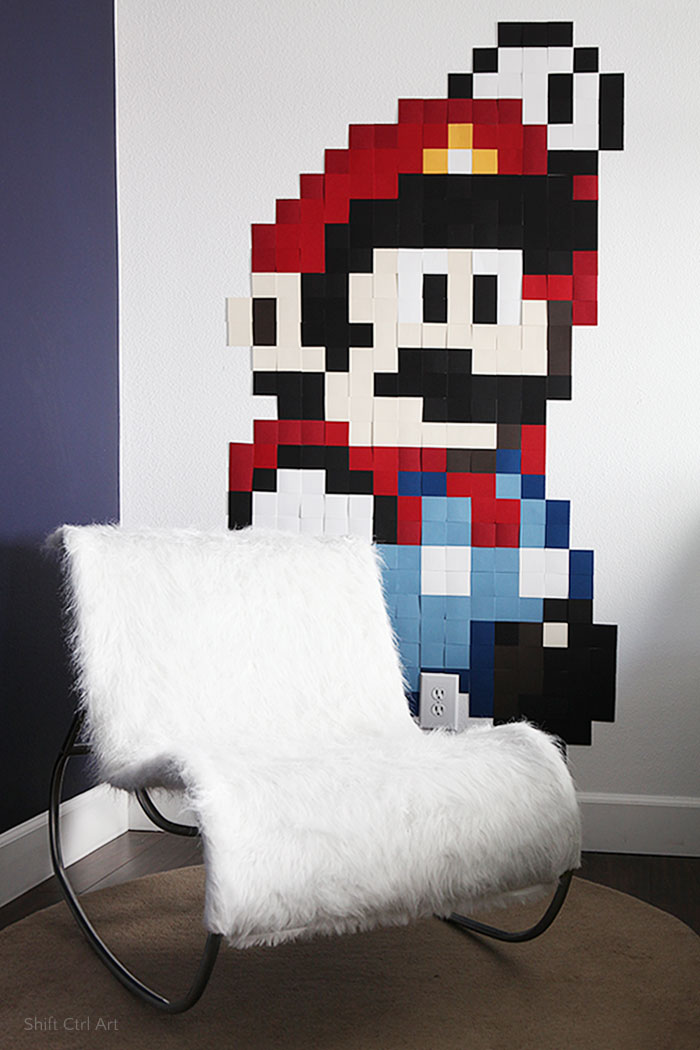
Next to the bed I wanted to do a project with B. We were talking about it and B said: What about something pixelated? That fired straight into my brain: cardstock, squares, another Mario, in less than a second.
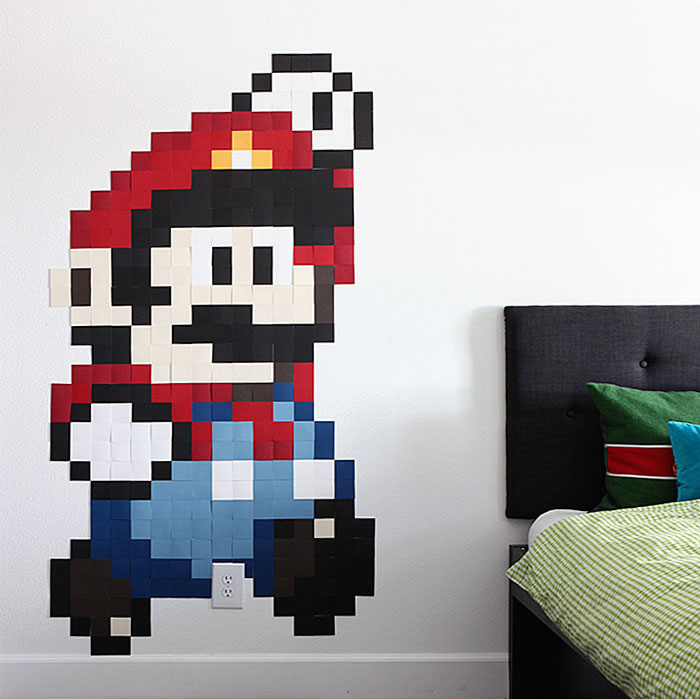
How we Super sized Mario - this was a homeschooling project as well. Math and all that.
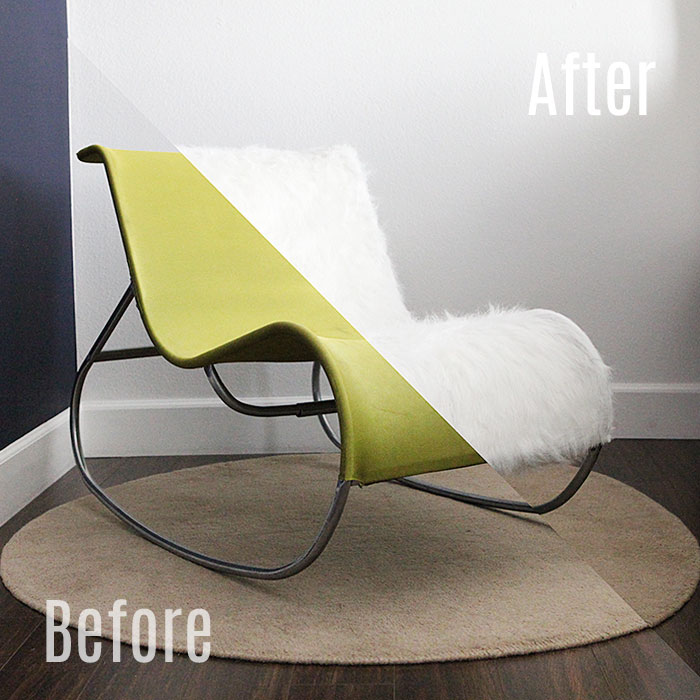
I re-used B's old IKEA Emmabo chair (discontinued) by sewing a new faux fur cover for it.
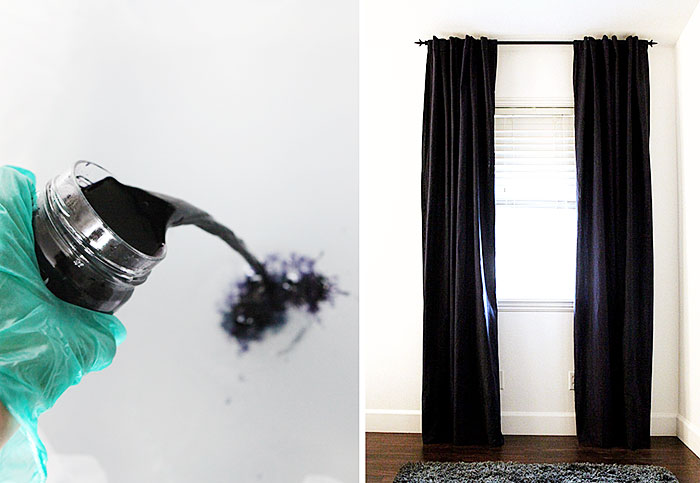
I dyed some curtains for the room in a nice dark blue color. I mixed navy blue RITT color with a bit of black to get this color. The original curtains were light blue.
I would have just bought some in a dark blue, but I couldn't find any dark blue linen curtains. Believe me, I searched. The ones in the mood board were polyester and pilling like crazy, so pass.
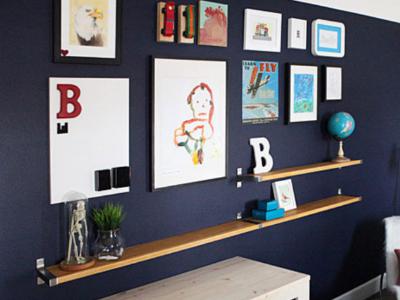
Once I had that curtain color, I chose a matching dark blue color for the opposite wall. I painted it Valspar's Blue Coal. All the other walls and ceiling are painted Valspar's white. Just the base white paint they have on the shelf. They have since come out with an Ultra White, which I like even more. It's peculiarly enough a little less blue.
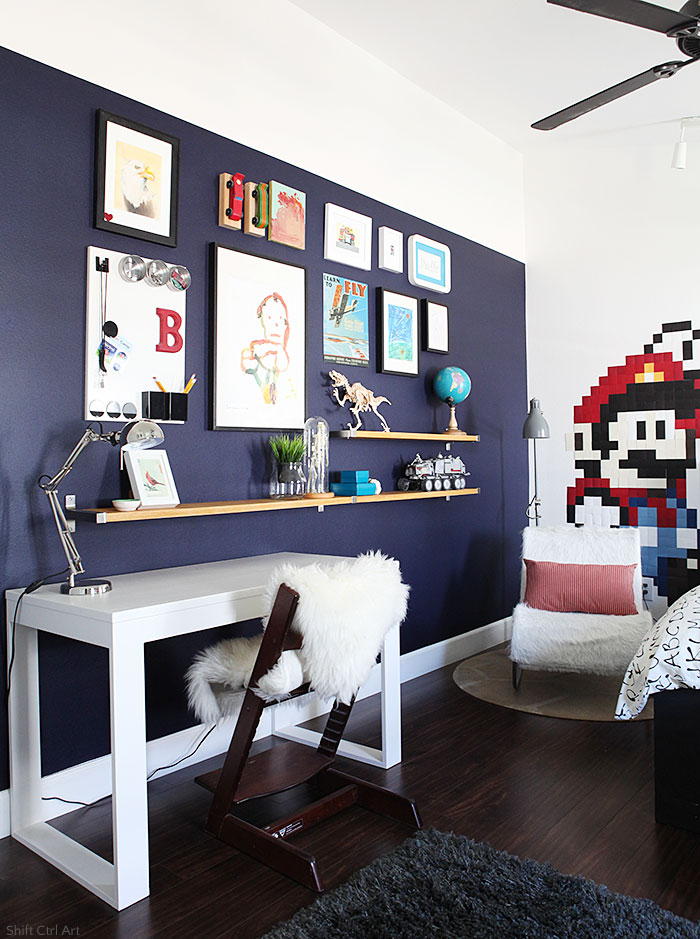
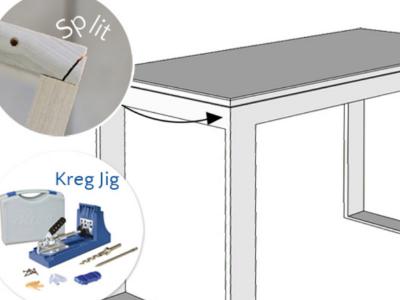
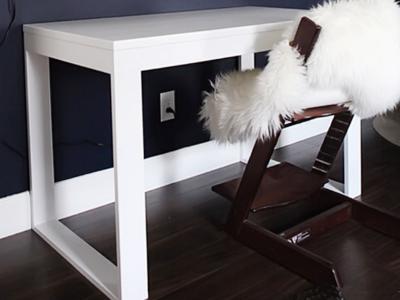
Frank and I built the white desk and I got some Asp wood for some shelving which our handyman helped make by cutting the wood down for me to fit into some IKEA Ekby Bjärnum brackets. I used the same stain for the shelves as for the cubby.
The rug under the chair received a painted hexagons pattern.
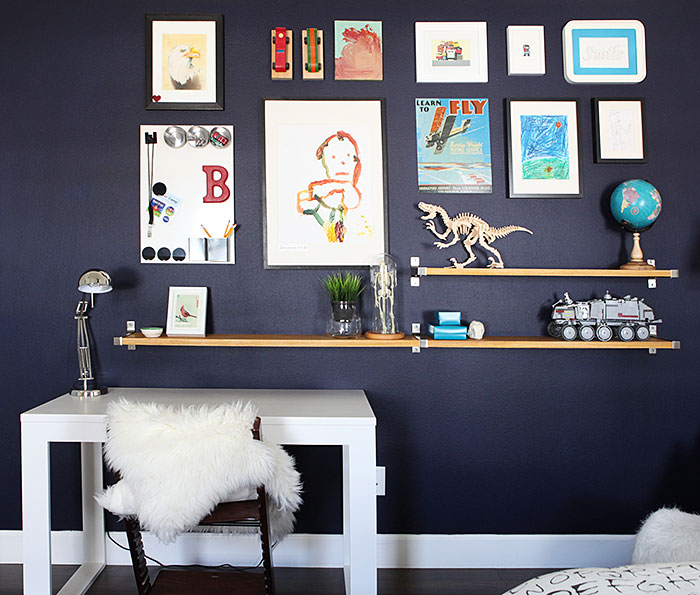
I hung a bunch of B's artwork above the shelf. Top left an eagle he made at art class. Next to that two Derby cars he made for cub scouts. Frank and B made some wooden blocks with dowels for them to hang on. Next to that a green and red abstract he made at 5 years old (I think). Embroidered Mario is on the top row, next to last. Bottom second, B's first painting of himself - also around 5 or 6 years old.
On the shelves I put a dinosaur he put together one time, one of his many Lego sets, a skeleton he put together after a trip to the Science museum. On the far left a little ceramic bowl he made when we took a ceramics class together.
Then I cleaned out and organized his closet and book case last week. Which was all that was really needed to call this room done.
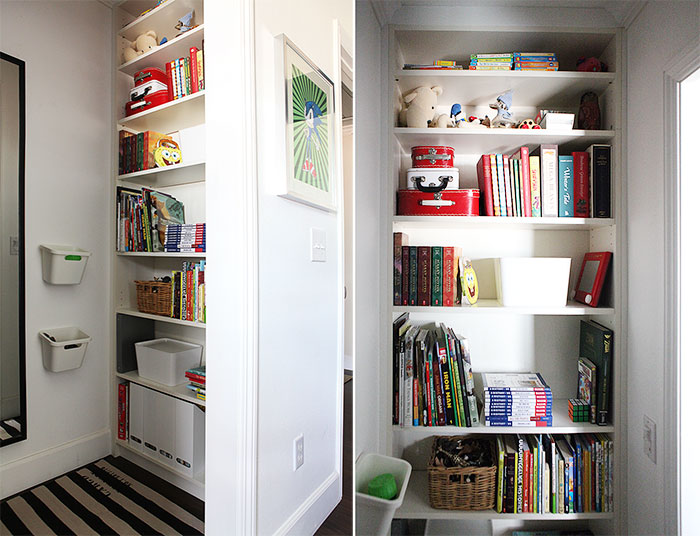
I organized his book case in the last corner of the room. This wall is also where Sonic is hanging out, which was on the mood board. Another drawing of B's that I had printed as a large print and framed for his room.
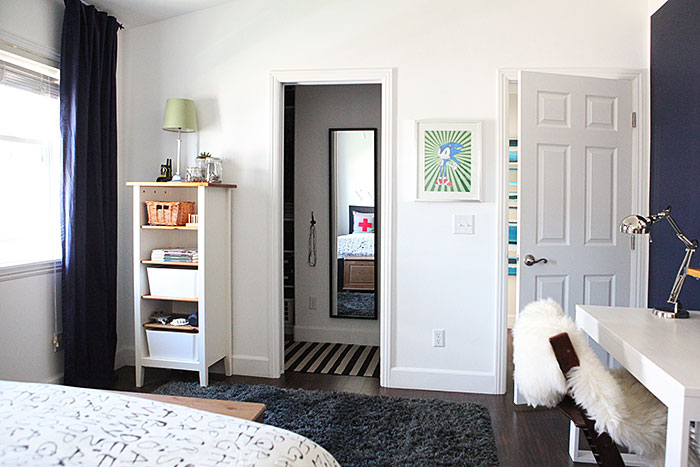
That's how this room became B's tween boy bedroom.

B turns teenager this October. Shwsssss (sound of years whizzing by).
So.
Who is ready for a teen make-over?
I kid.
Believe me, I am not re-doing his room in here anytime soon.
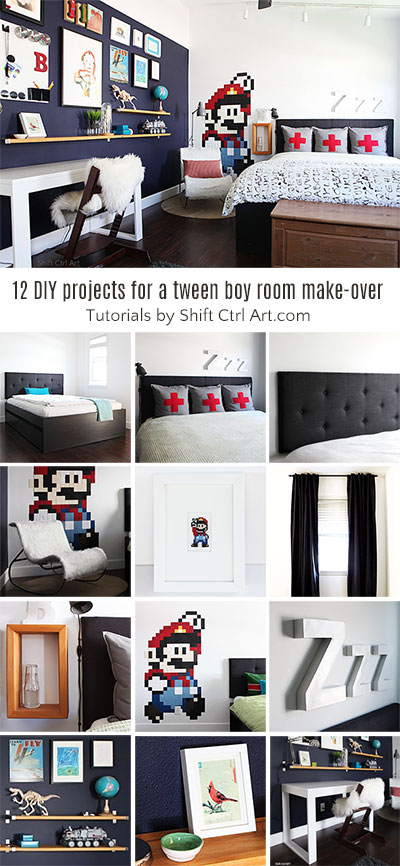
Here is a round-up of all the DIYs that happened in this room.
Share
To show you the final reveal of B's tween bedroom make over.

It all started way back in November 2012, when I put together an Advent calendar for B. One of the gifts was a little embroidery kit that I made for him.

Which he finished embroidering by himself. I love how that came out. I later cut a matte and framed it for his gallery wall.

This Mario set the tone for the whole room and after a few tweaks, I made this mood board for the room.

Sources
Here is the finished room.

Looking in through the door way from the hall.
Frank and I built the bed in 2009 for B. It's a queen bed with trundle. It was originally stained, but for this make-over we had it raised up a bit to make room for a center post that was more substantial. We made the bed with some parts from IKEA, wood from the hardware store, and brackets from Rockler. The whole process is documented here and is one of the reader top 10 posts in my archive.

Trundle in, trundle out.
It has been great for sleep-overs as well as guests. We have room for 5-6 sleeping guests between B's room and the guest room. B sleeps on a mattress on the floor in our bedroom when we have that many staying with us, which has happened a couple times. I love to have house guests and play bed and breakfast with them.

We made a tufted headboard for the bed. I used a charcoal upholstery grade furniture fabric (bought in Denmark) I originally made the buttons myself with one of those kits from JoAnn's. But this particular fabric is so thick, the buttons started popping off, so I took some fabric to an upholsterer and had her make a new set on a button machine. When one of the old ones pops off, I switch it out with one of those. They hold up fabulously and don't pop off.

I got the Eivor Ord cover for the foot of the bed instead of the Twåblad cirkel (not available anymore) which was on the mood board. Mainly because it was in stock and cheaper. It had the same black/white effect I wanted. I think every room needs a black/white moment.
I hand sewed some Swiss crosses to some GURLI pillows from IKEA.

Over the bed, I put some spray painted Zzzs. They balance out the wall without drawing too much attention to themselves because they are the same color as the wall.

I built a little wall mounted cubby for the wall out of some wood that was left over from our Deck hand rail project. Here staged with a glass carafe. In real life B has a plastic water bottle here. Full disclosure and all that. The glass carafe is prettier in a picture though.
Frank hung a Hektar lamp next to the bed and I secured the cord with little wire holders that I painted black with a sharpie.

Next to the bed I wanted to do a project with B. We were talking about it and B said: What about something pixelated? That fired straight into my brain: cardstock, squares, another Mario, in less than a second.

How we Super sized Mario - this was a homeschooling project as well. Math and all that.

I re-used B's old IKEA Emmabo chair (discontinued) by sewing a new faux fur cover for it.

I dyed some curtains for the room in a nice dark blue color. I mixed navy blue RITT color with a bit of black to get this color. The original curtains were light blue.
I would have just bought some in a dark blue, but I couldn't find any dark blue linen curtains. Believe me, I searched. The ones in the mood board were polyester and pilling like crazy, so pass.

Once I had that curtain color, I chose a matching dark blue color for the opposite wall. I painted it Valspar's Blue Coal. All the other walls and ceiling are painted Valspar's white. Just the base white paint they have on the shelf. They have since come out with an Ultra White, which I like even more. It's peculiarly enough a little less blue.


Frank and I built the white desk and I got some Asp wood for some shelving which our handyman helped make by cutting the wood down for me to fit into some IKEA Ekby Bjärnum brackets. I used the same stain for the shelves as for the cubby.
The rug under the chair received a painted hexagons pattern.

I hung a bunch of B's artwork above the shelf. Top left an eagle he made at art class. Next to that two Derby cars he made for cub scouts. Frank and B made some wooden blocks with dowels for them to hang on. Next to that a green and red abstract he made at 5 years old (I think). Embroidered Mario is on the top row, next to last. Bottom second, B's first painting of himself - also around 5 or 6 years old.
On the shelves I put a dinosaur he put together one time, one of his many Lego sets, a skeleton he put together after a trip to the Science museum. On the far left a little ceramic bowl he made when we took a ceramics class together.
Then I cleaned out and organized his closet and book case last week. Which was all that was really needed to call this room done.

I organized his book case in the last corner of the room. This wall is also where Sonic is hanging out, which was on the mood board. Another drawing of B's that I had printed as a large print and framed for his room.

That's how this room became B's tween boy bedroom.

B turns teenager this October. Shwsssss (sound of years whizzing by).
So.
Who is ready for a teen make-over?
I kid.
Believe me, I am not re-doing his room in here anytime soon.
Here is a round-up of all the DIYs that happened in this room.

About Katja Kromann
I am a Danish American decorating life in Seattle. I love all things design and DIY.
I can’t think of anything more fun than coming up with project, making it, photographing it and sharing it with you on my websites.
I am a Graphic Artist, a remodeller and home maker by day.
AHomeForDesign.com AHomeForCrafts.com AHomeForFood.com My Portfolio
